How to Edge Your Driveway Like a Pro in 15 Minutes
The Science of the Clean Line: Engineering the Perfect Margin
Professional driveway edging requires a defined 90-degree vertical cut that severs stolons and rhizomes at a depth of 2.5 inches. This prevents turf encroachment and protects the integrity of the asphalt or concrete edge from root-induced cracking while maintaining proper drainage away from the hardscape. It is not about aesthetics alone. It is about civil engineering on a micro scale. If you do not create a structural barrier between your turf and your driveway, the grass will eventually win. It will find a hairline fracture in your asphalt, send a root down, and use hydrostatic pressure to blow a hole in your investment. Stop thinking like a gardener and start thinking like a foreman.
The Ground-Up Build: Why Preparation Dictates Speed
I always drill into my new crew members: if you don’t fix the soil grading first, every plant you put in the ground is just expensive compost. The same logic applies to your driveway edge. I once watched an apprentice try to edge a driveway that had two inches of accumulated silt and organic debris overhanging the concrete. He spent three hours fighting a battle he could have won in ten minutes if he’d simply cleared the shoulder first. You cannot cut a clean line through a mess. You need to see the substrate. We start by clearing the debris, identifying the hardscape boundary, and ensuring the soil bulk density is high enough to hold a vertical wall. If your soil is too loose, your edge will collapse into the first rain. If it is too compacted, you will burn out your blade. You have to find that sweet spot of moisture and density.
“Maintaining a distinct separation between turf and hard surfaces prevents the lateral migration of rhizomatous species into structural voids.” – Agronomy Manual for Professional Turf Management
We do not use string trimmers for primary edging. That is a hack move. A string trimmer creates a rounded, sloppy shoulder that invites weeds. We use a dedicated vertical blade. This creates a shear force that cleanly severs the vascular system of the grass. It is clean. It is surgical. It is the only way to ensure the grass does not simply heal itself and creep back over the pavement within forty-eight hours.
Selecting Your Mechanical Edge: A Data-Driven Comparison
Before you pull a single cord, you need to understand the tool for the job. Not all edgers are created equal, and using the wrong one is a fast track to a $500 repair bill for your driveway surface. Use the table below to determine which tool fits your specific soil profile and driveway material.
| Tool Type | Optimal Soil Condition | Cutting Depth | Driveway Material | Professional Verdict |
|---|---|---|---|---|
| Manual Half-Moon | Moist Loam | 2.0 Inches | Pavers/Stone | Precision work only. |
| Electric Stick Edger | Sandy Loam | 2.5 Inches | Concrete | Good for light maintenance. |
| Gas-Powered Walk-Behind | Heavy Clay/Compacted | 3.0+ Inches | Asphalt/Concrete | The industry standard. |
The 15-Minute Professional Workflow
To achieve a professional result in under fifteen minutes, you must follow a strict operational sequence. Any deviation results in wasted movement and lost time. Efficiency is the byproduct of discipline. Don’t wander. Don’t second-guess the line.
- Step 1: The Visual Scout. Walk the length of the driveway. Remove stones or large debris that could kick back and shatter a window or chip your blade.
- Step 2: The Alignment. Set your edger blade to a depth of 2.5 inches. Ensure the guide wheel is resting firmly on the hardscape surface.
- Step 3: The Primary Cut. Engage the engine at full throttle. Move at a steady, walking pace. Do not stop. Momentum is your friend.
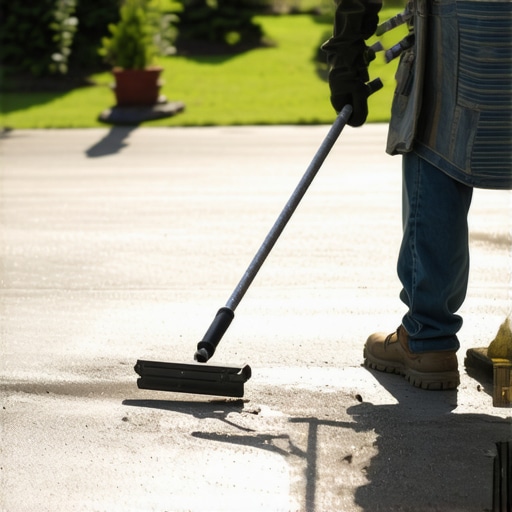
- Step 4: The Trench Clear. Use a stiff-bristled broom or a leaf blower to clear the severed turf from the new trench.
- Step 5: The Disposal. Collect the organic matter. Do not leave it in the street or on the driveway. It will rot.
How do I stop grass from growing over my driveway?
Stopping grass encroachment requires a physical air gap, often called a mechanical barrier, which prevents the roots from bridging the gap between the soil and the pavement. By maintaining a clean 2-inch deep trench, you create a zone where roots cannot survive due to air-pruning. This is the most effective organic method for lawn margin control without using non-selective herbicides that could leach into the water table.
What is the best tool for cutting a clean edge?
The best tool for a professional-grade edge is a gas-powered vertical edger with a high-carbon steel blade. These machines provide the necessary torque and blade velocity to slice through compacted clay and thick thatch layers that manual tools or string trimmers simply cannot penetrate. For homeowners with smaller lots, a 40V cordless stick edger is a viable alternative, provided the blade is kept sharp and the soil is not overly dry.
The Biology of the Edge: Why Most DIY Attempts Fail
Most homeowners fail because they don’t understand rhizome biology. Grasses like Kentucky Bluegrass or Bermuda spread via underground runners. If you just trim the top with a string trimmer, you are actually stimulating the plant to grow laterally. It’s a defensive response. When you sever the rhizome with a vertical blade, you’re causing a localized trauma that slows down that lateral expansion. You’re setting the plant back. This is why a pro-edged lawn looks better for longer. We aren’t just cutting hair; we’re performing a structural amputation of the plant’s spread mechanism.
“The structural integrity of a driveway’s shoulder is directly proportional to the moisture management at the soil-pavement interface.” – ICPI Pavement Guidelines
Furthermore, you have to watch your soil pH and nitrogen levels at the margin. When you edge, you expose the soil profile. This can lead to rapid moisture loss. If you edge during a heatwave, you’ll see a brown ring around your driveway. That’s desiccation. We mitigate this by edging in the early morning and ensuring the lawn is properly hydrated. Never edge a drought-stressed lawn. It won’t recover. It will die back, and then you’ll have a trench full of weeds like crabgrass that thrive in high-heat, low-competition zones. Keep your blade sharp. A dull blade tears the grass, leaving a jagged wound that is an open door for fungal pathogens like Pythium or Brown Patch. A clean cut heals. A tear rots.
The Settling-In Period: Maintaining the Margin
Once you’ve established that clean 90-degree cut, your work isn’t done. In the first year, that soil wall is fragile. Avoid heavy traffic near the edge. If you drive over it, you’ll collapse the trench and have to start over. Check the depth once a month. As the grass grows, the thatch layer will thicken, and you’ll need to pass through with the edger again to maintain that air gap. It’s a maintenance cycle, not a one-time event. Treat your driveway edge like the footer of a building. If the footer fails, the whole thing eventually comes down. Keep it clean. Keep it deep. Keep it professional. Don’t be the guy with the sloppy lawn. It’s an embarrassment to the neighborhood and a disservice to your property value. Stick to the 15-minute drill and do it right the first time.
![Fixing 2026 Yellow Lawn Patches [Pet Waste Fix]](https://lawnmajesty.com/wp-content/uploads/2026/07/Fixing-2026-Yellow-Lawn-Patches-Pet-Waste-Fix.jpeg)