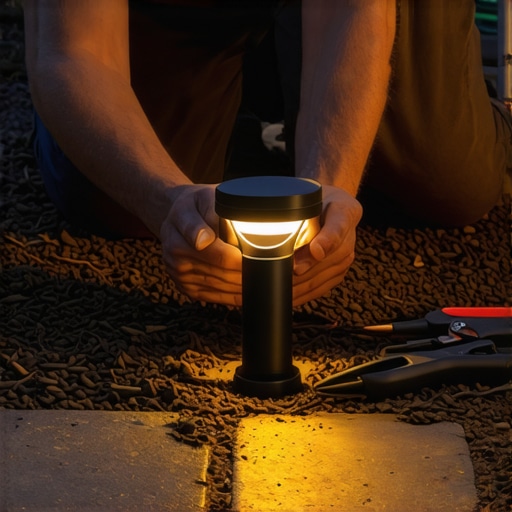
How to install a low-voltage lighting system
Designing 12V Systems From the Ground Up
Installing a low-voltage lighting system requires a strategic approach centered on voltage drop calculations, transformer load management, and waterproof wire integrity to ensure long-term durability in harsh outdoor environments. Most DIY failures occur because homeowners prioritize fixture aesthetics over the electrical engineering required to power them consistently across long wire runs.
I recently got called out to tear up a $30,000 patio that was sinking because the previous contractor didn’t just fail the base-layer compaction; they had also buried cheap, non-direct-burial wire directly under the pavers without a conduit. The wire insulation cracked under the weight of the settling stone, causing a dead short. To fix it, we had to excavate the entire perimeter. It was a mess. This is why I tell my crew that if you don’t treat a lighting install like a civil engineering project, you’re just burying trash in the dirt. Real pros don’t just ‘plug and play.’ We calculate resistance, we account for soil acidity eating away at copper, and we never, ever use those cheap plastic ‘vampire’ clips that come in the box.
“Voltage drop is the most common cause of premature LED failure in landscape lighting systems; maintaining a range of 10.8 to 12 volts at the fixture is critical for diode longevity.” – Hardscape Engineering Axiom
The Engineering of the Transformer and Wire Gauge
Your transformer is the heart of the system. I see guys buy a 100-watt transformer and try to hang 95 watts of lights on it. That is a recipe for a thermal shutdown. Follow the 80% rule: never load a transformer beyond 80% of its rated capacity. If you have 100 watts of lights, you need at least a 150-watt transformer to account for wire resistance and future expansion. Use a magnetic transformer rather than an electronic one; they handle the surge of outdoor environments much better. Wire gauge is your next hurdle. For most residential runs, 12/2 low-voltage wire is the standard. However, if your run exceeds 100 feet, you better be pulling 10/2 wire. Thicker copper means less resistance. Less resistance means your last light in the chain doesn’t look like a dying firefly while the first one is blindingly bright.
How deep do you bury low voltage landscape wire?
To meet standard landscaping safety codes and prevent accidental damage from lawn care tools like aerators or edgers, low-voltage wire should be buried at a minimum depth of 6 inches. While the NEC allows for shallower burial of 12V lines, professional installers prefer deeper trenches to protect the circuit from frost heave and gardening activities.
| Wire Gauge | Max Load (Watts) | Max Run Distance (ft) | Recommended Application |
|---|---|---|---|
| 14/2 Gauge | 144W | 75ft | Small garden beds, accents |
| 12/2 Gauge | 192W | 100-150ft | Standard residential paths |
| 10/2 Gauge | 288W | 200ft+ | Long driveways, estate runs |
The Hub-and-Spoke Installation Method
Don’t daisy-chain your lights. If you run one wire and tap every light into it in a line, the voltage will drop significantly at every connection. Instead, use the ‘Hub Method.’ Run a heavy-gauge ‘home run’ wire from the transformer to a weatherproof junction box (the hub) in the center of a lighting zone. From that hub, run individual lines out to each fixture. This ensures that every light in that zone receives the exact same voltage. It also makes troubleshooting a breeze. If one light goes out, you know it’s a fixture issue, not a break in the main line. When making connections, use heat-shrink grease nuts. Those snap-on connectors that pierce the wire are garbage. They allow moisture to wick into the copper strands via capillary action. Within two seasons, the copper turns green and brittle. It will rot. Use a real wire stripper, twist your leads, and seal them in a silicone-filled connector.
“Path lighting should be spaced to provide a uniform 0.5 to 1.0 foot-candle of illumination to ensure pedestrian safety without creating excessive light pollution.” – Agricultural Extension Engineering Manual
What size transformer do I need for landscape lighting?
To determine the correct transformer size, you must sum the total wattage of all intended LED or halogen fixtures and multiply by 1.25 to provide a safety buffer. This 25% headroom accounts for voltage drop across the wire runs and prevents the transformer from overheating during peak summer temperatures.
The Installation Checklist
- Call 811 to mark underground utilities before trenching. Don’t be the guy who hits a gas line for a 2-watt path light.
- Layout all fixtures during the day, but wait until dusk to finalize the aiming. Shadows change everything.
- Use a voltmeter at the furthest fixture to confirm you are getting at least 11 volts.
- Mount the transformer at least 12 inches above the finished grade to avoid backsplash and snow accumulation.
- Avoid ‘mulch volcanoes’ around base-mounted lights; keep the area clear for heat dissipation.
Hardscaping and Lighting Integration
When working with hardscaping features like retaining walls or stone steps, you need to plan your sleeves before the first block is set. I use 1-inch PVC conduit under any paved surface. If a wire fails under a patio and it isn’t in a conduit, you’re looking at a multi-thousand-dollar demolition job to replace a five-dollar wire. In heavy clay soils, like what we see in the Southeast, hydrostatic pressure can actually crush thin-walled conduit. Use Schedule 40 PVC. It’s overkill until the ground shifts in a freeze-thaw cycle and you realize your lights still work while the neighbor’s don’t. Every connection point should be accessible. Never bury a junction box under pavers. Use a ‘dummy’ stone or a hidden access panel. You’ll thank me in five years when you need to add a light or replace a lead.

![Build a $100 2026 Pea Gravel Fire Pit [Weekend DIY]](https://lawnmajesty.com/wp-content/uploads/2026/07/Build-a-100-2026-Pea-Gravel-Fire-Pit-Weekend-DIY.jpeg)