Build a $150 2026 Cedar Trellis for Garden Entry
Engineering the Perfect Garden Entry: The 2026 Cedar Trellis
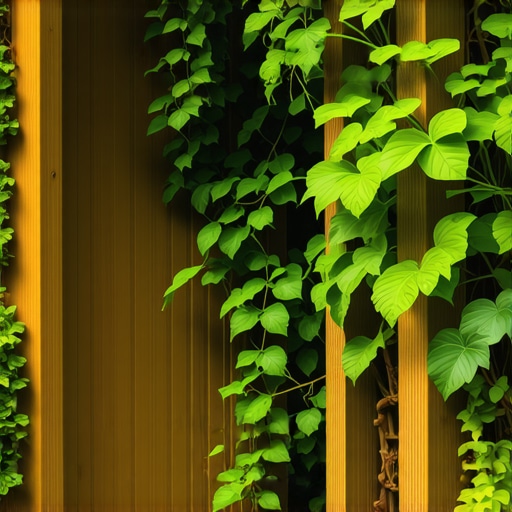
Building a 2026 cedar trellis requires Western Red Cedar, stainless steel fasteners, and a post-hole depth of at least 24 inches to ensure structural stability against wind loads. This $150 entry feature serves as a functional anchor for vining perennials while providing immediate architectural interest to a garden design. I always drill into my new crew members: if you don’t fix the soil grading first, every plant you put in the ground is just expensive compost. Vertical structures follow the same rule. If you do not account for the frost line and moisture wicking at the base, that trellis will be firewood in three seasons. I have seen too many DIY projects where the homeowner used interior-grade screws that snapped the moment the wood expanded in the spring humidity. We do things differently because biology and physics do not care about your weekend schedule. Wood is a living, breathing material even after it is milled. You have to respect the grain and the environment it sits in.
Why Western Red Cedar Dominates the 2026 Market
Cedar remains the gold standard for hardscaping and garden design due to its chemical makeup. It is not just about the look. The extractives in cedar, specifically thujaplicins, provide a natural resistance to rot that pressure-treated pine can only achieve through heavy chemical saturation.
“Western Red Cedar is naturally resistant to decay and insects due to its high concentration of thujaplicins and water-soluble phenolics.” – USDA Forest Service Wood Handbook
When you are working on a $150 budget in 2026, you have to be precise with your lumber buy. You are looking for ‘Rough Sawn’ or ‘S4S’ (surfaced on four sides) Heartwood. Avoid the sapwood; it has zero rot resistance and will soften within twenty-four months of ground exposure.
The $150 Material Breakdown and Economics
To keep this project under the $150 mark, you must source from local lumber yards rather than the big-box retailers that overcharge for low-grade ‘cedar-tone’ products. You need four 2x4x8 posts, two 2x2x8 top rails, and a handful of 1×2 slats for the lattice work. In 2026, the cost of lumber has stabilized, but you must factor in the price of high-quality 304-grade stainless steel screws. Galvanized hardware will eventually react with the tannins in the cedar, leaving ugly black streaks running down your wood. That is a sign of a hack job. I refuse to let that happen on my sites.
| Material Item | Quantity | Estimated Cost (2026) | Purpose |
|---|---|---|---|
| 2x4x8 Cedar Post | 2 | $48.00 | Main Vertical Supports | 2x2x8 Cedar Rail | 2 | $22.00 | Top Header Assembly | 1x2x8 Cedar Slats | 6 | $36.00 | Lattice Grid Structure | 304 Stainless Screws | 1 Box | $25.00 | Corrosion-Resistant Fastening | Quikrete Fast-Setting | 2 Bags | $14.00 | Post Foundation | Total | — | $145.00 | — |
The Blueprint: Ground-Up Installation
Step one is always utility marking. Call 811. Do not be the person who severs a fiber optic line for a trellis. Once cleared, we focus on the physics of the hole. A trellis is a giant sail in a windstorm. If your posts are only 12 inches deep, they will lean. You need to go 24 to 30 inches deep, depending on your local frost line. In heavy clay soils, we use a 6-inch base of modified gravel (3/4-inch minus) to allow water to drain away from the bottom of the post. If the post sits in a pool of water, even cedar will fail eventually.
“For structures over six feet, wind load becomes the primary cause of lateral failure if the foundation depth is insufficient.” – Structural Engineering Guidelines for Residential Hardscapes
How deep should trellis posts be buried?
Posts for a garden entry trellis should be buried at least one-third of their total height, with a minimum depth of 24 inches in most temperate climates. In areas with high wind or soft, sandy soil, increasing the depth to 36 inches with a concrete collar ensures the structure remains plumb over time. This prevents the ‘heaving’ effect caused by freeze-thaw cycles that can ruin your landscaping efforts.
The Assembly: Avoiding Structural Weakness
When assembling the lattice, do not just butt-joint the wood and hope for the best. Use a lap joint where the horizontal slats meet the vertical posts. This increases the surface area for the adhesive and the mechanical fastener. I tell my crew to listen for the ‘clack’—the sound of two perfectly flat surfaces meeting. If there is a gap, it will collect moisture. Moisture leads to fungal growth. Fungal growth leads to rot. We use a 45-degree miter on the top of the posts to shed water. A flat-topped post is a sponge. Cut it at an angle so the rain runs off. Simple engineering saves you hundreds in repairs later.
What is the best wood for an outdoor trellis?
Western Red Cedar and Black Locust are the top choices for outdoor structures due to their natural decay-resistant properties and dimensional stability. While pressure-treated pine is cheaper, it is prone to warping, twisting, and leaching chemicals into the soil, which can be detrimental to nearby lawn care and sensitive garden plants. Cedar offers the best balance of aesthetics, longevity, and ease of workability for a $150 budget.
Final Structural Checks and Finishing
Once the frame is up, check it for square. Use a 3-4-5 triangle method. If it is off by even an inch, the lattice will look crooked to anyone walking through the entry. For the finish, do not use a film-forming stain. It will peel. Use a penetrating oil-based sealer with UV inhibitors. This keeps the wood from turning silver-gray, though some designers prefer the weathered look. In 2026, the trend is moving toward ‘Natural Transparency’—letting the grain show through while protecting the lignin from sun damage. Do not skip the end-grain sealer on the bottom of the posts before they go into the ground. That is the straw that sucks up the moisture. Seal it, or lose it.
- Verify Utilities: Always call 811 before digging post holes.
- Gravel Base: Use 4-6 inches of crushed stone for drainage under the post.
- Leveling: Use a 4-foot level to check both faces of the posts.
- Fasteners: Use only stainless steel to prevent tannin staining.
- Spacing: Ensure the entry width is at least 36 inches for mower access.
A trellis is more than a decoration. It is an engineering challenge that bridges the gap between hardscaping and horticulture. When you build it right, you create a legacy for the garden that lasts decades, not just a single season. Pay attention to the details, respect the soil, and don’t cut corners on the hardware.
![Build a $300 2026 Stone Fire Pit Area [Fast]](https://lawnmajesty.com/wp-content/uploads/2026/07/Build-a-300-2026-Stone-Fire-Pit-Area-Fast.jpeg)