How to Keep Your Mulch from Washing Away on a Hill
The Engineering of Hillside Mulch Retention
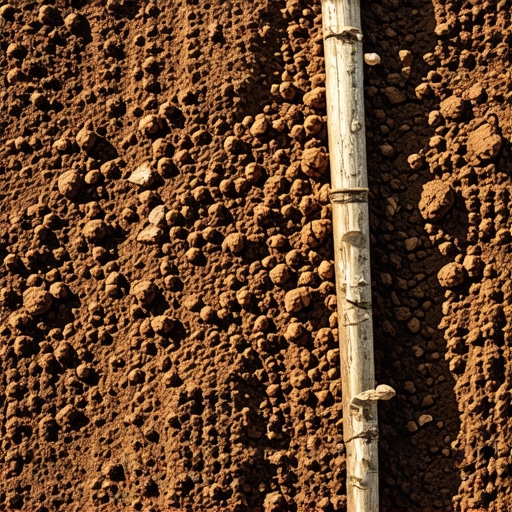
To prevent mulch from washing away on a hill, you must address hydrostatic pressure and surface friction by using shredded hardwood mulch, installing contour trenches, and utilizing biodegradable erosion control blankets to lock organic matter into the soil sub-strata. Gravity is a relentless force, and when you combine it with the kinetic energy of a heavy rainstorm, a standard garden bed becomes a slip-and-slide for organic matter. This is not just an aesthetic issue; it is a structural failure of your landscaping. I always drill into my new crew members: if you don’t fix the soil grading first, every plant you put in the ground is just expensive compost. I have seen guys spend thousands on high-end nursery stock only to have it suffocated or washed out because they ignored the basic physics of the slope. We do not just toss wood chips on a hill and hope for the best. We engineer a solution that stays put for years. To understand why your mulch is currently in the street, you have to look at the microscopic level of the soil and the material fibers. Smooth, round mulch like pine bark nuggets are essentially tiny boats. They have a high buoyancy and a low coefficient of friction. In a rain event, they float and then travel. If you want retention, you need interlocking fibers that act like a matted web. Shredded hardwood or cedar is the gold standard because the jagged edges of the wood fibers physically hook into each other and into the soil surface. This creates a monolithic layer that resists movement. This is what we call the angle of repose in civil engineering. For organic materials on a grade, we want a high internal friction angle. If your mulch consists of uniform, large particles, that angle is too low for anything steeper than a five-degree grade.
“Surface runoff velocity increases exponentially with slope length and gradient, necessitating the use of rough-textured mulches to interrupt water flow.” – USDA Natural Resources Conservation Service
How deep should a mulch trench be on a slope?
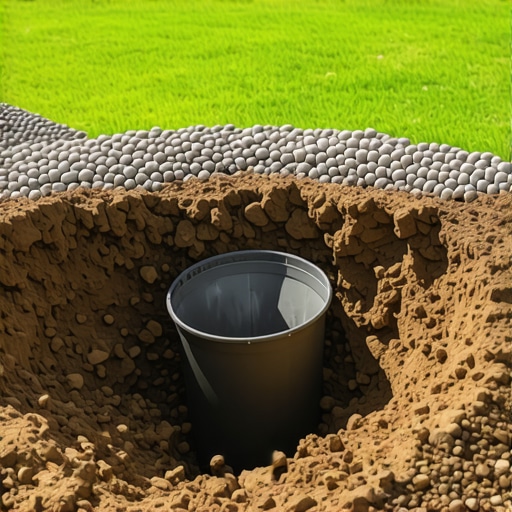
On a significant incline, a standard shallow edge is insufficient to catch the inevitable downward migration of material; you require a V-shaped trench at least 4 to 6 inches deep at the base of the slope to serve as a collection basin and mechanical stop for the mulch bed. This trench acts as a final fail-safe. Think of it as a sediment trap. When water carries small particles down the hill, they hit this trench and settle instead of spilling over onto your lawn or driveway. But the trench is only the beginning. You have to consider the soil’s percolation rate. If you have heavy clay, the water will sit on top of the soil, lifting the mulch and carrying it away. If you have sandy soil, the water sinks fast, but the soil itself may erode from under the mulch. We often install what I call ‘contour breaks’—small, hidden trenches every five to ten feet up the hill, filled with heavier stone or wrapped in burlap—to break the water’s velocity before it gains enough power to strip the hill bare. It is about energy management. You cannot stop the water, but you can slow it down enough that it loses its ability to carry weight. Most homeowners make the mistake of piling mulch 6 inches deep. This is a death sentence for your plants. It creates a ‘mulch volcano’ that holds too much moisture against the root flare, leading to rot and fungal infections. It also makes the mulch more likely to slide. We aim for 2 to 3 inches of tightly packed, shredded material. Don’t just dump it; you have to rake it in and then compress it. I tell my guys to walk on it or use a hand tamper. Compaction is not the enemy here; it is the source of stability. You are trying to create a crust. Once that first layer of fungi starts to grow—those white threads called hyphae—they act as a biological glue. If you disturb the mulch every week with a rake, you are breaking that glue and making the hill vulnerable again.
What is the best mulch for steep hills?
The most effective material for extreme gradients is double-shredded hardwood mulch or gorilla hair cedar, as these materials feature long, interlocking fibers that create a cohesive mat resistant to both wind displacement and hydraulic lifting. To further assist you in choosing the right material, refer to the following engineering comparison of common landscaping materials used on inclines.
| Material Type | Friction Level | Buoyancy Rating | Max Recommended Grade |
|---|---|---|---|
| Pine Bark Nuggets | Low | Very High | 3 Degrees |
| Wood Chips (Arborist) | Medium | Medium | 10 Degrees |
| Shredded Hardwood | High | Low | 25 Degrees |
| Long-Fiber Cedar | Very High | Low | 40+ Degrees |
| Pine Straw (Needles) | Medium | Very Low | 30 Degrees |
Notice the performance of pine straw. It is a favorite in the South for a reason. The needles interlock and the resin makes them somewhat water-resistant, allowing water to flow over the top while the needles stay pinned to the soil. However, it breaks down fast and does little for soil nutrition compared to hardwood. If you are dealing with a grade steeper than 40 degrees, you are no longer in the realm of simple mulching. You are in the realm of hardscaping and erosion control. This is where we bring in jute netting or coir logs. You lay the netting down, pin it with 6-inch steel staples every 12 inches, and then blow or spread the mulch into the netting. The net holds the mulch, and the mulch protects the soil. It is a symbiotic relationship. Eventually, the netting biodegrades, but by then, your groundcover plants—things like creeping juniper, vinca minor, or native sedges—should have their root systems established. The roots are the ultimate anchor. No amount of engineering can beat a healthy, deep root system. I have seen people try to use landscape fabric on hills. Never do this. Landscape fabric is a slip-sheet. It creates a smooth surface that allows the mulch to slide off at the first sign of rain. It is a shortcut that leads to failure every time. If you are worried about weeds, use a pre-emergent like Snapshot or Preen, or better yet, maintain a healthy microbial colony in the soil that out-competes the weed seeds. We also need to talk about the ‘tackifier.’ There are commercial grade, non-toxic glues made from guar gum that we spray on top of mulch for high-end projects. It dries clear and binds the top inch of mulch into a flexible, water-permeable sheet. It is great for areas where you have high wind or the drip line of a roof with no gutters. One heavy downpour from a roof can cut a canyon through a mulch bed in minutes. If you don’t have gutters, you need to install a splash block or a dry creek bed made of river rock right where that water hits.
“A retaining wall doesn’t fail because of the stone; it fails because of the water trapped behind it.” – Hardscape Engineering Axiom
This axiom applies to mulch beds too. If water cannot move through or around your bed, it will move the bed itself. This is why we check the grade before we ever start. If the hill is shedding water toward the house, we have bigger problems than mulch. We have to cut a swale or install a French drain to move that water safely away. Only then do we worry about the aesthetics. Here is the checklist my foremen use before signing off on a slope job.
- Grade Verification: Ensure the slope does not exceed the material’s angle of repose.
- Sub-soil Prep: Scrape away old, loose debris to reach firm, mineral soil.
- Trenching: Cut a 4-inch deep ‘V’ trench at the lowest point of the bed.
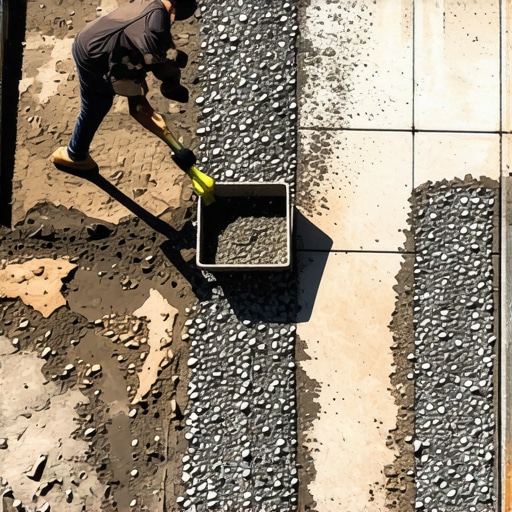
- Netting Installation: For slopes over 25 degrees, anchor jute mesh using steel staples.
- Material Application: Spread 3 inches of double-shredded hardwood; do not use nuggets.
- Hydration: Lightly mist the mulch to settle the dust and begin the interlocking process.
- Compaction: Firmly press the mulch into the netting or soil using a flat shovel or feet.
Once the install is done, the first year is the most critical. You need to watch it during the first big storm. If you see ‘rills’—those small channels where water is starting to concentrate—you need to intervene immediately. Pack some heavier stone into those rills or adjust the grade above to divert the water. Landscaping is a living system. It settles, it shifts, and it reacts to the environment. Don’t expect it to be a set-it-and-forget-it deal. You have to maintain the edge of that bottom trench. If it fills with silt, the mulch will start to hop over it. Keep that trench clean, and your mulch stays on the hill. It is that simple. Finally, consider the pH of your soil. Heavy applications of certain mulches, especially pine-based products, can slightly acidify the top layer of soil over time as they decompose. While this is great for azaleas and blueberries, it might not be what your turf or other perennials want. Always get a soil test every couple of years. We aren’t just moving dirt; we are managing a biological engine. Treat it with the respect it deserves, and it will reward you with a stable, functional landscape that doesn’t end up in the neighbor’s yard every time the clouds open up. Avoid the cheap bags at the big-box store. That stuff is often just ground-up pallets and construction debris dyed a fake color. It lacks the natural resins and fibrous structure of real nursery-grade hardwood. Buy it by the cubic yard from a reputable landscape supply yard. You want to see the texture. You want to see those long, stringy pieces. That is the secret to a hill that stays put. It isn’t magic; it is engineering.

![Fix Standing Water: Why Your Yard Needs a Swale [DIY]](https://lawnmajesty.com/wp-content/uploads/2026/06/Fix-Standing-Water-Why-Your-Yard-Needs-a-Swale-DIY.jpeg)