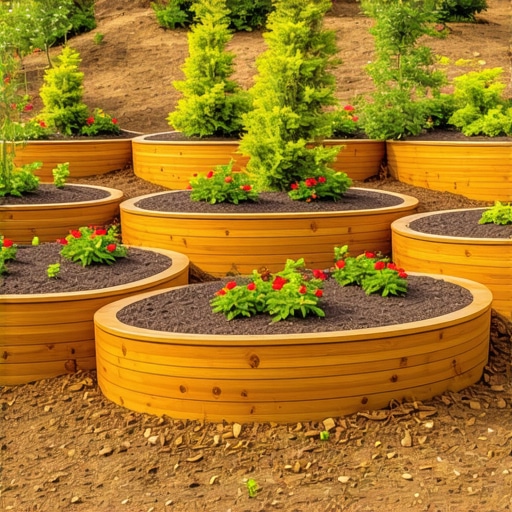
How to Level a Sloping Yard with Terraced Garden Beds
Engineering the Level Yard: The Mechanics of Terracing
To level a sloping yard using terraced garden beds, you must install structural retaining walls that counteract hydrostatic pressure through mechanical compaction and granular drainage layers. This process involves excavating the slope into flat steps, installing a compacted gravel base, and managing water runoff to prevent soil erosion or wall failure. Proper terracing requires a firm grasp of civil engineering principles to ensure the weight of the soil does not compromise the structure over time.
The Hardscape Autopsy: Why Cheap Walls Fail
I recently got called out to tear up a $30,000 patio and retaining wall system that was literally sliding into the neighbor’s pool. The previous contractor thought they could get away with using clean fill or native soil as backfill. Water got trapped behind the blocks, the soil saturated, and the sheer weight of the hydraulic pressure blew the wall out at the base. It was a $30,000 mistake because they skipped $500 worth of 57 stone and a four-inch perforated pipe. When you see a wall bellying out or tilting, the failure started months ago in the drainage layer. If you do not give water a path of least resistance, it will create its own, usually by pushing your wall over. I tell my crew every morning: we are not just stacking rocks; we are managing the massive weight of the earth and the fluid dynamics of groundwater. This project is about engineering, not just aesthetics. [IMAGE_PLACEHOLDER]
“A retaining wall doesn’t fail because of the stone; it fails because of the water trapped behind it.” – Hardscape Engineering Axiom
The Math of the Slope: Calculating Rise and Run
Before you touch a shovel, you need to understand the physics of your grade. A slope is a ratio of rise over run. If you have a 10-foot horizontal run and a 5-foot vertical drop, you have a 50 percent grade. Most residential landscapes should not attempt to hold more than 3 feet of vertical soil with a single wall without a structural engineer. For steeper hills, you must use multiple shorter terraces. This reduces the surcharge load on each individual wall. Measuring this requires a transit level or a simple string level. You must determine exactly how many tiers are required based on the height of your chosen material. If you are using 6-inch concrete blocks, and you have a 24-inch rise, you need four courses plus one course buried for the footer. Never calculate based only on what is visible; the strength of the wall is what is hidden underground.
How deep should a retaining wall trench be?
A retaining wall trench should be excavated to a depth that accounts for 6 inches of compacted 2A modified gravel and at least one full course of block or timber below grade. For walls over 3 feet, deeper footings or a 10 percent embedment of the total wall height is required to prevent the base from kicking out under the weight of the saturated soil backfill.
What is the best material for terraced garden beds?
The best material depends on the soil pH and drainage capacity, but SRWs (Segmental Retaining Walls) made of high-density concrete are superior for longevity. While pressure-treated timbers are cheaper, they eventually rot due to fungal activity in the soil, whereas concrete units are resistant to freeze-thaw cycles and provide better friction for interlocking during soil movement.
Material Comparison for Terracing
| Material Type | Longevity | Installation Effort | Drainage Requirement |
|---|---|---|---|
| Pressure-Treated Timber | 10-15 Years | Moderate | High |
| Interlocking Concrete Block | 50+ Years | High | Critical |
| Natural Dry-Stack Stone | Indefinite | Very High | Moderate (Self-draining) |
| Gabion Baskets | 30+ Years | Moderate | Low (Highly porous) |
The Anatomy of a Stable Terrace
Every terraced bed is a sandwich of specific materials. At the bottom, you have the subgrade, which must be undisturbed soil. You then add the leveling pad, typically a 2A modified stone or crushed limestone, compacted to a 95 percent Proctor density. If this base is loose, the wall will settle unevenly. The wall units go on top, but the most important part is the drainage chimney. This is a 12-inch wide column of 57 stone or 1-inch clean gravel placed directly behind the wall units. This gravel prevents the soil from clogging the drainage system and allows water to drop straight down to the perforated pipe. Without this chimney, the soil stays wet, turns into heavy mud, and applies lateral pressure that no amount of mortar can hold back. Don’t skip this. Use a non-woven geotextile fabric to separate the drainage stone from the native soil. This prevents migration of fines, which is a fancy way of saying it stops the mud from clogging your gravel.
“Effective site drainage is the primary factor in preventing the structural failure of segmental retaining walls.” – ICPI Best Practices Manual
Step-by-Step Installation Checklist
- Site Survey: Identify the high and low points. Use stakes and string lines to mark the perimeter of each terrace tier.
- Utility Check: Call 811 before digging. Severing a gas line or an underground electrical conduit is a fast way to end a project and your bank account.
- Excavation: Cut into the hill. You are creating a series of steps. Ensure the area behind the wall is excavated deep enough to accommodate the 12-inch drainage chimney.
- The Footer: Dump 6 inches of 2A modified stone. Compact it using a plate compactor until the machine literally bounces off the surface. If it feels soft, keep compacting.
- The First Course: This is the most difficult part. Every block must be level from side to side and front to back. If the first course is off by a fraction of an inch, the tenth course will be off by several inches.
- Drainage Pipe: Lay a 4-inch perforated SDR-35 pipe behind the first course. Day-light the pipe to a lower point on the property or into a dry well.
- Backfilling: Fill the core of the blocks and the 12-inch space behind them with 57 stone. Add native soil behind the stone in 6-inch lifts, compacting each lift as you go.
- Geogrid: If the wall is over 3 feet, use a geogrid (a high-tenacity polyester mesh) every two courses to tie the wall into the soil mass behind it.
Soil Science within the Terraces
Once the hardscaping is done, you are left with several flat boxes. Do not just throw the clay you dug out back into the beds. That soil is likely anaerobic and lacks the pore space for root respiration. To ensure your garden thrives, you need to manage the cation exchange capacity (CEC) of the soil. Mix in organic compost and expanded shale to improve drainage and nutrient retention. Because terraced beds are elevated, they dry out faster than the ground. This is due to increased evaporation from the face of the wall and better drainage. Install a drip irrigation system with pressure-compensating emitters to deliver water directly to the root zones. Avoid overhead watering, which promotes fungal growth on the foliage and wastes water through evaporation. You have built a structural masterpiece; now give the plants the chemistry they need to live. Don’t use cheap mulch volcanoes. Keep the mulch 3 inches away from the stems of your plants to prevent rot. Hardscaping and horticulture must work in tandem.