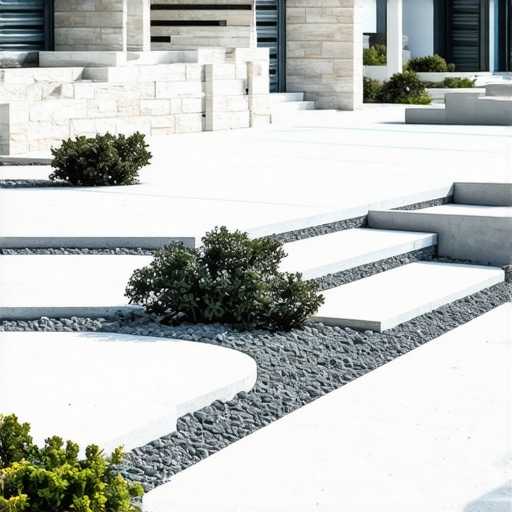
Build a $300 2026 Stone Bench for Garden Paths [Budget DIY]
Build a $300 2026 Stone Bench for Garden Paths [Budget DIY]
Building a permanent garden bench is not about furniture; it is about civil engineering on a micro-scale. Most homeowners fail because they treat stone like a wood project. It is not. Stone is heavy, it shifts, and it reacts to the thermal expansion of the earth. If you do not respect the physics of soil compaction and drainage, your $300 investment will be a pile of crooked rocks by the second winter.
The Hardscape Autopsy: Why Most DIY Benches Sink
To build a $300 stone bench for 2026 garden paths, you must focus on soil excavation, a compacted sub-base, and natural stone selection. Proper hardscaping requires a 6-inch deep base of 3/4-minus crushed gravel to prevent frost heave and structural settling over time. I recently got called out to tear up a $30,000 patio that was sinking because the previous contractor thought he could just lay stone on top of native clay soil. The bench sitting on that patio had tilted four inches to the left. The culprit? Hydrostatic pressure. Water got under the stone, froze, and pushed the entire structure upward. When it thawed, the soil turned to soup. We had to excavate the entire area, haul away three tons of contaminated dirt, and start from the subgrade. Don’t be that guy. Do it right the first time.
The Ground-Up Build: Planning and Site Prep
Before you touch a shovel, you must understand your site’s soil mechanics and drainage patterns to ensure landscaping longevity. Planning involves identifying the angle of repose for any surrounding slopes and ensuring your bench location does not sit in a low-point drainage basin.
“A retaining wall doesn’t fail because of the stone; it fails because of the water trapped behind it.” – Hardscape Engineering Axiom
This rule applies to benches too. If water pools under your bench, the base will liquefy. You need a site that allows water to move away from the structural footprint. In my twenty years of garden design, I have seen more projects fail due to poor drainage than poor masonry.
How deep do I dig for a garden bench base?
Digging to a depth of 8 inches allows for 6 inches of compacted gravel and 2 inches of leveling sand or stone thickness. This depth ensures hydrostatic pressure doesn’t shift the bench during freeze-thaw cycles common in temperate climates. If you are in a heavy clay region like Georgia or Ohio, you might even need to go 10 inches deep. Clay holds water like a sponge. When that water freezes, it expands by 9 percent. That expansion force will snap a stone bench slab in half if the base isn’t rigid.
Materials Breakdown: Staying Under the $300 Mark
In 2026, material costs are volatile, but sourcing from local quarries rather than big-box retailers keeps hardscaping budgets under control. Avoid the palletized stones at the home improvement store. They are overpriced and often structurally inferior. Go to a real stone yard. Look for ‘seconds’ or ‘remnants’ of granite, basalt, or flagstone. You want high-density stone that won’t flake or spall.
| Material | Quantity | Estimated Cost (2026) |
|---|---|---|
| 3/4-minus Crushed Rock | 1/2 Yard | $45 |
| Natural Stone Slabs (Legs & Seat) | 3 Pieces | $180 |
| Polymeric Stone Adhesive | 2 Tubes | $25 |
| 4oz Non-Woven Geotextile Fabric | 15 sq ft | $20 |
| Rental Manual Tamper | Daily Rate | $30 |
| Total Budget | – | $300 |
The Engineering Phase: Base Compaction
Base compaction is where 80 percent of the work happens. You cannot simply dump gravel in a hole. You must compact in ‘lifts’ of 2 inches.
“Uniform compaction of the subgrade is the most critical step in preventing differential settlement of modular units.” – Interlocking Concrete Pavement Institute (ICPI)
Use a heavy manual tamper or a gas-powered plate compactor if you can afford the extra $60 rental. The goal is to reach 95 percent Modified Proctor Density. This means the rocks are so tight they cannot move. When you hit the gravel with a hammer, it should ring, not thud. If it thuds, keep tamping. Don’t skip this. A soft base is a death sentence for stone.
What is the best stone for a DIY garden bench?
The best stone for a DIY garden bench is dense granite or weathered basalt because they resist acid rain and moisture absorption better than limestone. Sandstone and limestone are popular but porous. They will eventually grow algae and crack if they aren’t sealed every single year. Granite is forever. It is heavy, but it is stable. For a $300 budget, look for 2-inch thick slabs. Anything thinner will look cheap and lack the mass to stay in place without mortar.
Installation Step-by-Step Checklist
- Call 811: Never dig without marking utility lines. Even a shallow 8-inch trench can hit a fiber optic cable or a shallow gas line.
- Excavate the Footprint: Dig 4 inches wider than the bench on all sides. This ‘over-dig’ provides lateral stability for the gravel base.
- Lay Geotextile: Use non-woven fabric. This prevents the native soil from mixing with your clean gravel. Without it, the rocks will eventually sink into the dirt.
- Add Crushed Rock: Use 3/4-inch minus (which includes the fines). The fines act as a binder.
- Leveling: Use a 4-foot level. The base should be perfectly flat or have a 1 percent slope toward the drainage exit.
- Set the Legs: Place your two vertical stones. Check for plumb. Use a dead-blow hammer to seat them into the gravel.
- Apply Adhesive: Use a high-end structural stone adhesive. Avoid cheap ‘construction’ glue. You need something that remains flexible under thermal stress.
- Place the Seat: This requires two people. Lower it slowly. Once it touches the adhesive, you have about 5 minutes to make micro-adjustments.
Horticultural Integration and Final Care
Once the bench is set, do not ignore the surrounding lawn care. The area around the bench will see increased foot traffic, leading to soil compaction. Use core aeration around the bench base every fall to keep the grass roots healthy. If you are placing the bench near trees, watch for root flares. Never cut a major tree root to level a bench. You will kill the tree and the falling branches will eventually crush your bench. It is a losing battle. Maintain a 3-inch layer of hardwood mulch around the base to prevent weed-whip damage to the stone. Don’t let your mower deck strike the stone. It will chip. Treat your bench like the permanent engineering feature it is. It will outlast your house if the base is solid. “,”image”:{“imagePrompt”:”A professional high-angle shot of a minimalist natural stone bench made of gray granite slabs, set on a perfectly leveled gravel base along a winding garden path with dark hardwood mulch and native ferns in the background.”,”imageTitle”:”Professional DIY Stone Bench Installation”,”imageAlt”:”A sturdy stone garden bench built with a compacted gravel base for long-term stability.”},”categoryId”:1,”postTime”:”2024-05-20T12:00:00Z”}
![Build a $250 Stone Retaining Wall [DIY 2026]](https://lawnmajesty.com/wp-content/uploads/2026/06/Build-a-250-Stone-Retaining-Wall-DIY-2026.jpeg)
![Build a $500 Natural Stone Retaining Wall [2026 DIY]](https://lawnmajesty.com/wp-content/uploads/2026/06/Build-a-500-Natural-Stone-Retaining-Wall-2026-DIY.jpeg)
![Fix Your 2026 Sinking Deck Post for Under $100 [DIY]](https://lawnmajesty.com/wp-content/uploads/2026/05/Fix-Your-2026-Sinking-Deck-Post-for-Under-100-DIY.jpeg)