How to Use Slate Chips to Stop Weed Growth in Garden Beds
Effective Weed Suppression Using Slate Chips in Professional Landscape Design
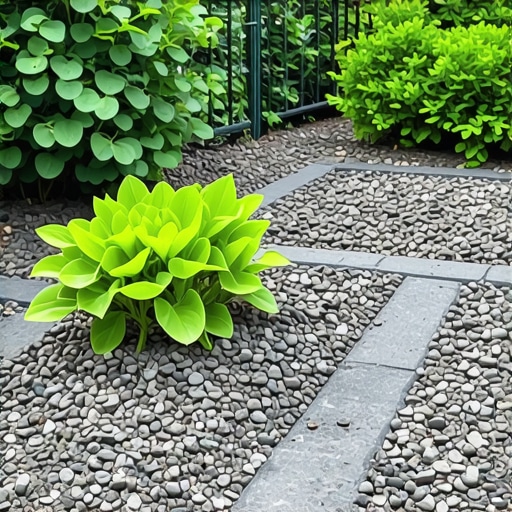
To stop weed growth using slate chips, you must create a multi-layered barrier consisting of a heavy-duty non-woven geotextile fabric topped with exactly 2 to 3 inches of professional-grade slate. This system works by eliminating the light required for germination while providing a rapidly draining surface that prevents airborne weed seeds from finding the moisture and organic material they need to survive.
I recently got called out to tear up a $30,000 patio and garden renovation that was sinking and overrun with thistles because the previous contractor thought they could just dump slate over raw dirt. It was a disaster. The slate had mixed with the native clay, creating a grey slurry that actually encouraged weed growth while suffocating the root flares of the expensive Japanese Maples. It took my crew four days of hand excavation to fix a mistake that could have been avoided with $200 worth of proper fabric and a bit of common sense regarding soil grading. If you do not fix the sub-grade first, you are just throwing money into a hole.
The Engineering Physics of Slate Mulching
Slate is not just a pretty rock; it is a metamorphic stone that provides unique mechanical advantages in a garden bed. Because slate is flat and plate-like, it layers much more efficiently than rounded river rock. When you install it, these plates overlap, creating a physical shield that is nearly impossible for sunlight to penetrate. No light means no photosynthesis for dormant seeds in the soil. Furthermore, slate has a high thermal mass. It heats up during the day and stays warm, which can actually desiccate young weed seedlings that manage to land on the surface before they can send a taproot down through the fabric. It is a harsh environment for weeds. That is exactly what we want.
“Inorganic mulches such as crushed stone, gravel, or volcanic rock are permanent and do not require frequent replacement, provided they are installed over a landscape fabric to prevent the stone from sinking into the soil.” – Penn State Extension Office
The Comparison: Why Slate Beats Organic Alternatives
Most homeowners are used to shredded hardwood mulch. It looks okay for about three months, then it turns grey and starts to decompose. That decomposition is the problem. As wood mulch breaks down, it creates a rich, organic seedbed—literally a nursery for weeds. Slate does not rot. It does not blow away in a high wind. It stays where you put it. You are trading a recurring annual cost for a one-time capital investment in your property’s hardscape. It is a smart move for long-term maintenance reduction.
| Material Attribute | Wood Mulch (Shredded) | Slate Chips (Metamorphic) | River Rock (Rounded) |
|---|---|---|---|
| Longevity | 1-2 Years | 20+ Years | 20+ Years |
| Weed Suppression | Moderate (Fails as it rots) | High (Light Blocking) | Moderate (Voids allow light) |
| Maintenance Level | Annual Top-dressing | Occasional Leaf Blowing | Occasional Leaf Blowing |
| Curb Appeal | Traditional/Soft | Modern/Architectural | Natural/Rustic |
How deep should slate chips be in a garden bed?
For maximum weed suppression and aesthetic coverage, slate chips should be installed at a depth of 2 to 3 inches depending on the chip size. Using less than 2 inches will likely expose the underlying landscape fabric over time due to foot traffic or heavy rain, while exceeding 3 inches can create hydrostatic pressure issues and make it difficult for oxygen to reach the root zones of your ornamental plants.
How much modified gravel do I need for a patio base?
While we are discussing bed prep, remember that any hardscape element like a path or edge near your slate beds requires a 4 to 6-inch compacted base of 21A or 3/4-inch modified gravel. You cannot skip compaction. If the ground under your slate chips or edging moves, the weed barrier will tear, and the entire system will fail. We use a plate compactor until the base literally bounces the machine back. That is when you know it is set.
Professional Installation Checklist
- Excavate the bed to a depth of 3 inches below the desired finished grade.
- Grade the soil away from the foundation at a 2 percent slope.
- Install a 4.5 oz non-woven geotextile needle-punched fabric.
- Secure the fabric with 6-inch steel sod staples every 12 inches along the edges.
- Cut ‘X’ slits for existing plants, ensuring you do not crowd the root flare.
- Spread the slate chips evenly using a metal garden rake.
- Hose down the slate to remove the dust and reveal the natural color.
Precision matters here. If you leave a gap in the fabric, the weeds will find it. They are opportunistic. I have seen Nut Sedge pierce through cheap plastic liners like a needle through paper. Use the heavy stuff. It is more expensive up front, but you will not be out there pulling weeds on your hands and knees in July. Don’t be cheap with the fabric. It is the most important part of the job.
“The primary cause of failure in stone-based mulch systems is the lack of a separation layer between the stone and the subgrade soil, leading to migration and weed infiltration.” – ICPI Hardscape Standards
The Long-Term Maintenance Reality
Nothing is 100 percent maintenance-free. Over the years, organic debris like leaves, grass clippings, and pollen will settle into the crevices between the slate chips. This debris will eventually break down into a fine compost. If you let it sit, weeds will grow on top of the fabric. The solution is simple. Use a leaf blower once a month. Keep the stones clean. If you see a weed, it is likely growing in a tiny bit of dust on top. It will pull right out because it cannot get its roots through the professional-grade fabric you installed. It is a five-minute fix instead of a weekend-long chore. Stay on top of it. Use a pre-emergent like Snapshot twice a year if you are in a high-pollen area. It creates a chemical vapor barrier that stops the seeds from ever waking up. Science is your friend here. Use it.
![Why Your 2026 Boxwoods are Turning Yellow [3 Soil Rules]](https://lawnmajesty.com/wp-content/uploads/2026/05/Why-Your-2026-Boxwoods-are-Turning-Yellow-3-Soil-Rules.jpeg)