
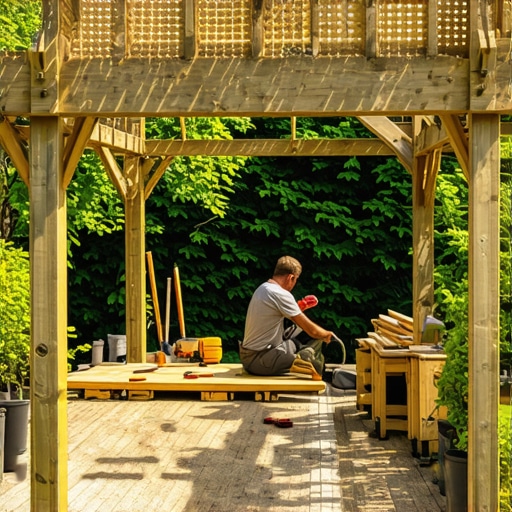
How to Build a Custom Wood Pergola for Your Deck
Engineering a Custom Wood Pergola for Structural Longevity
Building a custom wood pergola requires precise structural calculations, focusing on ledger attachments, post-to-beam connections, and frost-line footings to ensure the deck can handle the dead and live loads without sagging or structural failure. Most homeowners treat a pergola as a cosmetic addition, but as a seasoned hardscape foreman, I see it as a complex assembly of shear strength and gravity loads. If you don’t account for the torque that wind exerts on these structures, you are building a liability, not an asset.
I always drill into my new crew members: if you don’t fix the structural integrity of the deck first, every piece of cedar you put in the air is just expensive firewood. I recall a project three years ago where a client wanted a heavy western red cedar pergola over an existing 15-year-old deck. The ‘mow-and-blow’ contractor who built the original deck used 4×4 posts and missed every single joist hanger requirement. Had we bolted that 2,000-pound pergola to that frame, the whole thing would have pancaked during the first heavy snow load. We had to strip it back to the footings. Engineering comes before aesthetics. Always.
How much weight can a standard deck hold for a pergola?
A standard residential deck is typically designed for a live load of 40 pounds per square foot (PSF) and a dead load of 10 PSF. Adding a custom wood pergola significantly increases the dead load, often requiring doubled-up joists or additional 6×6 support posts directly beneath the pergola’s structural points to prevent deflection and catastrophic collapse.
“A retaining wall doesn’t fail because of the stone; it fails because of the water trapped behind it. Similarly, a pergola doesn’t fail because of the wood; it fails because of the connection points and the lack of lateral bracing.” – Hardscape Engineering Axiom
Selecting High-Grade Materials for Exterior Durability
Choosing the right species of wood is the difference between a structure that lasts thirty years and one that rots in seven. Western Red Cedar and Redwood are the industry standards for a reason: they contain natural tannins and oils that repel insects and resist decay. However, you cannot just buy ‘clear’ grade from a big-box store and expect it to stay straight. You need S4S (Surfaced 4 Sides) kiln-dried lumber to minimize the warping and twisting that occurs as wood moisture content equalizes with your local environment.
| Material Type | Durability Rating | Maintenance Requirement | Best Use Case |
|---|---|---|---|
| Pressure Treated (PT) | High (Rot Resistant) | High (Frequent Staining) | Structural Posts, Joists |
| Western Red Cedar | High (Natural) | Moderate | Visible Beams, Rafters |
| Ipe / Brazilian Walnut | Extreme | Low (Oil only) | High-End Luxury Decks |
| Douglas Fir | Moderate | High (Must be sealed) | Arid climates only |
Do not use standard interior screws. You must use 316-grade stainless steel or hot-dipped galvanized fasteners. The chemicals in pressure-treated wood will eat through standard zinc screws in less than 24 months through a process called galvanic corrosion. This is a non-negotiable step. Use Simpson Strong-Tie hardware or similar structural connectors for every joint. Don’t rely on toe-nailing; it won’t hold under wind uplift.
Foundation and Post Installation: The Critical Anchor
The post-to-deck connection is where 90% of DIY pergolas fail. You cannot simply surface-mount a 6×6 post to a 5/4 deck board. You must carry the load through the deck. This means the pergola posts should ideally be extensions of the deck’s foundation posts, or they must be bolted directly to the rim joists with through-bolts and backup blocks. If you are mounting to a concrete patio or a separate footing, you must dig below the frost line—usually 36 to 48 inches in northern climates—to prevent heaving.
How deep should pergola footings be?
Pergola footings must reach the local frost line to prevent the ground’s freeze-thaw cycle from pushing the posts upward. In most temperate regions, this requires a 12-inch diameter hole dug 36 inches deep, filled with 3,000 PSI concrete and reinforced with rebar to stabilize the lateral force of the wood structure.
“Soil compaction and moisture content are the primary variables in foundation stability; without a compacted gravel base, concrete footings remain subject to hydraulic movement.” – International Code of Council (ICC) standards
- Checklist for Post Installation:
- Verify 811 utility markings before digging.
- Use a laser level to ensure all post tops are perfectly horizontal.
- Install 6-inch of 3/4-inch crushed stone at the bottom of the hole for drainage.
- Apply a bitumen-based sealer to the bottom of the posts to prevent moisture wicking.
- Use temporary 2×4 bracing to hold posts plumb during concrete cure.
The Anatomy of the Superstructure: Beams and Rafters
The beams are the primary horizontal members that support the entire weight of the rafters and purlins. For a 12-foot span, you should be looking at doubled 2×10 or 2×12 beams. These must be notched into the posts or secured with heavy-duty structural ties. Do not just bolt them to the side of the post; this puts the entire load on the shear strength of the bolt rather than the compressive strength of the wood post. Notching ensures the beam sits on a ‘shoulder’ of the post, transferring the load directly down to the foundation.
Rafter spacing is where you define the shade factor. Typically, rafters are spaced 12 to 24 inches on center. If you want more shade, you use purlins (smaller 2×2 or 1×2 strips) on top of the rafters. Be mindful of the ‘sail effect.’ A pergola with too many top slats can act like a wing in high winds, creating massive uplift pressure. This is why mechanical fasteners are superior to gravity. Every rafter should be secured to the beam with a hurricane tie or a 6-inch structural screw like a GRK or Spax.
Finishing and Maintenance: Preserving the Investment
Once the structure is up, don’t let it sit naked. Raw wood is a sponge for UV radiation and moisture. Apply a penetrating oil-based stain rather than a film-forming paint. Paints will crack and peel as the wood expands and contracts, leading to trapped moisture and rot. An oil-based stain penetrates the fibers, keeping them flexible. Expect to re-apply this every 2 to 3 years depending on UV exposure. Check the hardware annually. Wood shrinks as it dries; those bolts that were tight in July might be loose by next April. Tighten them. It takes ten minutes and saves the structure. Hardscaping is a game of inches and long-term vigilance. Do it right once, or don’t do it at all. Maintenance is the price of quality.
“,”image”:{“imagePrompt”:”A detailed technical architectural drawing of a wood pergola showing the post-to-beam connection with a 6×6 notched post, doubled 2×10 beams, and stainless steel structural bolts, set against a background of a professional construction site.”,”imageTitle”:”Structural Pergola Post-to-Beam Connection Detail”,”imageAlt”:”An engineering diagram showing how to notch a 6×6 wood post for a pergola beam attachment.”},”categoryId”:0,”postTime”:””} Loaded successfully.

![Build a $400 2026 Outdoor Kitchen Island [Budget DIY]](https://lawnmajesty.com/wp-content/uploads/2026/05/Build-a-400-2026-Outdoor-Kitchen-Island-Budget-DIY.jpeg)