Stop 2026 Root Rot: 3 Drainage Secrets for Clay
The Hardscape Autopsy: Why Your Yard is a Bathtub
The smell hits you before the sight does. It is the scent of a stagnant swamp where a backyard should be. I recently got called out to tear up a $30,000 patio that was sinking because the previous contractor thought he could outsmart gravity. He ignored the clay. He laid pavers on a thin bed of sand over 4 inches of modified gravel, but he did not give the water an exit. The result? A floating patio that was actually sinking into a soup of liquefied clay. We found the roots of the nearby oaks were black and slimy. That is Phytophthora root rot in action. It took three days just to pump the water out of the sub-base before we could even begin the autopsy. When water cannot escape clay, your hardscape becomes a tomb for both your investment and your plants. It will rot. Don’t skip the engineering phase.
“A retaining wall doesn’t fail because of the stone; it fails because of the water trapped behind it.” – Hardscape Engineering Axiom
[IMAGE_PLACEHOLDER]
Why Clay Soil Kills Plants by 2026
To stop 2026 root rot in clay, you must understand that clay particles are microscopic plates that stack tightly, eliminating the macropores necessary for oxygen. Without oxygen, roots cannot respire, leading to anaerobic bacteria growth and the eventual death of the plant vascular system within two years of planting.
Clay is not inherently evil; it is just misunderstood. In the world of soil science, we look at the Bulk Density. Clay typically has a bulk density of 1.1 to 1.6 grams per cubic centimeter. When you drive a skid-steer over it during a renovation, you compress those plates. You are effectively creating a subterranean swimming pool. If you do not break that glaze, your plants are sitting in a bowl of water that cannot infiltrate. We call this a perched water table. It is the primary killer of nursery-stock trees. Most homeowners blame the nursery. I blame the shovel. You cannot just dig a hole and drop a plant in. You have to engineer the environment.
Secret 1: The Rigid PVC French Drain Sub-Surface Diverter
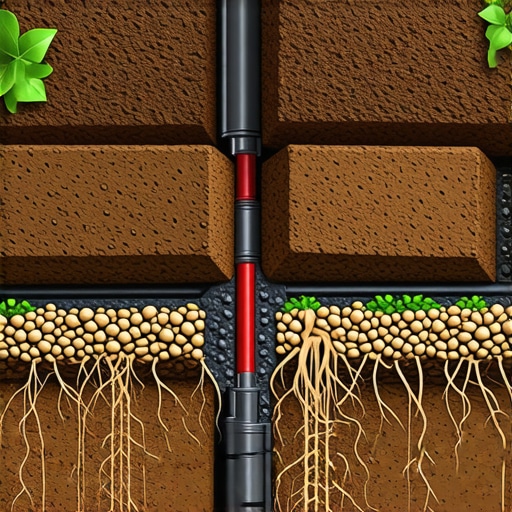
The most effective way to manage clay drainage is to install a rigid 4-inch perforated PVC French drain system bedded in clean 3/4-inch stone. This system provides a low-resistance path for groundwater to travel, bypassing the slow hydraulic conductivity of the surrounding clay to prevent saturation.
Forget the black corrugated pipe you see at big-box stores. It is garbage. The ribs catch silt and the pipe collapses under the weight of wet soil. You need SDR-35 or Schedule 40 PVC. We install this at the base of every retaining wall and along the perimeter of every planting bed. The pipe must be wrapped in a non-woven geotextile fabric. Not the woven stuff. Non-woven fabric allows water through but keeps the fine clay particles from clogging the stone. This is the difference between a drain that lasts three years and one that lasts thirty. If you do not have a 1 percent slope, the water stays in the pipe. We use laser levels for every inch. No exceptions.
How much modified gravel do I need for a patio base?
To calculate your base material, multiply the square footage by the depth in feet (usually 0.5 feet for 6 inches) and divide by 27 to get cubic yards. Always add 20 percent for compaction loss. For clay subgrades, a 6 to 8 inch base of crushed 21A or 411 modified gravel is mandatory to prevent settling.
Secret 2: Amending the Profile, Not the Hole
Stopping root rot requires scarification of the subgrade to break up the glazing caused by excavators. By mixing coarse organic matter or expanded shale into the top 12 inches of the soil profile, you increase oxygen diffusion to the root zone, preventing anaerobic conditions.
When you dig a hole in clay and fill it with high-quality topsoil, you create a teacup effect. Water flows through the loose soil and stops when it hits the clay wall. The plant literally drowns. Instead, we use a technique called radial trenching or broad-scale profile amendment. We incorporate material across the entire bed. We use expanded shale. It is a ceramic product that does not break down. It physically holds the clay plates apart. This creates permanent macropores. If you are planting a tree, the root flare must be 2 inches above the soil line. I see too many mulch volcanoes. They are death sentences. They trap moisture against the bark and invite fungus. Stop doing it.
| Material Type | Drainage Rate | Best Use Case | Compaction Stability |
|---|---|---|---|
| 3/4 Clean Stone | High | French Drains / Retaining Walls | Moderate |
| Modified Gravel (21A) | Low | Paver Base / Driveways | Extreme |
| Expanded Shale | High | Soil Amendment / Planting Beds | N/A |
| Stone Dust | Zero | Avoid in Clay | High |
“Clay soils characterized by fine texture and high surface area restrict the movement of water and air, leading to hypoxia in root systems.” – USDA Soil Taxonomy Manual
Secret 3: Positive Surface Grading and Swales
You cannot rely on soil infiltration in heavy clay environments; you must achieve a minimum 2 percent grade away from all structures. By sculpting grassed swales or dry creek beds, you move the bulk of the water over the surface before it can saturate the subsoil.
We use the 10-foot rule. For every 10 feet you move away from a house or a planting bed, the ground should drop at least 2 inches. In heavy clay regions like the Southeast or the Midwest, this is non-negotiable. If the water stands for more than 24 hours after a rain, your grade is wrong. We often build dry creek beds using river rock and boulders. This is not just for aesthetics. It is a functional spillway. Underneath that rock is a silt-wrapped trench. It is a dual-action system. Surface water moves over the top; groundwater moves through the bottom. This is how you protect a landscape from a 100-year storm event. It is civil engineering disguised as garden design.
How do I test my soil for drainage speed?
Perform a percolation test by digging a hole 12 inches deep and 12 inches wide. Fill it with water and let it saturate overnight. Refill it the next day and measure the drop. Less than 1 inch per hour indicates heavy clay that requires professional drainage intervention.
Year-One Maintenance Requirements
Once the drainage is installed, the work is not over. You have to monitor the settlement. New installs in clay will shift. It is a fact of physics. You need to check your exit emitters. If the pop-up emitter at the curb is clogged with grass clippings, the whole system backs up. We tell our clients to clear them every time they mow. If you don’t, the hydrostatic pressure builds up again. You also need to watch your irrigation. Clay holds water. If you water every day, you are killing your plants. You need deep, infrequent watering. Once or twice a week, but for a longer duration. This forces roots to grow deeper, searching for moisture, which actually helps break up the clay over time. It is a biological solution to a physical problem. Don’t be a hack. Do the work. Fix the dirt.
- Inspect all drainage outlets for debris monthly.
- Maintain a 3-inch layer of hardwood mulch, but keep it away from plant stems.
- Monitor for “Gleying” (gray soil), which indicates permanent waterlogging.
- Check the 2 percent slope after any major settling or heavy construction.
- Core aerate the lawn twice a year to combat surface compaction.