Stop 2026 Yard Flooding with This DIY Sump Pit Trick
Stop 2026 Yard Flooding with This DIY Sump Pit Trick
The ground doesn’t just get wet; it becomes a hydraulic press. When your yard turns into a sponge that stays squishy for three days after a rain, you aren’t just looking at a lawn care problem. You are looking at a structural threat. Standing water exerts 62.4 pounds of pressure per cubic foot against your foundation. If you don’t give that water a path of least resistance, it will find one through your basement walls or by heaving your expensive pavers.
The Hardscape Autopsy: Why Drainage Fails
The reason your yard floods is usually a failure of the sub-grade soil percolation rate combined with poor topographical grading that traps water in a low-point basin. I recently got called out to tear up a $30,000 patio that was sinking because the previous contractor ignored a 2-degree slope toward the house. They used a standard ‘mow-and-blow’ approach, throwing down some 2B stone and calling it a day. Within two seasons, the hydrostatic pressure had liquefied the bedding sand. The entire project was a total loss because they didn’t understand that water must be actively managed, not just hidden under gravel.
“A retaining wall doesn’t fail because of the stone; it fails because of the water trapped behind it.” – Hardscape Engineering Axiom
The DIY Sump Pit Trick Explained
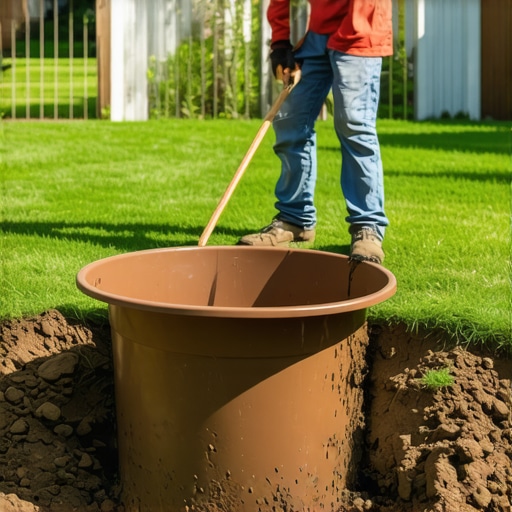
A DIY Yard Sump Pit is an engineered subterranean basin designed to collect subsurface runoff and mechanically discharge it to a safe outlet using a submersible pump. Unlike a standard French drain which relies entirely on gravity and soil absorption, a sump pit provides a high-capacity reservoir that can handle sudden deluges by forcing water out of the problem area regardless of the yard’s natural slope.
How deep should a yard sump pit be?
To be effective, a yard sump pit should be excavated to a depth of at least 36 to 48 inches. This allows the basin to sit below the frost line in many regions and ensures that the inlet pipes (the French drains feeding the pit) have enough pitch—at least 1/8 inch per foot—to keep water moving toward the reservoir without sediment buildup.
| Material Component | Recommended Specification | Why It Matters |
|---|---|---|
| Basin Tank | HDPE Perforated Basin | Prevents collapse under soil weight and allows groundwater entry. |
| Backfill Aggregate | ASTM D448 No. 57 Stone | Provides 40% void space for water storage between the rocks. |
| Filter Fabric | Non-woven Needle-punched (4oz) | Prevents silt from clogging the stone and pump intake. |
| Pump Power | 1/2 HP Submersible Pump | Ensures enough GPM (Gallons Per Minute) to outpace heavy rainfall. |
The Physics of the ‘Dry Well’ Sump Hybrid
Most DIYers make the mistake of using a solid plastic bucket. That is a mistake. You need a perforated basin. We use 1/2-inch drill bits to Swiss-cheese the bottom third of the tank. This allows the pit to act as a leach field during light rains, letting water soak back into the earth. But when the 2026 spring monsoons hit, the pump kicks in to handle the overflow. You are essentially creating an artificial aquifer. You must use washed 3/4-inch clean stone. Do not use ‘crusher run’ or anything with fines. The fines will wash into your pump and burn out the motor in six months. It will rot. Don’t skip the clean stone.
Will a yard sump pump freeze in winter?
A yard sump pump will only freeze if the discharge line is installed incorrectly with ‘low spots’ where water can pool and turn to ice. To prevent this, your 1.5-inch PVC discharge pipe must be buried below the frost line or installed with a continuous downward pitch to the exit point so that gravity clears the line after every pump cycle.
“Effective site drainage requires that the rate of water removal exceeds the rate of soil saturation to maintain structural soil integrity.” – Penn State Agricultural Extension
Step-by-Step Installation Protocol
- Utility Marking: Call 811. Do not guess where your gas or electric lines are. A shovel through a power line is a bad day.
- Excavation: Dig a hole 12 inches wider than your basin on all sides. Depth is critical.
- The Geotextile Envelope: Line the entire hole with non-woven filter fabric. If the soil touches the stone, the system will fail within three years.
- The Base Layer: Pour 6 inches of No. 57 stone into the bottom. Compact it. The basin must sit on a stable, level base.
- Plumbing the Discharge: Use Schedule 40 PVC, not that flimsy corrugated black pipe. Corrugated pipe catches debris and is impossible to snake.
- Check Valve Installation: Install a silent check valve on the vertical rise. This prevents the water in the pipe from falling back into the pit when the pump shuts off.
The information gain here is the air-gap discharge. Never hard-pipe your pump directly into a municipal storm drain or curb without an air gap or a ‘freeze relief’ fitting. If the city line backs up or freezes, your pump will keep running against a closed pipe until the motor melts. An air gap ensures that even if the main line is blocked, the water has an emergency exit point away from your foundation.
Managing Soil pH and Microbiology Post-Flood
Once you solve the drainage, the work isn’t done. Flooded soil is often anaerobic. The beneficial microbes have drowned, and the pH has likely swung toward the acidic side as nutrients leached away. After the sump pit is operational, core aerate the surrounding turf to a depth of 4 inches and apply a high-calcium lime treatment to stabilize the soil chemistry. Deep, infrequent watering is the goal. Force those roots to chase the water table down 6 or 8 inches. This builds a lawn that can survive the heat of July just as well as the floods of April. Avoid the big-box 10-10-10 fertilizers for now; your soil needs humic acid and mycorrhizae to recover from the saturation stress.


![Build a $500 Natural Stone Retaining Wall [2026 DIY]](https://lawnmajesty.com/wp-content/uploads/2026/06/Build-a-500-Natural-Stone-Retaining-Wall-2026-DIY.jpeg)
![Build a $300 Retaining Wall with Cinder Blocks [2026 DIY]](https://lawnmajesty.com/wp-content/uploads/2026/06/Build-a-300-Retaining-Wall-with-Cinder-Blocks-2026-DIY.jpeg)