
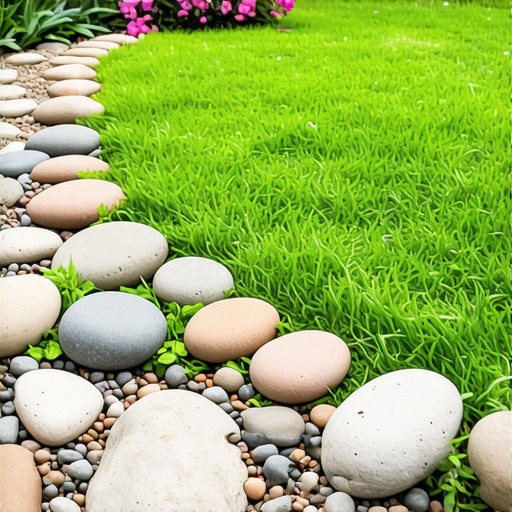
The Best Stones for a Natural-Looking Garden Border
Why Most Garden Borders Fail Within Two Seasons
The best stones for a natural-looking garden border include fieldstone, river rock, and flagstone, as these materials mimic regional geology and offer structural weight. Successful installation requires a trench depth of 4-6 inches, a compacted gravel base, and non-woven geotextile fabric to prevent soil migration and frost heave.
I recently got called out to tear up a stone border that was sinking into the mud because the previous contractor just threw some heavy granite boulders on top of raw turf. Within six months, the weight of the stones pushed them into the clay, the grass grew right through the gaps, and the homeowner couldn’t even run a string trimmer without hitting rock. It was a $12,000 mess that could have been avoided with three inches of modified gravel. If you don’t fix the soil engineering first, every rock you put in the ground is just an expensive headache. Hardscaping is not about what you see; it is about the structural integrity beneath the surface. I have spent 20 years pulling limestone out of the mud because someone skipped the excavation phase. Don’t be that person. You need to understand the physics of soil pressure and the biological reality of root systems before you even look at a stone yard catalog. The ground is a living, moving entity. It heaves in the winter and settles in the summer. Your border needs to move with it or be strong enough to resist it. Most DIYers think a border is just a line. It is not. It is a retaining system for your mulch and a barrier against your turf. Treat it with the respect that engineering demands.
“Edge restraint integrity is directly proportional to the sub-base compaction and the prevention of lateral movement.” – Hardscape Engineering Axiom
Selecting the Right Stone: A Material Comparison
Choosing a stone is a matter of geology and durability, not just finding something that looks nice at the local big-box store. You need stones that can withstand freeze-thaw cycles and the high PSI of a lawnmower wheel if you plan on mowing right up to the edge. Avoid soft sandstones that flake apart within three years. Instead, look for igneous or metamorphic rocks that offer a high density. Granite and basalt are top-tier for longevity. If you want a more weathered look, fieldstone is your best bet, but it requires more labor to fit the irregular shapes together. River rock is aesthetically pleasing but lacks the flat faces needed for a stable, walkable edge. It will roll. It will shift. Unless you are mortar-setting it, river rock is best used as a secondary texture rather than a primary structural border.
| Stone Type | Pros | Cons | Best Use Case |
|---|---|---|---|
| Fieldstone | Highly natural, regional look | Irregular shapes require skill | Native gardens, rustic aesthetics |
| River Rock | Smooth, water-worn texture | Unstable, rolls easily | Dry creek beds, low-traffic zones |
| Flagstone | Flat, stackable, stable | Can be expensive per ton | Formal borders, mowing strips |
| Granite Cobble | Extremely durable, uniform | Can look too manufactured | Driveway edges, high-traffic paths |
How do I keep grass from growing into my stone border?
To prevent turf encroachment, you must install a physical root barrier such as 20-mil plastic edging or a deep-set trench filled with 1-inch clean stone. The barrier should extend at least 4 inches below the surface to intercept rhizomatous grass roots like Kentucky Bluegrass or Bermuda grass.
The Installation Process: From Excavation to Compaction
Installation begins with a survey of the site drainage. You are not just laying stones; you are creating a dam. If you don’t account for how water exits your garden beds, you will create a swamp. I start every project with a grading check. We dig a trench 6 inches wide and 6 inches deep. This is non-negotiable. Then comes the non-woven geotextile fabric. This isn’t the cheap black plastic that tears when you look at it. You need a 4-ounce or 6-ounce fabric that allows water through but keeps the soil from mixing with your gravel base. Soil migration is the number one cause of sinking stones. Once the fabric is in, we add 3 inches of 21A or 3/4-inch modified gravel. We pack it using a hand tamper or a plate compactor until it sounds like concrete when you hit it. The stones sit on this base. If the base is soft, the stones will move. It is that simple. We use a dead-blow hammer to set the stones into the gravel, ensuring they are level or slightly pitched away from the house to manage runoff.
Do I need a concrete base for a stone garden edge?
A concrete base is only necessary for mortared stone borders or heavy-traffic areas where hydrostatic pressure is extreme. For most residential garden borders, a compacted aggregate base is superior because it allows for thermal expansion and drainage without cracking under stress.
“A retaining wall doesn’t fail because of the stone; it fails because of the water trapped behind it.” – Hardscape Engineering Axiom
The Physics of Stone Placement and Stability
When placing stones, you must respect the angle of repose and the center of gravity of each individual piece. This is where the amateurs get exposed. You don’t just stand a stone up on its narrowest side because it looks tall. You lay it on its broadest face. This distributes the pounds per square inch (PSI) across the base, preventing the stone from tipping. If you are stacking stones for a higher border, you must batter the wall—meaning each layer should be slightly recessed toward the garden bed. This uses gravity to push the weight of the stone into the soil rather than away from it. This is basic civil engineering. I see people building vertical stacks with no batter, and then they wonder why the frost heave pushed the whole thing over in February. Don’t skip the polymeric sand in the joints if you are using flat stones like flagstone. It locks the pieces together and inhibits weed growth. It acts as a flexible grout. It is a critical component of a modern hardscape. Use it correctly. Follow the manufacturer’s instructions for wetting it down, or you will end up with a white film all over your expensive stone.
- Excavate 6 inches deep and 6 inches wide for the primary trench.
- Lay heavy-duty non-woven geotextile fabric to prevent soil mixing.
- Add 3 inches of 3/4-inch modified gravel and compact to 95% Proctor density.
- Select stones with at least one flat face for the base layer.
- Use a 4-pound dead-blow hammer to set each stone individually.
- Fill gaps with 1/4-inch clean stone or polymeric sand to lock the structure.
- Maintain a 1-inch gap between the stone and the lawn for easy trimming.
Maintaining Your Stone Border for the Long Haul
Maintenance is where the “natural” look is either preserved or lost to the weeds. Every spring, you need to check for settling. If a stone has dropped, pry it up, add a handful of gravel, and re-tamp it. This takes five minutes now but saves a full rebuild later. You should also check your soil pH near the border. If you used limestone, it will slowly leach calcium into the soil, raising the pH. This might be fine for some plants, but it will kill your acid-loving azaleas or blueberries. It is a chemical reality that most landscapers ignore. Also, avoid using de-icing salts near your stone borders in the winter. The salt enters the pores of the stone, crystallizes, and expands, causing spalling. Use sand for traction instead. Finally, keep your mulch levels an inch below the top of the stone. If the mulch is too high, it will spill over and provide a medium for weed seeds to germinate right on top of your border. A stone border is a tool, not just a decoration. Treat it like one and it will last as long as the house does. Stop buying the cheap plastic stuff. Invest in the weight of the earth. It is the only thing that stays put.
![Build a $200 Modern Trellis for 2026 Privacy [DIY]](https://lawnmajesty.com/wp-content/uploads/2026/06/Build-a-200-Modern-Trellis-for-2026-Privacy-DIY.jpeg)
![Fixing 2026 Clogged French Drains [No Digging]](https://lawnmajesty.com/wp-content/uploads/2026/07/Fixing-2026-Clogged-French-Drains-No-Digging.jpeg)