The Best Way to Edge a Curved Garden Bed
Eighty percent of a high-end landscape project is finished before the first shovel hits the dirt. If you think edging a curved garden bed is just about aesthetics, you have already lost the war against invasive turf and hydrostatic pressure. Real landscaping is an exercise in civil engineering and soil biology. I always drill into my new crew members: if you don’t fix the soil grading first, every plant you put in the ground is just expensive compost. You need to understand that the edge is the physical barrier between two competing ecosystems. On one side, you have nitrogen-hungry turf grass; on the other, you have the specialized root zones of your ornamental plantings. If that boundary is not structurally sound, the grass will win. It is that simple. Don’t skip the site preparation phase or you will be back out there in six months fixing a collapsed trench.
Choosing the Right Material for Curvature
The best way to edge a curved garden bed involves using flexible steel edging or a vertical spade-cut trench to maintain structural integrity while allowing for natural soil expansion and contraction. Unlike rigid plastic or thin aluminum, professional-grade 14-gauge steel can hold a radius without kinking. If you are going the hardscape route with natural stone or pavers, you must excavate a proper base of modified gravel to prevent the blocks from heaving during the freeze-thaw cycle. Cheap big-box store products will fail because they lack the tensile strength to resist the lateral pressure of the soil. Use real materials. It is the only way to ensure the edge remains crisp for more than a single season.
| Material | Minimum Radius | Durability | Maintenance Level |
|---|---|---|---|
| 14-Gauge Steel | 12 inches | 25-30 Years | Low |
| Natural Stone (Dry Stack) | 36 inches | 50+ Years | Medium |
| Spade Cut (Natural Edge) | Variable | 1 Year | High |
| Composite Lumber | 48 inches | 10-15 Years | Medium |
“Soil compaction is the most overlooked factor in residential landscape longevity; without a stable base, any edging material will eventually succumb to frost heave.” – Penn State Agricultural Extension
How deep should a garden bed edge be?
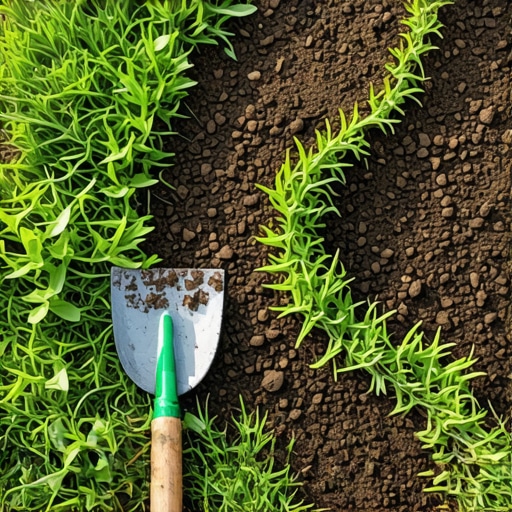
To effectively stop stoloniferous grass roots like Kentucky Bluegrass or Bermuda from invading your beds, you must maintain a vertical depth of at least 4 to 6 inches. This depth creates a physical air gap that most turf roots cannot jump. If your trench is too shallow, the rhizomes will simply dive under the barrier and emerge inside your mulch bed. We call this a root-vault. It is a nightmare to fix once it starts. Use a sharpened half-moon edger or a dedicated power edger to keep the walls of the trench at a strict 90-degree angle. This is not about being a perfectionist; it is about root biology. If the wall is sloped, the grass has a ramp. Don’t give it a ramp.
The Engineering of the Trench and Base Layer
When we install a hardscape edge for a curved bed, we do not just set stones on the dirt. That is a amateur move that results in sinking within two years. We excavate 8 inches down. We lay 4 inches of 21A modified gravel. We compact that gravel with a vibratory plate compactor until the machine literally bounces off the surface. That is the only way to achieve the necessary PSI for a stable foundation. Water is the enemy of any edge. Without proper drainage and a compacted base, hydrostatic pressure will push your stones out of alignment during the first heavy rain. [image_placeholder_1] It is a slow-motion car crash that costs thousands to repair.
How much modified gravel do I need for a patio base or stone edge?
For a standard stone edge, you need approximately one ton of modified gravel per 50 linear feet if you are digging a trench 6 inches wide and 4 inches deep. Calculate your volume by multiplying length by width by depth in feet, then divide by 27 to get cubic yards. Multiply that by 1.5 to get the tonnage. Most homeowners underestimate their material needs by 40 percent. Don’t be that person. Order the extra half-ton. You will need it for the low spots. High-density compaction is not optional; it is the difference between a professional finish and a DIY disaster.
- Step 1: Paint your curve with marking paint, then stand back and check the site lines from the second-floor window.
- Step 2: Cut the vertical wall first to define the radius.
- Step 3: Excavate the transition zone, sloping the soil back into the bed at a 45-degree angle.
- Step 4: Install your chosen edging material, ensuring it sits 1/2 inch above the grass height to prevent mower damage.
- Step 5: Backfill with crushed stone or high-quality mulch, but keep the mulch away from the root flares of any shrubs.
Soil Biology and Mulch Management
Once the edge is set, you have to manage the soil chemistry. A clean edge is useless if the soil inside the bed is a mess of anaerobic bacteria. I see homeowners piling mulch 6 inches deep against their foundation and tree trunks. We call those mulch volcanoes. They will rot the bark and kill the plant. Your mulch layer should never exceed 3 inches. It needs to breathe. Also, check your soil pH. Most turf prefers a neutral pH of 6.5 to 7.0, while many ornamental plants like azaleas or hydrangeas need it more acidic. Your edge is the border, but the soil is the engine. If the engine is flooded with the wrong nutrients or restricted airflow, the plants will die. It is that simple.
“A retaining wall or garden edge doesn’t fail because of the stone; it fails because of the water trapped behind it.” – Hardscape Engineering Axiom
What is the best tool for edging a curved garden bed?
For the cleanest, most professional curve, nothing beats a manual half-moon edger with a sharpened carbon steel blade. Power edgers are fast, but they lack the finesse required for tight radii. If you are doing a large-scale project, a bed-redefiner machine can save your back, but you will still need the manual tool for the detail work. Keep a file in your back pocket. A dull blade is dangerous and makes messy cuts that invite fungal pathogens into the grass blades. Sharpen the tool every 50 feet. It makes the work easier. You will feel the difference in your shoulders by the end of the day. Do not use a standard round-point shovel; the curve of the blade will distort your edge and create uneven pockets where water will pool and rot your turf roots.
Year-One Maintenance and Settlement
Expect some settling in the first year. That is the reality of moving earth. If you installed a stone edge, check for shifting after the first hard frost. If you went with a spade-cut edge, you will need to re-trench it at least twice a year—once in the spring to define the line and once in the late summer to catch the runners. This is the price of a clean look. Landscaping is not a one-and-done event. It is a process of constant refinement. If you see the edge beginning to slump, address the drainage immediately. Standing water is a sign that your grade is wrong. Fix the grade or lose the edge. There are no shortcuts in this business. Put in the work now or pay for it later.
![Kill 2026 Crabgrass without Chemicals [Vinegar Method]](https://lawnmajesty.com/wp-content/uploads/2026/05/Kill-2026-Crabgrass-without-Chemicals-Vinegar-Method.jpeg)