
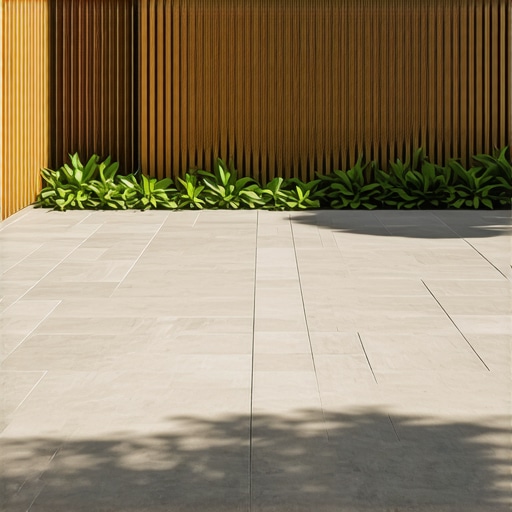
Why You Should Use Large Format Pavers for Small Patios
The Engineering Logic Behind Oversized Slabs in Tight Spaces
Using large format pavers for small patios creates a sense of spatial expansion by reducing visual noise and joint lines. These oversized units, typically 24×24 inches or larger, minimize the grid-like pattern that makes tight areas feel cramped while providing superior structural stability through increased surface-to-joint ratios. I recently got called out to tear up a $30,000 patio that was sinking because the previous contractor used small, 4×8 clay bricks over a poorly compacted base of stone dust. They thought the small units would be easier to level, but instead, they created thousands of individual failure points. Every joint is an opportunity for water infiltration or weed growth. In that cramped backyard, the thousands of grout lines made the space feel like a claustrophobic cage. We ripped it out, excavated to 8 inches, and laid down 24×36-inch wet-cast slabs. The difference was immediate. The yard didn’t just look bigger; it felt like a solid piece of civil engineering. Most homeowners think big stones are only for big yards. They are wrong. It is about the math of the eye and the physics of the ground. Don’t let a ‘mow-and-blow’ guy tell you otherwise.
“A retaining wall or paved surface doesn’t fail because of the stone; it fails because of the water trapped behind or beneath it.” – Hardscape Engineering Axiom
How much modified gravel do I need for a patio base?
To calculate your base material, multiply the square footage by the desired depth in feet (usually 0.5 feet for 6 inches) and divide by 27 to get cubic yards. For a standard 10×10 patio, you will need approximately 2.5 to 3 tons of 21A or 57 stone to ensure proper drainage and compaction. Anything less is a recipe for settling. Large format pavers require an even more precise screed layer. If your base is off by even a quarter inch, a 24-inch slab will rock like a seesaw. You need to use 1-inch O.D. (outside diameter) steel pipes as screed rails to get that bedding sand perfectly flat. We use washed concrete sand, never stone dust. Stone dust holds too much moisture and leads to efflorescence, that white chalky crap that ruins the look of high-end pavers.
The Relationship Between Joint Density and Perception
In garden design, the ‘grid effect’ is a real psychological phenomenon. When the eye sees a high density of lines, it subconsciously counts them, defining the boundaries of the space. Large format pavers reduce this density by up to 80%. This forces the eye to sweep across the surface rather than stopping at every four-inch interval.
| Paver Size | Joints per 100 Sq Ft | Polymeric Sand Required | Visual Noise Level |
|---|---|---|---|
| 4″ x 8″ Brick | Approx. 450 linear ft | High (3-4 bags) | High / Busy |
| 12″ x 12″ Square | Approx. 200 linear ft | Medium (1.5 bags) | Moderate |
| 24″ x 36″ Slab | Approx. 70 linear ft | Low (0.5 bags) | Low / Expansive |
By choosing 24×24 or larger, you are effectively creating a ‘seamless’ floor for your hardscaping project. This is not just about looks. Fewer joints mean less polymeric sand to maintain and fewer spots for ants to excavate the bedding layer. It will rot if you leave water sitting under those slabs, so the pitch must be exactly 1/8 to 1/4 inch per foot away from the foundation. No exceptions.
Will large format pavers crack more easily?
Large format pavers are highly resistant to cracking if the sub-grade compaction reaches at least 98% Proctor density. While they have a lower flexural strength than smaller units over uneven ground, a properly prepared 6-inch compacted gravel base prevents the point-loading stress that causes structural failure.
“Structural pavement systems must be designed to distribute loads to the subgrade without exceeding the soil’s bearing capacity.” – ICPI Tech Spec 2
The Installation Protocol for Heavy Slabs
You cannot just throw these down. A 24×36 slab can weigh over 100 pounds. If you drop it, you break it or your toe. We use vacuum suction lifters. It is the only way to set them precisely without disturbing the bedding sand. If you try to hand-set these, you will inevitably dig your fingers into the sand, creating a void. That void becomes a pocket for water. When that water freezes, it expands, and your expensive slab heaves.
- Excavate 8-10 inches deep to hit native subsoil.
- Lay non-woven geotextile fabric to prevent soil migration.
- Apply 21A modified stone in 2-inch lifts, compacting each with a plate tamper.
- The tamper should literally bounce off the stone when you reach full compaction.
- Screed 1 inch of washed concrete sand.
- Set slabs with a vacuum lifter and a dead-blow hammer.
Don’t skip the fabric. It is the cheapest insurance policy you can buy for lawn care and hardscaping longevity. It keeps the mud from pumping up into your clean gravel. Without it, your base eventually turns into a slurry, and your patio becomes a swamp.
The Maintenance Reality
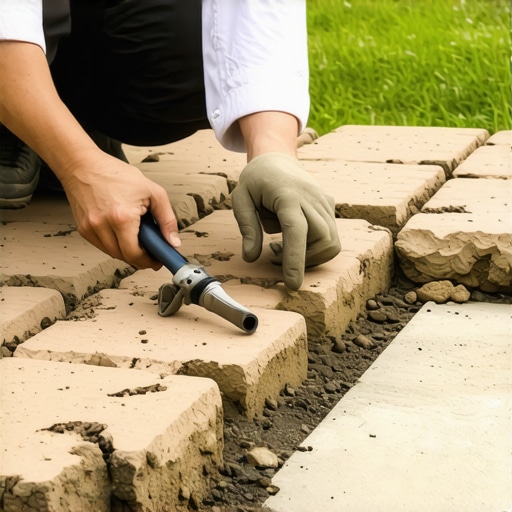
Once the slabs are set, you sweep in polymeric sand. Use a high-quality brand, not the cheap stuff from the big-box stores. You want a sand that has high-polymer concentrations to withstand the lateral pressure. Mist it lightly—don’t flood it. If you over-water the sand during activation, you wash out the polymers and it will never cure. It will stay soft and wash away in the first rainstorm. These large slabs are the pinnacle of modern landscaping. They require precision, sweat, and a deep understanding of soil mechanics. But the result is a patio that looks like it belongs in a magazine, not a driveway.
![Build a $600 Flagstone Patio on a Sand Base [2026 DIY]](https://lawnmajesty.com/wp-content/uploads/2026/05/Build-a-600-Flagstone-Patio-on-a-Sand-Base-2026-DIY.jpeg)
![Fixing 2026 Sinking Pavers with Polymeric Sand [DIY]](https://lawnmajesty.com/wp-content/uploads/2026/07/Fixing-2026-Sinking-Pavers-with-Polymeric-Sand-DIY.jpeg)