![Build a $150 Natural Stone Path [2026 Step-by-Step]](https://lawnmajesty.com/wp-content/uploads/2026/07/Build-a-150-Natural-Stone-Path-2026-Step-by-Step.jpeg)
Build a $150 Natural Stone Path [2026 Step-by-Step]
Most homeowners believe a stone path is a weekend aesthetic project. They are wrong. It is a civil engineering challenge in miniature. If you ignore the physics of soil compaction and hydrostatic pressure, your $150 investment will be a tripping hazard within twelve months. I have seen countless DIY paths heave and shatter because the builder treated the ground like a carpet rather than a living, shifting foundation. To build a path that lasts until 2040, you must think about the dirt before you think about the stone.
The Engineering Reality of Natural Stone
To build a $150 natural stone path, you must prioritize site grading, sub-base compaction, and strategic stone sourcing. Utilizing local fieldstone or reclaimed flagstone keeps costs low, while a four-inch compacted gravel base prevents shifting during freeze-thaw cycles and ensures long-term structural integrity. This is not about decoration; it is about managing the load-bearing capacity of your soil.
I always drill into my new crew members: if you dont fix the soil grading first, every plant you put in the ground is just expensive compost, and every stone you lay is just a future projectile for the lawnmower. Last year, I watched an apprentice try to level a path by adding more sand on top of uncompacted clay. Within three weeks, the rain had turned that sand into a slurry, and the stones had sunk three inches. We had to rip the whole thing out. You dont build on top of the ground; you build into it. You must understand the shear strength of your soil and the way water moves across your property line before you touch a shovel.
| Material Item | Unit Cost (Bulk) | Quantity for 20ft Path | Total Estimated Cost |
|---|---|---|---|
| Modified 2A Gravel | $28 / ton | 1.5 tons | $42 |
| Natural Fieldstone | $0.05 / lb (Quarry) | 1500 lbs | $75 |
| Polymeric Sand/Fines | $22 / bag | 1 bag | $22 |
| Geotextile Fabric | $0.45 / linear ft | 20 ft | $9 |
| Total Project Cost | – | – | $148 |
The Planning Phase: Sourcing and Soil Logic
High-end results on a $150 budget require avoiding the big-box retail trap. Bagged stone is for amateurs with too much money. To stay under budget, you must visit a local aggregate quarry or look for local listings of farmers clearing fieldstone from their acreage. Natural stone is heavy, and shipping is what kills the budget. Buy local or dig it up yourself.
How much modified gravel do I need for a path base?
To calculate modified gravel needs, multiply the path length by the width and the depth (usually 0.33 feet for 4 inches), then divide by 27 to get cubic yards. For most 20-foot residential paths, 1.5 tons of crushed limestone or 2A modified gravel provides the necessary structural friction to prevent stone migration.
“A retaining wall doesnt fail because of the stone; it fails because of the water trapped behind it.” – Hardscape Engineering Axiom
This principle applies to paths as well. If your path acts as a dam, water will accumulate, freeze, and heave your stones. You must ensure a 1 percent to 2 percent slope away from any structures. This is non-negotiable. Use a line level. Check it twice. Then check it again after you compact the base.
The Ground-Up Build: Excavation and Base Layers
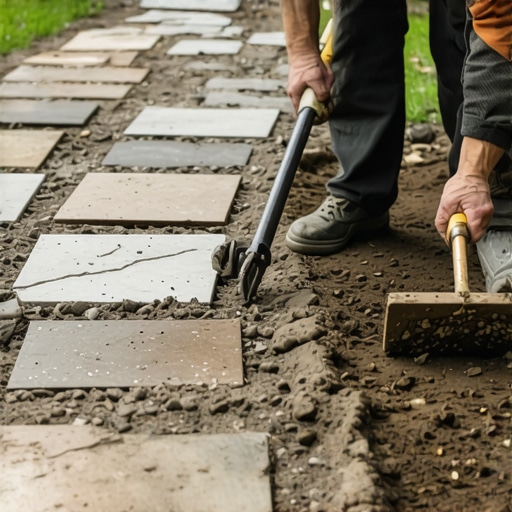
You need to excavate at least six inches deep. This allows for four inches of compacted aggregate and two inches for your stone and leveling bed. Don’t skip the geotextile fabric. It acts as a structural separator, preventing your expensive gravel from migrating downward into the subgrade clay. It is the literal backbone of the project.
What is the best stone for a natural garden path?
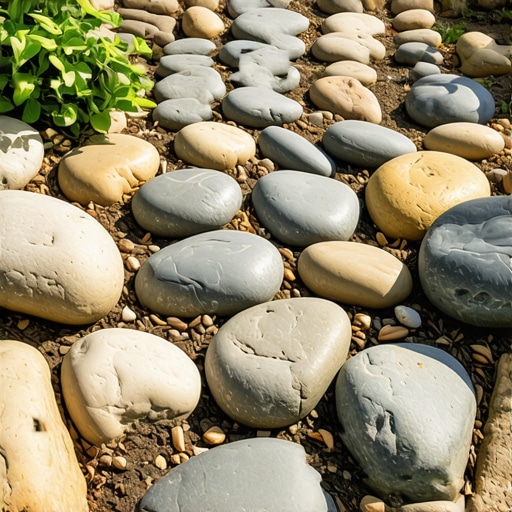
The best stone for a budget-friendly natural path is local fieldstone or sandstone flagstone with a thickness of at least 1.5 to 2 inches. Thinner stones lack the tensile strength to withstand frost heave and will crack under the weight of a loaded wheelbarrow or heavy foot traffic.
- Mark the path using high-visibility marking paint and stakes.
- Excavate to a depth of 6 inches, removing all organic matter and root systems.
- Install a heavy-duty non-woven geotextile fabric at the base of the trench.
- Add 4 inches of 2A modified gravel in 2-inch lifts, compacting each lift with a hand tamper.
- Lay the stones, ensuring a maximum gap of 2 inches between edges.
- Fill the voids with stone fines or polymeric sand to lock the system in place.
The Technical Installation
When you are tamping the base, the tamper should literally bounce off the compacted surface. If it feels soft or thuds, you have too much moisture or not enough compaction. Keep going. Compaction is the difference between a professional finish and a DIY disaster. Use a screed pipe to ensure your leveling bed is uniform. When placing the stone, use a rubber mallet to set them into the fines. They should not rock. If a stone rocks, remove it, add more fines, and reset it. It will rot if water sits in the gaps. Every stone must be stable. Use the natural geometry of the stones to create a tight weave. This increases the friction between units and prevents individual stones from migrating over time.
“Soil compaction is the most critical and most neglected aspect of any structural landscape installation.” – Penn State Agricultural Extension
Maintenance is simple but vital. Every spring, check the joints. If the fines have washed out, sweep in more. Do not let weeds take root in the joints; their root systems will expand and push the stones apart. A quick application of a high-strength vinegar solution can kill emerging weeds without poisoning the surrounding soil microbiology. This path is a living structure. Treat it with the respect its engineering demands.