![2026 Pollinator Garden Setup [Bee-Friendly]](https://lawnmajesty.com/wp-content/uploads/2026/09/2026-Pollinator-Garden-Setup-Bee-Friendly.jpeg)
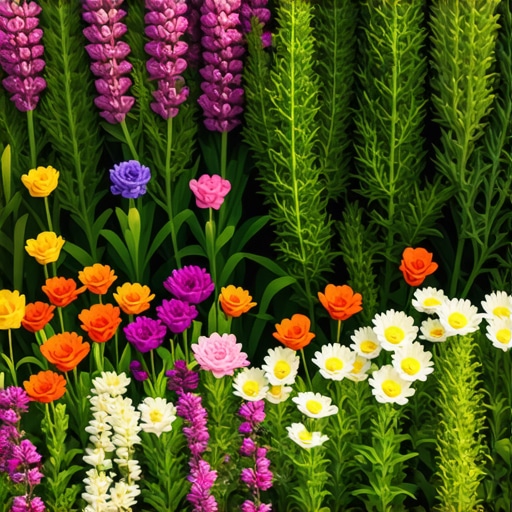
2026 Pollinator Garden Setup [Bee-Friendly]
Designing for Biodiversity: The 2026 Professional Pollinator Strategy
Successful 2026 pollinator garden setup requires a focus on soil engineering and botanical synchronicity rather than mere aesthetics. You are not just planting flowers; you are constructing a biological corridor that must provide specific nectar-to-pollen ratios and structural nesting sites for native Hymenoptera. Most homeowners fail because they ignore the soil profile and install decorative mulch that actually smothers ground-nesting bees.
I always drill into my new crew members: if you don’t fix the soil grading first, every plant you put in the ground is just expensive compost. I saw a project last year where a client spent twelve thousand dollars on native perennials only to have them rot within three months because the subsoil was a compacted slab of heavy clay with zero percolation. We had to excavate eighteen inches, break the hardpan, and re-engineer the entire drainage field before the site was viable. If the water doesn’t move, the roots don’t breathe. It is that simple. This isn’t hobby gardening; it is biological site management.
Soil Geotechnical Preparation and Microbial Integrity
To establish a native pollinator habitat, you must first analyze the Cation Exchange Capacity (CEC) and pH levels of your existing substrate. A 2026 bee-friendly garden thrives in a soil pH between 6.2 and 6.8, where micronutrients like phosphorus—critical for bloom production—are most bioavailable to the root system. Avoid synthetic 10-10-10 fertilizers that provide a quick nitrogen spike but destroy the rhizosphere. High-end landscaping involves fostering mycorrhizal fungi that form a symbiotic relationship with plant roots, extending their reach for water during mid-summer droughts.
“Soil health is the primary determinant of floral nectar quality; plants grown in biologically active soil produce significantly higher glucose and fructose concentrations in their nectar.” – Agricultural Extension Agronomy Manual
What is the best soil for a native pollinator garden?
The best soil for a native pollinator garden is a sandy loam with a 3% to 5% organic matter content that allows for a percolation rate of at least one inch per hour. Heavy clays must be amended with expanded shale or coarse sand—not fine masonry sand—to prevent the formation of concrete-like structures that inhibit root expansion.
The Engineering of Hardscape Thermal Mass
Hardscaping is often overlooked in pollinator design, but it provides essential thermal mass for cold-blooded insects. Strategically placed boulders or a dry-stack stone wall act as solar heat sinks, allowing bees to regulate their body temperature during early spring mornings. This is critical for Osmia lignaria (Blue Orchard Bees) which emerge when temperatures are still marginal. Grading around these structures must ensure that runoff does not accumulate at the base, which would lead to anaerobic soil conditions and frost heaving of your stones.
How much modified gravel do I need for a patio base?
For a standard pedestrian-load stone path within a garden, you need a minimum of four inches of compacted 21A or 3/4-inch modified gravel topped with one inch of bedding sand. Failure to compact in two-inch lifts with a plate tamper lead to settling and trip hazards. Do not skip the geotextile fabric between the subgrade and the base; it prevents the gravel from migrating into the soil.
| Material Type | Function in Pollinator Garden | Engineering Specification |
|---|---|---|
| River Rock (3-5″) | Drainage Swales/Basking | 95% Compaction at edges |
| Native Sandy Loam | Planting Medium | Bulk Density < 1.3 g/cm3 |
| Flagstone | Access Paths/Thermal Mass | Minimum 1.5″ thickness |
| Arborists Woodchips | Moisture Retention | No deeper than 2 inches |
Strategic Botanical Installation and Hydraulic Zoning
When selecting plants for a bee-friendly setup, you must follow the rule of Hydraulic Zoning—grouping species with identical evapotranspiration needs. This prevents the common mistake of over-watering drought-tolerant natives like Asclepias while trying to keep moisture-loving Monarda alive. We focus on succession blooming, ensuring that from March through November, there is a consistent caloric source available. Plant in drifts of at least five individuals of the same species. Bees are efficient; they won’t waste energy flying to a single isolated flower. They want a target-rich environment.
“A retaining wall doesn’t fail because of the stone; it fails because of the water trapped behind it.” – Hardscape Engineering Axiom
Do not bury the root flare. This is the most common rookie mistake. If you pile mulch against the stem of a shrub or tree—the “mulch volcano”—you are inviting fungal pathogens and girdling roots. It will rot. The flare should be visible at the soil surface. Use a sharp spade to edge your beds; don’t rely on plastic or metal edging that eventually heaves out of the ground. A deep, clean Victorian edge provides a natural drainage break and looks cleaner than any cheap big-box store product.
Pollinator Site Prep Checklist
- Site Survey: Locate underground utilities via 811. Don’t hit a gas line for a Coneflower.
- Soil Test: Get a professional lab analysis, not a $10 DIY kit. You need the CEC and organic matter percentages.
- Grading: Ensure a 2% slope away from any foundations or hardscape structures.
- Invasive Removal: Use mechanical extraction for rhizomatous weeds. Do not just till them; you’ll just create a thousand new plants from the root fragments.
- Source Selection: Buy from local nurseries that guarantee neonicotinoid-free stock. Big-box plants are often pre-treated with systemic pesticides that kill the very bees you are trying to save.
Long-Term Ecological Management
A pollinator garden is a living system, not a static furniture arrangement. In the fall, resist the urge to “clean up.” Many native bees overwinter in the hollow stems of perennials or under leaf litter. If you cut everything back and haul it to the landfill, you are throwing away next year’s pollinators. Leave the stems until the temperature is consistently above 50 degrees Fahrenheit in the spring. This is the difference between a master landscaper and a lawn butcher. We manage for the cycle of life, not just for a clean photo on a website. Real beauty comes from a functional ecosystem that hums with life. Anything else is just outdoor carpeting.
![Reviving Clay Soil Without Digging [2026 Guide]](https://lawnmajesty.com/wp-content/uploads/2026/09/Reviving-Clay-Soil-Without-Digging-2026-Guide.jpeg)