
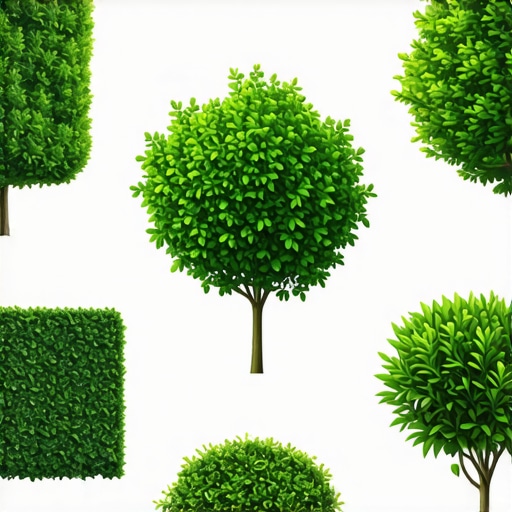
5 Fast-Growing 2026 Privacy Hedges for Small Yards
The Engineering of a Living Screen: Why Planning Trumps Planting
Successful installation of 5 fast-growing 2026 privacy hedges depends entirely on the subsurface preparation and bulk density of your soil rather than the immediate size of the nursery stock. In professional grade landscaping, we prioritize root system architecture and caliper thickness to ensure a living wall can withstand urban wind-loading and limited rhizosphere space. I always drill into my new crew members: if you don’t fix the soil grading first, every plant you put in the ground is just expensive compost. I have seen too many rookies drop a $200 Thuja into a hole that has the drainage capacity of a concrete bucket. Within three weeks, the roots are anaerobic, the needles are dropping, and the client is looking for a refund. We don’t do that here. We build from the ground up, starting with a perc test and ending with a fertigation schedule that actually makes sense for the local biology. Most homeowners think they can just dig a hole, throw in some peat moss, and call it a day. That is how you end up with root girdling and premature vascular failure. Real garden design requires understanding the hydrostatic pressure of your lot and how a dense hedge line will impact surface water runoff. If you block the water, you rot the roots. It is that simple. Don’t skip the site prep. Don’t buy the cheapest mulch you can find at a big-box store. And for the love of the craft, stop burying the root flare.
How far apart should I plant privacy hedges for quick coverage?
To achieve a dense privacy screen without causing fungal pathogens from poor airflow, you must space hedges based on their mature width and foliar density, typically between 3 and 5 feet on center for columnar varieties. Over-planting leads to resource competition and canopy thinning at the base.
“Planting trees or shrubs too deep is the leading cause of landscape plant failure in urban environments, as it restricts oxygen access to the root system.” – Clemson University Cooperative Extension Service
The 2026 Selection: Top 5 High-Performance Hedges
The following table breaks down the growth metrics and soil requirements for the most resilient specimens we are installing for the 2026 season. These are selected for narrow footprints and accelerated vertical elongation.
| Species Name | Annual Growth (ft) | Mature Width (ft) | Soil Preference |
|---|---|---|---|
| Thuja ‘American Pillar’ | 3 to 4 | 4 | Clay/Loam |
| Skip Laurel (Schipkaensis) | 2 | 5 to 7 | Well-drained |
| Fine Line Buckthorn | 1.5 to 2 | 2 to 3 | Adaptive |
| Skyrocket Juniper | 2 | 2 to 3 | Sandy/Arid |
| Nellie R. Stevens Holly | 2.5 | 8 to 10 | Acidic (pH 5.5 to 6.5) |
1. Thuja occidentalis ‘American Pillar’
The American Pillar is the superior successor to the overused Emerald Green, offering a vertical growth rate that can exceed 36 inches per year when established. Its columnar habit makes it the gold standard for small yard landscaping where lateral space is a premium. You get the height without the 15 foot spread that eats your entire lawn.
2. Prunus laurocerasus ‘Schipkaensis’
Commonly known as the Skip Laurel, this broadleaf evergreen is our go-to for shade-heavy garden design. It possesses a high tolerance for alkaline soils and provides a dense, waxy cuticle that resists salt spray and urban pollutants. Do not confuse this with the Cherry Laurel, which grows too wide for most modern hardscaping footprints.
3. Rhamnus frangula ‘Fine Line’
This is the architectural specimen of the group. It offers a fern-like texture and rarely exceeds 3 feet in width. It is ideal for planting beds adjacent to paver patios where you need a screen that won’t heave the modified gravel base. It is non-invasive and provides exceptional foliar density.
4. Juniperus scopulorum ‘Skyrocket’
If you are dealing with sandy soil or high-wind corridors, the Skyrocket Juniper is the answer. Its glaucous foliage and extreme drought tolerance make it a low-maintenance powerhouse. It requires zero pruning to maintain its pencil-thin profile. Avoid this if your soil stays saturated; it will develop Phomopsis blight in soggy feet.
5. Ilex x ‘Nellie R. Stevens’
The Nellie R. Stevens is a vigorous hybrid that creates an impenetrable wall. Its deep green glossy leaves and red berries provide winter interest, but it requires a disciplined pruning schedule to keep it from dominating a small space. We use it for perimeter screening where a true barrier is required to block noise and headlights.
What is the fastest growing hedge for privacy in small spaces?
The Thuja ‘American Pillar’ is currently the fastest-growing narrow-profile hedge, capable of reaching 20 feet in height while maintaining a 4-foot diameter, making it the most efficient choice for suburban privacy.
“A hedge is a living wall; without proper drainage at the base, hydrostatic pressure can cause root hypoxia in less than 48 hours.” – American Society of Landscape Architects
Technical Installation: The Professional Protocol
Most DIYers fail because they treat a plant like a piece of furniture. It is a biological engine. When we install a privacy hedge, we follow a strict civil engineering workflow. First, we identify the utilities by calling 811. Nothing ruins a project faster than a severed fiber-optic line. Second, we excavate a trench that is twice as wide as the root ball but no deeper than the root flare. We scarify the sides of the trench to prevent glazing, which acts like a terracotta pot and traps roots inside. We use mycorrhizal inoculants to jumpstart the symbiotic relationship between the soil and the plant. We don’t use high-nitrogen fertilizer at planting; it burns the tender new root hairs. We use a transplant solution with high phosphorus and humic acid to reduce transplant shock. The mulch layer must be exactly 3 inches thick, and it must never touch the trunk. We call it the mulch donut, not the volcano. If you pile mulch against the bark, you are inviting cambium rot and borer insects. It will die. Maybe not today, but in three years, it will be gone.
- Step 1: Dig a trench 2x the width of the root balls to allow for lateral root expansion.
- Step 2: Amend soil with 15 percent organic compost to improve Cation Exchange Capacity (CEC).
- Step 3: Place plants and ensure the root flare is 1 to 2 inches above the surrounding grade to allow for settling.
- Step 4: Backfill with native soil to ensure consistent capillary action for water movement.
- Step 5: Install 0.5 GPH drip irrigation emitters at the base of each plant.
The first year is the establishment phase. You are not growing top growth; you are growing roots. Deep, infrequent watering is the secret. You want the roots to chase the moisture down into the subsoil. If you water for five minutes every day, you create a lazy root system that will fail during the first heatwave of July. Give them one inch of water per week, delivered slowly. This forces geotropism and builds a resilient hedge. By year two, the vertical velocity will kick in. That is when you see the 3 foot jumps. Keep your pruning shears sharp and only take off the terminal buds if you want to encourage lateral branching. Professional hedges are built, not just planted. Stick to the science, and you will have the best yard on the block.
![Fixing Muddy Side Yards for Under $100 [Fast Fix]](https://lawnmajesty.com/wp-content/uploads/2026/09/Fixing-Muddy-Side-Yards-for-Under-100-Fast-Fix.jpeg)