Stop Your Deck From Rotting with This Simple $50 Flashing Fix
The Forensic Autopsy of a $40,000 Structural Failure
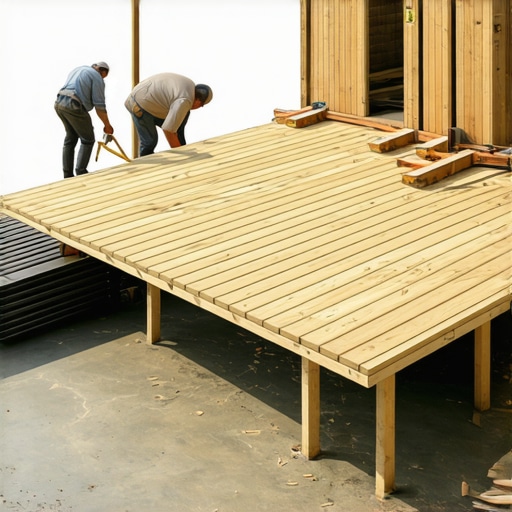
I recently got called out to tear up a $30,000 patio that was sinking because the previous contractor failed to manage the water coming off the deck ledger. As I pulled back the first few boards of the adjacent deck, the smell hit me first: the unmistakable, earthy scent of wet rot. The ledger board, the primary structural connection between the deck and the house, had turned into something resembling wet cardboard. This was a high-end hardscaping project ruined by a $50 oversight. The homeowner was looking at a total rebuild because of a hydraulic bridge. Water had seeped behind the siding, trapped against the rim joist by a ledger board with zero flashing. It did not just rot the deck; it was eating the house. This is what happens when you prioritize aesthetics over hardscape engineering. Water is patient. Water is persistent. If you do not give it a path away from your home, it will create its own path through your subfloor.
Why Deck Ledgers Rot and How to Stop It
To prevent deck rot, you must break the hydraulic bridge between the ledger board and the house rim joist using L-shaped flashing and butyl-based joist tape. This $50 material investment prevents water from becoming trapped behind the pressure-treated lumber, which leads to structural wood decay and mold growth. Without this barrier, capillary action draws moisture into the gaps, where it cannot evaporate. This creates a permanent moisture 100 percent saturation zone. This is the death knell for any garden design that includes attached structures. You can have the most expensive cedar or composite boards in the world, but if the ledger fails, the deck is a liability.
How do I know if my deck is rotting behind the siding?
Look for signs of staining on the interior basement rim joist or soft spots on the exterior siding directly above the deck connection. Use a screwdriver to probe the wood: if it sinks in more than a quarter inch with light pressure, you have structural compromise. This often happens because the landscaping or mulch beds are built too high, trapping moisture at the foundation line. Proper lawn care also involves ensuring your sprinklers are not hitting the ledger board directly, which accelerates the breakdown of the wood fibers.
“A retaining wall doesn’t fail because of the stone; it fails because of the water trapped behind it.” – Hardscape Engineering Axiom
The Science of Capillary Action and Wood Decay
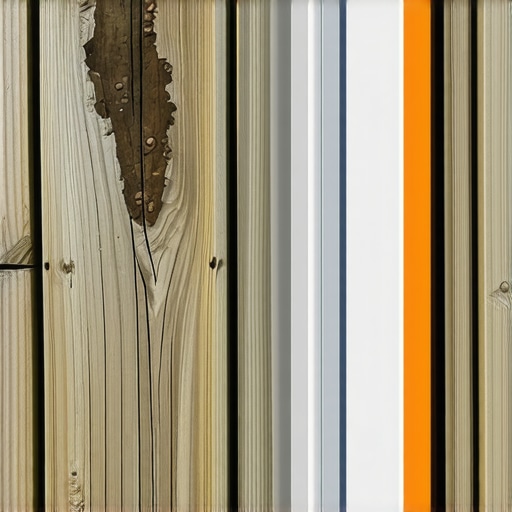
Wood rot is not just a cosmetic issue; it is a biological process involving fungi like Serpula lacrymans. These organisms require four things: oxygen, a food source (cellulose), favorable temperatures, and moisture. You cannot control the first three in an outdoor environment, so you must control the moisture. When two flat surfaces like a ledger and a house wall are bolted together, they create a microscopic gap. Through capillary action, water defies gravity and climbs into this gap. If that water is not redirected by metal or vinyl flashing, it sits there. Pressure-treated wood is impregnated with copper-based preservatives like ACQ (Alkaline Copper Quaternary). While this protects the wood, the high copper content is corrosive to standard aluminum. This is why you must use G185 galvanized steel or stainless steel flashing. If you use cheap aluminum, the wood will literally eat the metal in less than five years. This is the kind of detail a garden design professional must understand before ever digging a post hole.
What is the best flashing material for a deck?
For most residential builds, stainless steel or heavy-duty vinyl is the superior choice because they are chemically inert and will not react with the ACQ in modern lumber. If you are using copper flashing, it must be paired with copper-compatible fasteners to prevent galvanic corrosion. Avoid thin-gauge aluminum at all costs. It will fail. The following table breaks down the material costs and expected lifespans for a standard 20-foot ledger.
| Material Type | Estimated Cost (20ft) | Corrosion Resistance | Lifespan (Years) |
|---|---|---|---|
| Aluminum (Standard) | $15 – $25 | Low (Reactive with ACQ) | 3 – 7 |
| Galvanized Steel (G185) | $30 – $45 | High | 15 – 20 |
| Vinyl / PVC | $20 – $35 | Immune | 25+ |
| Stainless Steel (304) | $80 – $120 | Extreme | 50+ |
The $50 Remediation: Step-by-Step Installation
If you are building a new deck or have the ability to pull the first course of boards on an existing one, the flashing process is straightforward but exacting. You need to ensure the flashing extends at least 4 inches up the house wall behind the weather-resistive barrier (house wrap). The bottom leg should extend over the top of the ledger and out, forming a drip edge. This forces water to jump away from the house and onto the hardscaping below. Don’t forget the joist tape. Applying a butyl-based tape to the top of every joist adds another $30 to the budget but prevents the screw holes from becoming entry points for rot.
- Step 1: Remove the siding at least 6 inches above the ledger line.
- Step 2: Clean the rim joist area and check for existing rot. Repair if needed.
- Step 3: Apply a 12-inch wide strip of self-adhering butyl flashing tape directly to the house wall.
- Step 4: Install the L-flashing (Z-flashing) over the tape, ensuring the top flange is tucked under the house wrap.
- Step 5: Apply joist tape to the top of the ledger board to seal the bolt penetrations.
- Step 6: Reinstall siding, leaving a 1/2 inch gap above the flashing for drainage.
“Properly installed flashing is the single most important factor in the longevity of any exterior wood-to-masonry connection.” – UMass Building and Construction Technology Research
Impact on Surrounding Landscaping and Drainage
When you fix your deck flashing, you are also altering the way water moves through your garden design. Concentrated runoff from a 20-foot ledger can erode the lawn care efforts below. I always recommend installing a gravel drip trench or a small French drain beneath the deck’s edge. This prevents the water from splashing mud back onto your clean siding and keeps the soil moisture levels consistent. In high-clay areas, this is critical. If the soil at the foundation stays saturated, it can lead to hydrostatic pressure issues in your basement. Your hardscaping should always work in tandem with your home’s envelope. Don’t let a $50 piece of metal be the reason your $40,000 deck collapses. It is about engineering, not just carpentry. Do it right the first time.