How to Mix River Rock and Wood Mulch for a High-End Look
The Structural Reality of Mixing Hard and Soft Materials
To successfully mix river rock and wood mulch, you must implement a physical separation barrier using professional-grade steel or heavy-duty poly-edging. This high-end look relies on the textural contrast between inorganic stone and organic wood, requiring a minimum 4-inch excavation for the rock zones and a 3-inch depth for mulch to ensure long-term stability and weed suppression.
The Hardscape Autopsy: Why Most Mixed Lawns Fail
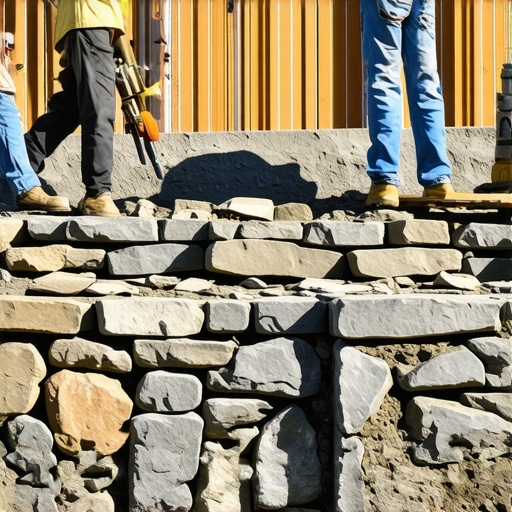
I recently got called out to tear up a $30,000 patio and garden area that was sinking because the previous contractor thought they could just pour river rock directly onto the soil next to wood mulch. Within two seasons, the mulch had decomposed into a fine sludge that washed into the rock voids. This created a perfect nutrient-rich medium for weeds to grow right through the stone. The drainage was completely choked. The homeowner was literally looking at a swamp of expensive stones and rotting wood. We had to excavate the entire site, haul away twenty tons of contaminated material, and start over from the sub-grade. It was an expensive lesson in physics. You cannot skip the separation layer. If you do, the earth will reclaim your design in eighteen months. Rock and mulch are not just decorations; they are layers in a functional drainage system. When you mix them without a plan, you are building a bio-filter that catches dirt and grows weeds. Do not be that guy. Fix the grade first.
The Engineering Behind Material Integration
Professional landscaping is about managing water and decomposition. River rock, specifically rounded 1-to-3-inch stones like Mexican Beach Pebble or Colorado Cobble, provides excellent drainage and stays put. Wood mulch, however, is transient. It breaks down into organic matter. If these materials touch, the mulch will rot and fill the gaps in the rock. This is where the engineering comes in. You must use a non-woven geotextile fabric beneath the rock sections. Do not use the cheap, thin plastic film from the big-box store. You need a fabric with a high micron rating that allows water through but prevents soil migration.
“A retaining wall doesn’t fail because of the stone; it fails because of the water trapped behind it.” – Hardscape Engineering Axiom
How much modified gravel do I need for a stone border?
For a stone border or river rock bed, you need a minimum of 2 inches of compacted modified gravel (2A or 3/4-minus) if you are walking on it, but for decorative beds, a 4-ounce non-woven fabric is sufficient. Ensure the rock is installed at a 3-inch depth to prevent the fabric from showing through over time.
Should I put fabric under wood mulch or just river rock?
Only place fabric under river rock. Putting fabric under wood mulch is a rookie mistake that prevents the mulch from bonding with the soil, causing it to slide off during heavy rains. Wood mulch needs to sit directly on scarified soil to allow for gas exchange and natural decomposition into the root zone.
Material Comparison and Selection Logic
Choosing the right stone and mulch isn’t just about color. It’s about mineralogy and thermal mass. Limestone will raise your soil pH, which can kill acid-loving plants like Azaleas. Granite or river-run gravel is generally inert. Wood mulch selection is equally critical. Dyed black mulch looks sharp against light stone, but it absorbs massive amounts of heat, which can stress shallow-rooted perennials in mid-July.
| Feature | River Rock (Inorganic) | Wood Mulch (Organic) |
|---|---|---|
| Primary Function | Drainage & Erosion Control | Moisture Retention & Soil Health |
| Lifespan | 20+ Years | 1-2 Years |
| Maintenance | Occasional Power Washing | Annual Top-Dressing |
| Heat Retention | High (Thermal Mass) | Low (Insulating) |
| Cost per Yard | $120 – $280 | $35 – $60 |
The Ground-Up Build: Step-by-Step Installation
Start with the sub-grade. You must ensure the soil slopes away from the foundation at a minimum 2% grade. If your yard is flat, you are already behind. Use a sod cutter to remove existing turf. This isn’t optional. Leaving grass under your mulch is asking for a nitrogen-robbing fermentation party. Once the soil is bare, trench your edges. A deep V-trench at the transition point between the rock and the mulch is the secret to that high-end, crisp line. Install your edging. I prefer 1/8-inch steel edging. It won’t heave during the freeze-thaw cycle like plastic. Lay your geotextile fabric in the rock zone, pinning it every 12 inches with 6-inch staples. When you pour the rock, start from the center and work toward the edges to keep the fabric taut. For the mulch, keep it away from the root flares of your trees. No mulch volcanoes. I will fire a crew member for piling mulch against a trunk. It rots the bark and invites borers.
“Wood mulch should never exceed three inches in depth, as excessive layering creates a hydrophobic barrier that prevents gas exchange and suffocates the root system.” – Texas A&M AgriLife Extension
The Professional Installation Checklist
- Grade the soil to a 2% minimum slope away from structures.
- Install 14-gauge steel edging between rock and mulch zones.
- Use 4-oz non-woven geotextile fabric under all stone areas.
- Apply a pre-emergent herbicide like Snapshot to the soil before mulching.
- Keep mulch 3 inches away from plant stems and tree flares.
- Ensure the river rock size is 1-3 inches to prevent scattering by leaf blowers.
Maintaining the High-End Contrast
The look only lasts if you maintain the boundary. Use a leaf blower on its lowest setting to clear debris from the rocks. Every two years, you will need to add a thin top-layer of mulch to refresh the color. Do not just keep piling it on. If the mulch layer gets thicker than 4 inches, you need to strip it back to the soil. For the river rock, a light spray with a white vinegar and water solution can kill any airborne seeds that sprout in the dust between the stones. Don’t use heavy salt; it will leach into your mulch beds and kill your plants. This is a scientific process. Respect the chemistry and the biology of your yard, and it will look like a professional install for a decade. Cut corners, and you’ll be calling me to dig it up in three years. Your choice.
![Build a $250 Gravel Shed Base [2026 No-Slab Fix]](https://lawnmajesty.com/wp-content/uploads/2026/05/Build-a-250-Gravel-Shed-Base-2026-No-Slab-Fix.jpeg)

![Build a $500 2026 Flagstone Fire Pit Circle [DIY]](https://lawnmajesty.com/wp-content/uploads/2026/05/Build-a-500-2026-Flagstone-Fire-Pit-Circle-DIY.jpeg)