The Best Stones to Use Around Your Swimming Pool
Why Material Choice Around Your Pool is an Engineering Decision
Selecting the best stones for a pool deck involves balancing thermal conductivity, slip resistance, and chemical resilience. You need materials like Travertine or Limestone that offer high Solar Reflectance Index (SRI) to prevent burns and a textured surface to ensure safety in wet conditions. Most contractors fail because they focus on aesthetics while ignoring the physical properties of the stone and the substrate beneath it.
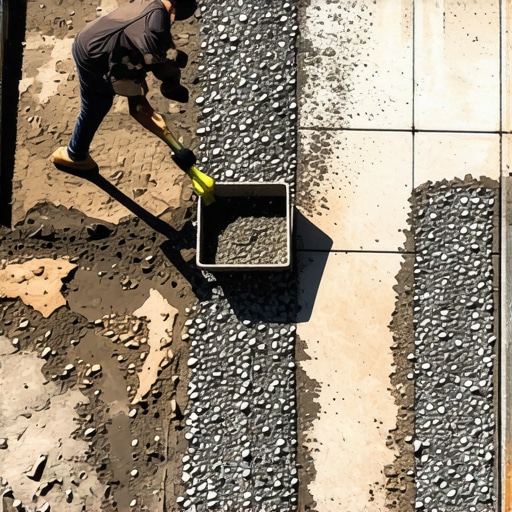
I recently got called out to tear up a $30,000 patio that was sinking because the previous contractor used a standard sand base for a heavy marble install on a slope without addressing hydrostatic pressure. The stones were literally floating away from the pool coping. I spent three weeks excavating their mess. It was a classic case of ignoring the engineering requirements of the site. In hardscaping, your finish material is only as good as the four inches of modified gravel sitting underneath it. If you don’t get the compaction to at least 98 percent Proctor density, you are just throwing money into a hole. Water will find a way to undermine your work. Always.
“A retaining wall doesn’t fail because of the stone; it fails because of the water trapped behind it.” – Hardscape Engineering Axiom
How much modified gravel do I need for a pool deck base?
For a standard residential pool deck, you must excavate deep enough to accommodate 4 to 6 inches of compacted 21A or 3/4-inch modified gravel. This base provides the structural integrity needed to support the weight of the stone and the people walking on it. If you have clay soil, you may need to go deeper. Use a plate compactor. Do not use a hand tamper for anything larger than a single stepping stone. If the tamper does not literally bounce off the ground, the soil is not ready for stone. Hardscaping is 80 percent dirt work and 20 percent laying the actual product. Your back will hurt, but your patio will stay level for decades.
The Critical Physics of Poolside Stone
When selecting stone, you must look at the Solar Reflectance Index (SRI). This value measures how much heat a surface reflects. A low SRI means the stone absorbs heat, turning your pool deck into a griddle. Dark granite or blue-stone looks great in a catalog, but on a 90-degree July afternoon, it will blister your feet. You want stones that stay under 100 degrees Fahrenheit even in direct sun. Travertine is the undisputed heavyweight champion here. Its cellular structure allows it to stay cool to the touch while being incredibly durable. It is a calcium-based stone, which means it reacts differently to heat than silica-based stones like quartz.
What stone stays the coolest in the sun?
Natural light-colored Travertine and Shelllock pavers are the best performers for temperature control. These materials have a high thermal mass but low heat retention, meaning they do not store the sun’s energy like darker pavers. This is vital for barefoot safety. Avoid dark basalt or slate unless you plan on wearing boots to the pool. Slip resistance is the second half of the equation. We measure this using the Dynamic Coefficient of Friction or DCOF. For pool areas, you want a DCOF of 0.42 or higher. Anything lower is a lawsuit waiting to happen. Tumbled finishes are better than honed or polished finishes for this exact reason.
| Stone Type | SRI Rating (Heat) | Slip Resistance | Chemical Resistance | Typical Cost (SqFt) |
|---|---|---|---|---|
| Travertine | Excellent | High (Tumbled) | Moderate | $12 – $18 |
| Limestone | Good | Medium | High | $10 – $15 |
| Marble | Fair | Low (unless sandblasted) | Moderate | $15 – $25 |
| Sandstone | Moderate | Excellent | Low | $8 – $12 |
| Granite | Poor (Dark) | High (Flamed) | Excellent | $15 – $22 |
Detailed Analysis of Stone Types
Travertine is my go-to for 90 percent of high-end pool projects. It is a form of terrestrial limestone deposited around hot springs. The tiny holes in the stone are not defects; they are the result of gas bubbles escaping during the formation process. These voids are what make the stone so cool underfoot. If you are worried about dirt, you can buy “filled” travertine, but for pool decks, I recommend “unfilled and tumbled.” The texture provides a natural grip that exceeds most safety standards. Just be aware that salt-water pools can eventually erode calcium-based stones if they are not sealed correctly with a high-grade silane-siloxane sealer.
Limestone offers a more uniform look than travertine and is exceptionally hard. It handles freeze-thaw cycles better than almost any other natural stone. If you live in a northern climate with heavy winters, limestone is your safest bet for durability. It is less porous than travertine, which means it resists salt and chlorine penetration more effectively. However, it can get slightly warmer than travertine, so stick to lighter shades like Indiana Limestone or French Grey. Always ensure the stone is at least 1.25 inches thick for a dry-set installation. Thinner tiles will crack under the pressure of a settling base.
“Slip resistance is influenced by the micro-texture of the stone surface and the presence of water, which acts as a lubricant.” – Architectural Stone Manual
Sandstone is the budget-friendly underdog that often gets overlooked in garden design. It has a natural, gritty texture that makes it virtually impossible to slip on. If you have kids running around the pool, sandstone is a smart choice for safety. The downside is that sandstone is highly porous. It acts like a sponge for pool chemicals and organic matter. If you have oak trees overhanging the pool, the tannins from the leaves will stain sandstone in 48 hours. You must seal sandstone annually. If you skip maintenance, the stone will look like a moldy mess in three years. It requires a diligent homeowner.
The Installation Checklist: No Shortcuts Allowed
Building a pool deck is a linear process. You cannot jump ahead. I see hacks trying to lay stone on top of loose dirt every single day. It will fail. Use this checklist to ensure your project lasts as long as your mortgage.
- Call 811 before you dig. Striking a gas line is a bad way to start a Monday.
- Excavate to a depth of 8 inches minimum for a standard paver install.
- Install a non-woven geotextile fabric to separate the soil from the gravel.
- Layer 3/4-inch modified gravel in 2-inch lifts, compacting each layer with a plate compactor.
- Check your pitch. You need at least a 1/4-inch drop per foot away from the pool for drainage.
- Use a 1-inch bed of washed concrete sand for the setting bed. Do not use stone dust.
- Install your stone with tight joints (1/16 to 1/8 inch).
- Sweep in polymeric sand to lock the joints and prevent weed growth.
Polymeric sand is not a suggestion; it is a requirement. It contains additives that harden when misted with water, creating a flexible but solid joint. This prevents ants from mining out the sand and keeps the stones from shifting. If you see a contractor using regular play sand, fire them on the spot. They are cutting corners that will cost you thousands in repairs later. Also, make sure they aren’t leaving “haze” on the stone. Polymeric haze is a nightmare to remove once it cures.
Maintenance and Long-Term Care
Once the stone is in the ground, the work isn’t over. Natural stone is a living material in the sense that it reacts to its environment. Efflorescence is the most common issue we see. This is a white, powdery salt that rises to the surface of the stone. It is not a defect in the stone; it is a sign of moisture moving through the base and pulling minerals up. Do not panic. You can wash it off with a mild acidic cleaner, but wait at least 60 days after installation before doing any heavy cleaning or sealing. The stone needs to breathe and stabilize first.
For salt-water pools, you must use a breathable, penetrating sealer. Do not use a “wet look” or film-forming sealer. These create a plastic-like coating that traps moisture inside the stone. When the water freezes, it will pop the face off the stone in a process called spalling. A penetrating sealer goes into the pores and lines them with a hydrophobic coating without blocking the stone’s ability to release vapor. It is more expensive, but it is the only way to protect a high-end hardscaping investment. One final tip: Never use a pressure washer with a zero-degree nozzle on natural stone. You will etch the surface and ruin the finish. Use a wide fan tip and keep the wand moving.
![Fix Cracked Driveways: 3 Cold-Patch Rules [2026 DIY]](https://lawnmajesty.com/wp-content/uploads/2026/06/Fix-Cracked-Driveways-3-Cold-Patch-Rules-2026-DIY.jpeg)