How to Build a $100 Modern Privacy Screen with Slats
Professional Guide to Building a $100 Modern Privacy Screen: Hardscape Engineering and Design Principles
I always drill into my new crew members: if you don’t fix the soil grading first, every plant you put in the ground is just expensive compost. The same logic applies to structural hardscaping. I have seen too many homeowners throw together a modern privacy screen only to see it lean at a 15 degree angle after the first spring thaw because they ignored the physics of soil compaction and wind load. A privacy screen is not just a cosmetic addition; it is a vertical structure subjected to hydrostatic pressure and lateral wind forces that can easily snap a 4×4 post if the leverage is not calculated correctly. In my twenty years of running a crew, I have learned that a project succeeds or fails based on the 36 inches of material hidden below the finish grade.
The Core Mechanics of Vertical Privacy Structures
Building a $100 modern privacy screen requires a strategic balance between material science and structural engineering to ensure the unit remains stable without exceeding a tight budget. By utilizing pressure-treated timber and precision-spaced horizontal slats, you create a baffle system that allows air to pass through while maintaining visual density. This reduces the drag coefficient, which is the primary reason why solid fences fail during high-wind events. You must prioritize the post-depth-to-height ratio, ensuring that at least one-third of your total post length is anchored in a compacted gravel base to resist frost heave and soil shifting.
“Ground contact lumber must be treated to a minimum retention level of 0.40 pcf for residential use to prevent fungal decay and termite attack.” – American Wood Protection Association Standards
How deep should a 4×4 post be for a privacy screen?
For a standard six-foot privacy screen, you must excavate your post holes to a depth of at least 30 to 36 inches, or 6 inches below the local frost line. This prevents the freeze-thaw cycle of the soil from pushing the post upward, a process known as frost heaving. In heavy clay soils, we use a bell-bottom hole design where the bottom of the excavation is wider than the top to provide an anchor against vertical movement. Failure to reach these depths will result in a screen that wobbles within two seasons.
Material Selection and Budget Management
Executing a build for $100 requires bypassing the high-end cedar clears and focusing on Grade 2 pressure-treated lumber or kiln-dried pine that you seal yourself. The structural integrity comes from the 4×4 main posts, while the aesthetic is carried by 1×2 or 1×3 slats. When I am auditing a site for cost-efficiency, I look for remnant stock or utility-grade boards that can be sanded to a professional finish. It is the labor and the wood sealant that provide the high-end look, not the initial price of the raw timber. Do not buy wood that is soaking wet from the chemical treatment; it will shrink and warp as it dries in the sun, pulling your screws and splitting your slats.
| Material Type | Estimated Cost | Service Life (Years) | Maintenance Level | |
|---|---|---|---|---|
| Pressure Treated Pine | $45 – $65 | 15 – 20 | Moderate (Seal every 2 years) | Standard Utility |
| Untreated Cedar | $110 – $150 | 10 – 15 | Low (Natural rot resistance) | Premium Look |
| Kiln-Dried Pine | $35 – $50 | 3 – 5 | High (Requires heavy paint) | Not Recommended |
While the internet tells you to use landscape fabric under your posts, a professional knows that fabric often traps moisture against the wood, accelerating fungal decay. Instead, we use 3/4-inch clean crushed stone for the base of the hole. This allows water to migrate away from the end-grain of the timber, which acts like a straw, wicking moisture upward into the core of the post. If that moisture stays trapped, the wood will rot from the inside out before you even notice the structural failure.
Step-by-Step Construction Checklist
- Site Marking: Use a string line and batter boards to ensure the run is perfectly straight.
- Post Hole Excavation: Dig to 36 inches. Verify the bottom is undisturbed soil or compacted gravel.
- Post Setting: Use a 4-foot level to check for plumb on two adjacent sides.
- The Gravel Foundation: Pour 6 inches of angular aggregate at the base for drainage. Do not use pea gravel; it acts like ball bearings and provides zero structural friction.
- Slat Installation: Use 1/2-inch spacers between slats to allow for expansion and contraction.
- Fastening: Use 2-inch 305-grade stainless steel or polymer-coated deck screws. Do not use zinc-plated nails; the chemicals in treated wood will eat through them in a single season.
What is the best wood for a budget privacy screen?
The most cost-effective choice for a $100 budget is Southern Yellow Pine (SYP) that has been pressure-treated for ground contact. While it lacks the red hues of cedar, it offers superior tensile strength and density. To achieve the modern aesthetic, you must sand the factory stamps off the wood and apply a high-quality semi-transparent oil-based stain. This protects the cellular structure of the wood from ultraviolet degradation while giving it a furniture-grade appearance that hides the cheaper origin of the lumber.
“Wind loads on vertical structures increase exponentially with height; proper slat spacing is the primary engineering control for residential wind mitigation.” – Hardscape Engineering Axiom
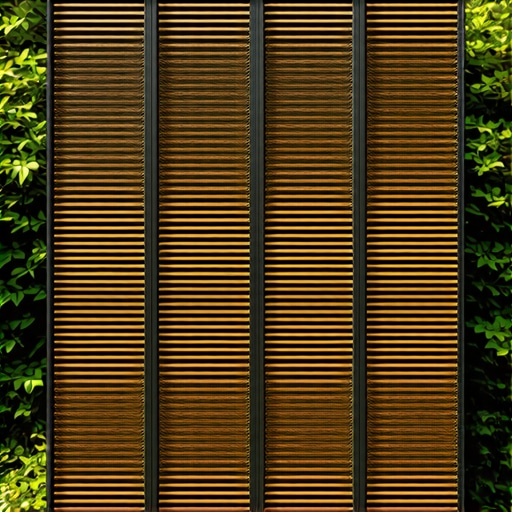
The Science of Slat Spacing and Wind Dynamics
In garden design, the screen is often viewed as a static object, but it is actually a dynamic sail. If you build a solid wall with zero gaps, you create a low-pressure zone on the leeward side which causes turbulence and can rip the posts out of the ground. By maintaining a 1/2-inch gap between your slats, you break the wind into smaller, less forceful streams. This is aerodynamic transparency. It keeps your backyard calm while ensuring the screen does not collapse during a summer thunderstorm. We use a jig to ensure every gap is uniform; an inconsistent gap is the hallmark of a “mow-and-blow” contractor who doesn’t respect the geometry of the landscape.
Finally, consider the grade of the soil around the screen. If you have a slope, you must step the panels rather than racking them. Racking follows the slope but makes the slats look crooked relative to the horizon. Stepping keeps the slats perfectly level, creating a clean, architectural line that defines the space. Always finish the wood with a paraffin-based sealer. This prevents water from penetrating the grain, which causes the wood to swell and twist. A twisted slat is impossible to fix without replacement. Proper landscaping isn’t about the first day it’s built; it’s about how it looks five years later after the elements have tried to tear it down. Use the right screws. Dig the deep holes. Don’t skip the gravel. Build it like a pro, and you won’t have to build it twice.