How to Stop Hillside Erosion for Less Than $100
The Anatomy of a Collapsing Slope: Why Your Hill is Moving
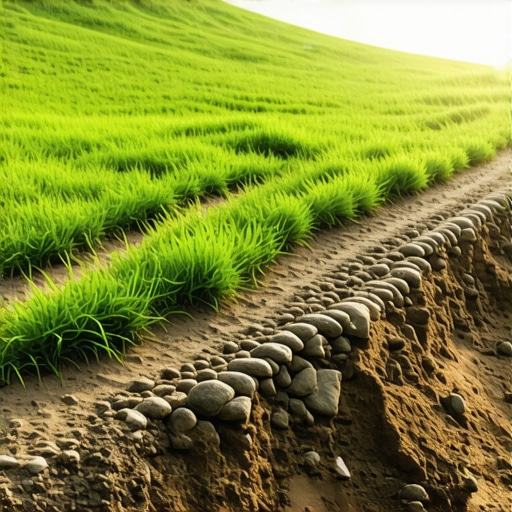
To stop hillside erosion on a budget, you must prioritize surface water diversion, soil anchoring through native deep-root vegetation, and mechanical friction layers like jute netting or wood chips to break the kinetic energy of raindrops before they displace soil particles and create rills. I always drill into my new crew members: if you don’t fix the soil grading first, every plant you put in the ground is just expensive compost. I have walked onto too many sites where a homeowner tried to ‘beautify’ a failing 45-degree slope with hostas and three inches of dyed mulch, only to watch $500 worth of nursery stock wash into the storm drain after a two-inch rain event. The problem is not the plants: it is the lack of structural integrity in the soil matrix. Erosion is a physics problem, not a gardening one. You are fighting gravity and hydraulic velocity. If you do not respect the angle of repose, the hill will win every single time. Most ‘mow and blow’ crews will tell you to just throw more seed down, but without addressing the shear strength of the soil, you are just feeding the birds. We need to look at the forensic reality of why the dirt is moving. Is it sheet erosion? Is it rilling? Or is it a deep-seated slope failure? For under a hundred bucks, we are focusing on surface and rill erosion: the most common killers of residential landscapes.
“A retaining wall doesn’t fail because of the stone; it fails because of the water trapped behind it.” – Hardscape Engineering Axiom
The Science of Soil Shear Strength and Water Velocity
Erosion starts with the ‘splash effect’ where a single raindrop hits bare soil like a tiny bomb, dislodging particles that then get carried away by overland flow. As water gathers, it gains velocity: and velocity is the enemy. If you double the speed of water, its ability to erode soil increases fourfold. This is why a gentle slope suddenly becomes a canyon after a heavy downpour. We must increase the surface roughness to slow that water down. In hardscaping, we use rip-rap and gabions, but on a $100 budget, we use biological engineering. We are looking for plants with fibrous root systems that knit the soil together like rebar in concrete. You need to understand the difference between a taproot, which goes straight down, and a lateral root system that creates a subterranean net. For our budget, we are sourcing native grass seeds and ‘free’ biomass. Check the table below for the cost breakdown of a professional-grade erosion kit for under $100.
How do you stop dirt from washing down a hill?
To stop dirt from washing down a hill, you must implement a layered defense system consisting of a physical barrier (jute or straw), a biological anchor (native seeds), and a moisture regulator (coarse wood chips) to prevent water from reaching terminal velocity on the soil surface. This is the three-pillar approach: slow it down, spread it out, and sink it in. Don’t skip the jute. It is the cheapest way to buy yourself six months of stability while your seeds germinate. Without it, your seeds will simply wash to the bottom of the hill in the first storm.
| Material | Estimated Cost | Professional Function |
|---|---|---|
| Jute Mesh/Netting (4′ x 50′) | $35.00 | Mechanical Friction & Seed Protection |
| Native Grass Seed Mix (1 lb) | $25.00 | Sub-surface Biological Anchoring |
| Landscape Staples (100 pack) | $15.00 | Securing Netting to Subgrade |
| Arborist Wood Chips (Bulk) | $0.00 | Energy Dissipation (Free via ChipDrop) |
| Straw Wattle (DIY Burlap) | $20.00 | Check Dams for Velocity Reduction |
| Total | $95.00 | Complete Slope Stabilization |
Step-by-Step Remediation: The Forensic Fix
First, you must scalp the existing weeds. Do not pull them by the roots: you need those dead roots to maintain what little integrity is left while you work. Next, use a hard rake to create horizontal ‘benches’ or mini-terraces in the soil. These should be no more than an inch deep. This ‘roughing up’ of the soil prevents it from acting like a slide. If the soil is hard-packed clay, it is hydrophobic. You need to break that surface tension. Once the ground is prepped, broadcast your native seed. Avoid ‘Contractor Mix’ from big-box stores: it is 50 percent annual rye that dies in a year and 50 percent weed seed. Go to a local ag extension or native plant society for a mix that actually belongs in your climate. These plants have roots that can reach 10 feet deep, unlike turf grass which quits at 3 inches.
“Soil bioengineering is the use of living plant materials to provide some or all of the structural support for a slope.” – USDA NRCS Engineering Field Handbook
After seeding, lay your jute netting. This is where most DIYers fail. You must trench the top of the netting into a 6-inch deep furrow at the crest of the hill and staple it down. If water gets under the netting at the top, the whole thing will blow out. Overlap your runs by 4 inches and staple every 2 feet. Finally, lightly top-dress with wood chips. Not the bagged, dyed mulch: that stuff floats. Use heavy, irregular arborist chips. They interlock. They stay put. They absorb impact. If you have a particularly steep section, use your remaining $20 to buy burlap and fill it with old leaves or soil to create a ‘check dam’ across the slope. This breaks the water’s run every few feet. It is simple engineering.
What is the cheapest way to stop erosion on a slope?
The cheapest professional method to stop erosion is live staking combined with coarse mulch, which utilizes dormant woody cuttings from native shrubs like willow or dogwood driven directly into the hillside to provide immediate mechanical stabilization and long-term root growth for zero material cost. If you have access to a creek or a neighbor with the right bushes, your cost for ‘stakes’ is exactly zero dollars. You are literally planting ‘rebar’ that grows. It is the ultimate horticultural hack for high-velocity areas. Pair this with free wood chips from a local tree service, and you have a professional-grade solution for the cost of a box of landscape staples.
The Maintenance Protocol: Year One
Your work is not done when the staples are in. The first three months are critical. You must monitor the ‘rills.’ If you see water starting to carve a path under your jute, you need to redirect it at the source. This might mean a small berm at the top of the hill. Remember: water follows the path of least resistance. Make that path difficult. By month six, your native seeds will have established a root matrix. By year two, the jute will have biodegraded, adding organic matter to the soil, and your plants will be doing the heavy lifting. Don’t fertilize. You want the roots to go deep in search of nutrients, not stay shallow for a quick fix. Deep roots equal a stable hill. Shallow roots equal a future landslide. Stick to the plan. Stay off the slope while it is wet. Let the biology work. The dirt stays where it belongs because you respected the physics of the site.
- Check for ‘piping’ or holes where water enters the soil behind your jute.
- Ensure no ‘mulch volcanoes’ are suffocating your new growth.
- Verify that the top ‘anchor trench’ is still buried after the first major storm.
- Pull invasive weeds by hand to avoid disturbing the newly formed soil crust.