The $20 Fix for Sinking Patio Pavers
The Anatomy of a Failed Patio
The visual of a jagged, uneven paver surface is more than an aesthetic failure; it is a structural warning sign that indicates your hardscape is returning to the earth. When you walk across your patio and feel that distinct wobble or see a puddle forming in a low spot, you are witnessing the physical manifestation of sub-surface erosion. It is frustrating. It is dangerous. It is entirely preventable. I recently got called out to tear up a $30,000 patio that was sinking because the previous contractor failed to account for hydrostatic pressure and used a standard sand base instead of a properly graded aggregate. The pavers themselves were fine, but the foundation was a disaster of poorly compacted soil and lack of edge restraint. This is what I call a hardscape autopsy. By the time I arrived, the water had already carved out subterranean channels beneath the bedding layer, leaving the pavers suspended over nothing but air and hope. Hope is not a construction strategy. In the world of high-end hardscaping, we do not guess. We measure. We compact. We stabilize. To fix a sinking paver, you have to understand the microscopic war between water and your base material. If you skip the science, you are just throwing money into a hole. Let’s get into the dirt and figure out why your patio is moving and how a simple $20 investment in high-performance materials can stop the rot.
Why Patios Sink: The Science of Base Failure
Patios sink primarily because of base saturation and improper compaction of the subgrade materials which allows water to displace the leveling sand. To stop a patio from shifting, you must address the moisture content and the structural integrity of the aggregate layers beneath the stone.
“A retaining wall doesn’t fail because of the stone; it fails because of the water trapped behind it.” – Hardscape Engineering Axiom
This same principle applies to your horizontal surfaces. When water gets trapped between the pavers and the base, it undergoes a process called liquefaction during heavy rains. The sand becomes a fluid, and under the weight of foot traffic or furniture, it simply moves out of the way. This leaves a void. The paver drops. In colder climates, this water freezes, expands, and creates the dreaded frost heave. You are fighting physics, and without the right materials, physics always wins. Most DIY homeowners and low-bid contractors use ‘play sand’ or ‘all-purpose sand’ for their joints. This is a critical error. These sands have no binding agents and wash away with the first spring thunderstorm. Once the joint sand is gone, the pavers can move laterally. This lateral movement breaks the interlock. Without interlock, you don’t have a patio; you have a collection of loose rocks sitting in the mud.
The $20 Fix: Polymeric Sand and Edge Restraint
The most effective low-cost fix for sinking pavers is the application of high-quality polymeric sand combined with the re-stabilization of the edge restraints. This specialized sand contains chemical binders that activate with water to create a flexible, concrete-like bond between the paver units. Many people think they need to excavate the entire patio when they see a few low spots. That is usually overkill. If the base failure is localized, you can lift the affected pavers, add a small amount of coarse bedding sand, and then lock the entire system down with polymeric sand. This material is the secret weapon of the professional hardscaper. It prevents weed growth, resists ant infestations, and most importantly, it stops the wash-out of the bedding layer. It creates a semi-permeable membrane that allows some moisture through while maintaining the structural ‘bridge’ between stones. Don’t buy the cheap stuff at the big-box store. Go to a dedicated masonry supply yard and get a professional grade product designed for high-traffic areas. You are looking for a product that meets ASTM standards for jointing materials. This is the difference between a fix that lasts one season and one that lasts a decade. It will cost you about $20 to $30 for a bag that covers a significant area, and it is the best money you will ever spend on your yard.
How much modified gravel do I need for a patio base?
Calculating the correct amount of 2A modified gravel requires multiplying the total square footage by the desired depth (usually 4 to 6 inches) and converting that volume to tons. For a standard 10×10 patio with a 6-inch base, you would need approximately 3.75 tons of material. Never guess on your base depth. If you are on heavy clay, you need more. If you are on sandy loam, you might get away with less. But always err on the side of more stone. Compaction will reduce the volume by about 20 percent, so buy extra. The modified gravel provides the structural ‘skeleton’ of your patio. It must be compacted in 2-inch ‘lifts’ using a plate compactor. If you try to compact 6 inches at once, the bottom 3 inches will stay loose. This leads to settling later. It is a common shortcut that ruins projects. Don’t be that guy. Use a vibrating plate compactor. It should literally bounce off the surface once you’ve reached maximum density. That is the sound of success.
The Professional Repair Protocol
If you want to fix a sinking spot correctly, follow this forensic approach. First, remove the sunken pavers. Inspect the bedding sand. Is it wet? Is it gone? If it is wet, you have a drainage problem. You might need to install a French drain nearby. If the sand is gone, it washed into the base. This means your base wasn’t compacted enough or you didn’t use a geotextile fabric. Add your coarse sand. Level it with a small screed board. Replace the pavers. Now, here is the critical part: clean out all the old sand from the joints of the surrounding pavers using a pressure washer or a shop vac. The new polymeric sand needs a clean surface to bond.
“Proper compaction of the subgrade and base materials is the single most important factor in the longevity of a flexible pavement system.” – ICPI Tech Spec No. 2
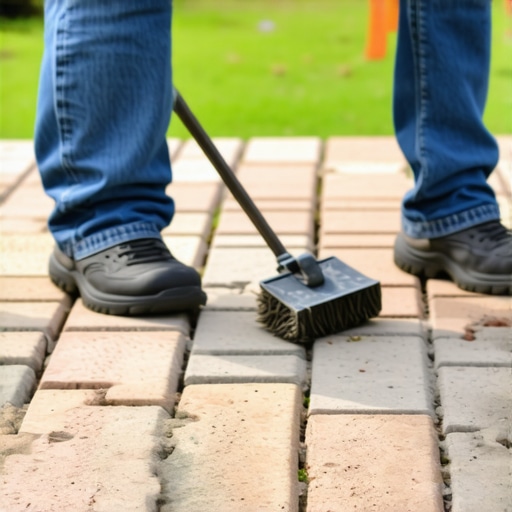
After the joints are dry, sweep in the polymeric sand. Use a rubber mallet to vibrate the pavers; this helps the sand settle to the bottom of the joint. Sweep off any excess. If you leave sand on the surface of the pavers, it will stain them once you add water. Mist the joints lightly. Do not flood them. You want to activate the polymers, not wash them out of the sand. It is a delicate balance. If you do it right, the sand will harden into a firm, rubbery consistency that holds everything in place.
| Material Type | Primary Use | Stability Rating | Cost Factor |
|---|---|---|---|
| Play Sand | Children’s Sandboxes | Very Low | Low |
| Masonry Sand | Mortar Mix | Medium | Low |
| Polymeric Sand | Hardscape Joints | Very High | Medium |
| 2A Modified | Structural Base | Highest | Medium |
What is the best way to prevent future sinking?
Long-term patio stability is achieved through proper drainage grading and the installation of rigid edge restraints that prevent lateral shifting. You must ensure the patio slopes away from your home at a rate of at least 1 inch for every 4 feet of distance. Water is the enemy. If water sits on the surface, it will eventually find a way into the base. Use professional-grade plastic or aluminum edge restraints secured with 10-inch steel spikes. Don’t use those flimsy green plastic garden borders. They are useless for structural support. Drive a spike every 12 inches. This creates a ‘frame’ that holds the pavers together like a picture. Without this frame, the outer rows of pavers will eventually migrate into the grass, opening up the joints and starting the sinking process all over again. It is a simple step that most DIYers skip because it’s hard work. Do it anyway. Your future self will thank you.
- Inspect joints annually for sand loss.
- Check edge restraints for popping spikes.
- Ensure gutters aren’t dumping water directly onto the patio edge.
- Clear weeds immediately to prevent root expansion in joints.
- Re-apply polymeric sand every 3 to 5 years as needed.
Hardscaping is an investment in your property’s value and your quality of life. Treat it with the respect it deserves. Stop using cheap fixes and start using engineering principles. A patio shouldn’t be a source of stress; it should be a place where you relax. By understanding the relationship between aggregate, compaction, and moisture, you can maintain a surface that remains flat, stable, and beautiful for decades. It is not magic. It is just good dirt work. Now get out there and fix those pavers. Use the right sand. Use the right tools. Don’t cut corners. The earth is waiting to swallow your mistakes, so don’t give it any openings.
{“@context”:”https://schema.org”,”@type”:”HowTo”,”name”:”How to Fix Sinking Patio Pavers”,”step”:[{“@type”:”HowToStep”,”text”:”Remove the sunken pavers and excavate the failed bedding sand.”},{“@type”:”HowToStep”,”text”:”Add coarse bedding sand and level it to match the surrounding base height.”},{“@type”:”HowToStep”,”text”:”Re-seat the pavers and use a rubber mallet to ensure they are flush.”},{“@type”:”HowToStep”,”text”:”Clean all debris from the joints and fill with high-quality polymeric sand.”},{“@type”:”HowToStep”,”text”:”Mist the joints with water to activate the binding polymers.”}],”totalTime”:”PT2H”}