How to Build a Retaining Wall That Won’t Lean
The Engineering Reality of Gravity Walls
To build a retaining wall that won’t lean, you must prioritize hydrostatic pressure management through a compacted aggregate base (6 to 12 inches) and a dedicated drainage system using perforated pipe and clean gravel backfill to prevent soil expansion and structural failure.
Most homeowners and low-bid contractors think a retaining wall is a decorative stack of stones. It is not. It is a civil engineering project designed to hold back thousands of pounds of saturated earth. I recently got called out to tear up a $30,000 patio that was sinking because the previous contractor skipped the base compaction and used organic topsoil as backfill. Within two seasons, the wall bowed six inches outward. The frost heave in our region turned that wall into a pile of expensive rubble. We had to excavate the entire mess, haul away 40 tons of contaminated dirt, and start from the virgin subsoil. It was a preventable disaster. This guide covers the physics of why walls fail and the exact specifications required to ensure yours stays vertical for 50 years.
The Physics of Failure: Why Walls Lean
Retaining walls fail because of water, not weight. When soil becomes saturated, it exerts hydrostatic pressure against the back of the block. If that water has nowhere to go, it pushes the wall forward. This is exacerbated in regions with freeze-thaw cycles where the expanding ice acts like a slow-motion hydraulic jack. You must understand the Angle of Repose. This is the natural slope at which a material remains stable. When you cut into a hill to build a wall, you are defying that angle. You are now the engineer responsible for that lateral load.
“A retaining wall doesn’t fail because of the stone; it fails because of the water trapped behind it.” : Hardscape Engineering Axiom
The second cause of leaning is settling. If your base is not compacted to 95 percent Standard Proctor Density, the wall will sink unevenly. A half-inch of settlement at the bottom can translate to a three-inch lean at the top. Don’t trust your eyes. Use a laser level. Every single course must be checked. If the first course is off by an eighth of an inch, the tenth course will be a nightmare. It will fail. Don’t skip the transit.
How much modified gravel do I need for a retaining wall base?
For a standard 3-foot gravity wall, you need a base trench that is 24 inches wide and 12 inches deep, filled with 6 inches of compacted 2A modified stone or 3/4-inch minus crushed rock. This provides a stable, non-shifting foundation that allows for minor drainage while resisting the vertical load of the block units. Never use pea gravel or rounded river rock for a base. These materials act like ball bearings and will cause the wall to slide. You need angular, crushed aggregate that locks together under compaction.
Phase 1: Excavation and Subgrade Preparation
Before you touch a shovel, call 811. Utility lines often run right where you want to dig. Once cleared, excavate the trench. You aren’t just digging a hole; you are creating a structural footing. The depth of your burial (embedment) is critical. A general rule of thumb is that 10 percent of the wall height should be buried below grade. For a 4-foot wall, that means the bottom 5 inches of your first block should be underground. This prevents the bottom of the wall from ‘kicking out’ under the pressure of the soil behind it.
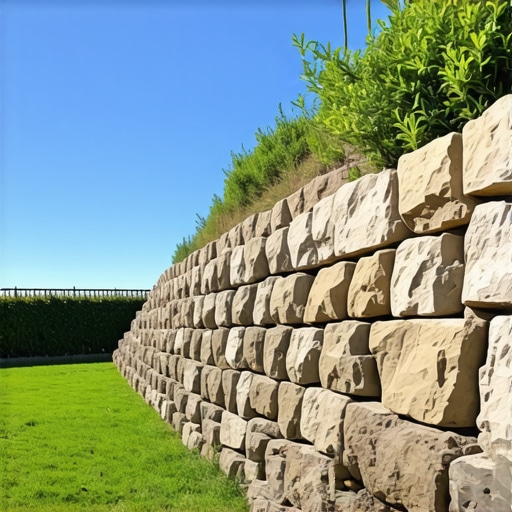
Check your soil type. If you have heavy red clay, you have a problem. Clay retains water and expands. In these cases, you must over-excavate and replace the native soil with more aggregate. If you are building on sandy loam, you have better natural drainage, but you still need a structural base. Soil mechanics matter more than the color of the stone you pick at the yard. [IMAGE_PLACEHOLDER]
| Wall Height | Base Depth (Compacted) | Trench Width | Embedment Depth |
|---|---|---|---|
| 1-2 Feet | 4-6 Inches | 18 Inches | 3-4 Inches |
| 3-4 Feet | 6-8 Inches | 24 Inches | 6 Inches |
| 5-6 Feet | 12 Inches + Geogrid | 30 Inches | 8-12 Inches |
Phase 2: The Critical First Course
The first course of block is the most difficult and the most important. Set your first block at the lowest point of your wall. Use a dead-blow hammer to set the block into the compacted aggregate. Level it front-to-back and side-to-side. Then, set the next block. Repeat this for the entire length. If you are building a wall on a slope, you will need to ‘step’ the base. This involves creating level sections that jump up or down by the height of one block. Never build a wall on a sloped base. It will slide down the hill. It is physics. You cannot argue with gravity.
Do I need a permit for a 3-foot wall?
Most municipalities allow walls up to 3 or 4 feet without a building permit or engineered drawings, but you must check local zoning codes and HOA regulations before starting. Walls exceeding 4 feet usually require a professional engineer’s stamp because the catastrophic failure of a 4-foot wall can be lethal. In many jurisdictions, any wall that supports a surcharge load, such as a driveway or a shed, requires a permit regardless of height. Safety is not optional.
Phase 3: Drainage and Backfill Protocol
This is where the ‘mow-and-blow’ guys fail. They stack blocks and then throw the dirt they dug out back behind the wall. That is a recipe for a leaning wall. You must use Clean #57 Stone (crushed limestone with no fines) for backfill. This stone has a high void space, allowing water to drop straight down to your drain pipe instead of pushing against the wall.
- Perforated Drain Pipe: Place a 4-inch perforated PVC or corrugated pipe behind the first course of block.
- Daylighting: The pipe must ‘daylight’ (exit) at the ends of the wall or through the face of the wall every 30-50 feet to let water out.
- Filter Fabric: Wrap the clean stone in a non-woven geotextile fabric. This prevents fine soil particles from clogging the gaps between the stones.
- Backfill Layers: Add backfill in 6-inch increments (lifts) and compact them. Do not wait until the wall is finished to dump all the gravel back there.
“Proper drainage is the single most critical factor in retaining wall longevity, as water weight can increase soil pressure by over 60 pounds per cubic foot.” : ICPI Tech Manual
Phase 4: Stepping Back and Geogrid
Professional walls are built with a ‘batter.’ This means the wall leans slightly into the hill. Most segmental retaining wall (SRW) blocks have a built-in lip or pin system that automatically creates a 1-inch setback for every foot of height. This shifts the center of gravity of the wall toward the soil it is holding, significantly increasing stability. If your wall is perfectly vertical, it is already halfway to failing.
For taller walls, we use Geogrid. This is a high-tenacity polyester mesh that extends back into the soil behind the wall. It turns the entire mass of soil into a reinforced block of earth. The weight of the soil on top of the grid holds the face of the wall in place. Think of it like a handle. If you don’t use grid on a wall over 4 feet, you are asking for a collapse. The grid should be pulled taut and covered with compacted backfill. No wrinkles. No Slack.
The Maintenance Schedule: Year One and Beyond
Once the wall is built and the capstones are glued down with high-strength concrete adhesive, your job isn’t done. The first year is the ‘settling’ year. After the first major rainstorm, inspect the wall. Look for ‘fines’ (dirt) washing out through the cracks. This indicates a failure in your filter fabric. Look for pooling water at the base. This means your drain pipe is clogged or not sloped correctly. Check the top of the wall for any signs of movement. A wall should move zero inches. If you see movement, you have an engineering problem that needs immediate excavation. Keep the area 3 feet behind the wall clear of large trees. Root pressure can snap a retaining wall like a toothpick. Stick to small shrubs or perennials with non-invasive root systems. Your wall is an investment. Treat it like one.
![Build a $100 2026 Pea Gravel Fire Pit [Weekend DIY]](https://lawnmajesty.com/wp-content/uploads/2026/05/Build-a-100-2026-Pea-Gravel-Fire-Pit-Weekend-DIY.jpeg)