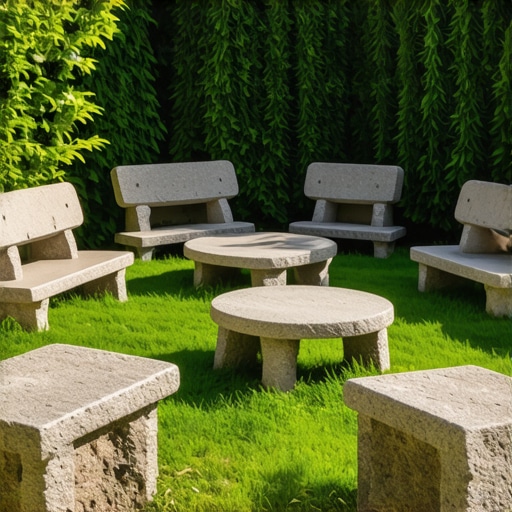
7 Stone Bench Designs for Quiet Corners
The Physics of Permanent Garden Seating
Proper garden design requires more than an aesthetic eye; it demands an understanding of soil bearing capacity and material science. I always drill into my new crew members: if you don’t fix the soil grading first, every plant you put in the ground is just expensive compost, and every stone bench you set is destined to tilt. Hardscaping success is 80 percent preparation and 20 percent placement. When we install a permanent bench, we aren’t just placing a seat; we are managing hydrostatic pressure and preventing frost heave. It starts with the excavation. You cannot set a 400-pound granite slab on top of loose topsoil and expect it to stay level through a single winter cycle. The ground will move. It will settle. The bench will fail. We excavate down to the sub-base, typically 6 to 10 inches depending on the local frost line and soil plasticity. If you are working in heavy clay, you need more drainage. If it is sandy loam, you have more leeway, but you still need a compacted foundation.
“Soil compaction is the most critical factor in hardscape longevity; without a stable subgrade, even the heaviest stone will migrate horizontally.” – Pennsylvania State Extension
1. The Dry-Stack Fieldstone Bench
The dry-stack fieldstone bench utilizes gravity and friction to create a structural seat by layering individual stones without mortar, allowing for natural drainage and movement. This design is the gold standard for landscaping in regions with high freeze-thaw cycles because the lack of rigid mortar prevents cracking when the ground expands. You need to select stones with at least two flat parallel faces. We call these ‘flats.’ Start with your largest, heaviest stones at the base. These are your ‘hearting’ stones. As you move up, stagger the joints. Never have a vertical seam running through more than two layers. This is basic masonry physics. The friction between the stones keeps the structure stable. We often backfill the center of the bench with 3/4-inch clean stone to allow water to pass through freely. It is a slow process. It requires patience. But it lasts a century.
2. Monolithic Granite Slabs
Monolithic granite slabs provide a minimalist, modern aesthetic by using a single, heavy piece of igneous rock supported by two stone pillars to create a high-mass seating surface. Granite is preferred for its compressive strength and low porosity, which makes it nearly impervious to water penetration and staining. When we source these, we look for slabs at least 4 inches thick. A thinner slab can snap under the stress of its own weight if the supports aren’t perfectly level. We set the pillars on 4-inch concrete footers or a 6-inch compacted 2A modified gravel base. The weight of the slab itself provides the stability. We use a thin bead of structural adhesive on the pillar tops to prevent any lateral shifting. It is heavy work. You need a skid steer or a tripod hoist. Don’t try to manhandle a 500-pound slab. Your back will regret it.
3. The Basalt Column Bench
Basalt column benches utilize the natural hexagonal geometry of volcanic rock to create an organic, architectural seating area that integrates seamlessly with garden design and xeriscaping. These columns are formed by cooling lava and are incredibly dense. To install these correctly, we often ‘plant’ the vertical columns 12 inches into the ground. We surround the buried portion with crushed stone and tamping it until it is rock hard. The horizontal seat is then notched into the vertical columns. This creates a mortise-and-tenon joint made of stone. It is structurally superior to any glued joint. Basalt holds heat. In the evening, it releases that thermal mass, making it a comfortable spot even as the temperature drops. We use it for ‘quiet corners’ where the stone acts as a sound baffle.
4. Gabion Basket with Limestone Seating
The gabion basket bench uses galvanized steel cages filled with limestone or river rock to create a porous, industrial-style base that facilitates excellent drainage and site stability. This is the ultimate solution for lawn care areas where drainage is an issue. The cage holds the stone in place, while the gaps between the stones allow water to flow through without building up pressure. We top these with a smooth-cut limestone cap. Limestone is softer than granite, making it easier to hone to a comfortable finish. However, limestone is alkaline. Over time, it can change the soil pH directly underneath it. If you have acid-loving plants like azaleas nearby, you need to monitor the soil. We always use a 4-ounce non-woven geotextile fabric under the gabion to prevent the stone from sinking into the subgrade.
How deep should a stone bench footer be?
For a permanent stone bench, the footer depth should extend below the local frost line or a minimum of 6 inches into a compacted gravel base to prevent shifting. In northern climates, this may require excavating 12 to 18 inches to ensure the structure remains level during the winter. Using 3/4-inch modified gravel ensures the base can be compacted to a high PSI, providing a stable platform that resists the vertical movement of freezing groundwater.
5. Carved Sandstone Blocks
Carved sandstone blocks offer a rustic, chunky aesthetic with high thermal mass, making them ideal for traditional hardscaping projects that prioritize natural textures and soft edges. Sandstone is sedimentary. This means it has layers. You must ensure the ‘bedding plane’ of the stone is horizontal. If you stand a sandstone block on its side with the layers vertical, water will get between the layers, freeze, and exfoliate the stone. It will peel like an onion. We specify ‘quarry-run’ sandstone for these benches. The surface is often finished with a bush-hammer to provide grip. It stays cool in the summer and warm in the winter. It is a living stone. Moss will grow on it if the corner is shaded enough. That is not a failure; it is a feature.
6. Flagstone Tiers for Sloped Corners
Flagstone tiered benches function as small retaining walls that provide seating while simultaneously managing soil grading and erosion on sloped garden sections. When we have a quiet corner on a hill, we don’t just dig a hole. We build a terrace. We use heavy flagstones, usually 2 to 3 inches thick, and we ‘tie’ them back into the slope. Every second layer should have a ‘deadman’ stone that extends back into the earth to anchor the bench. This prevents the weight of the hill from pushing the bench forward. We use polymeric sand in the joints to prevent weed growth and ants from undermining the structure. It is a technical build. You need to calculate the angle of repose for the soil behind the bench. Don’t guess. Measure it.
7. Cast-in-Place Concrete with Stone Veneer
A cast-in-place concrete bench with a stone veneer provides the structural rigidity of reinforced concrete with the high-end appearance of natural landscaping materials. We use rebar—#4 grade—to reinforce the core. This is not DIY work. You need to build a form that can handle the lateral pressure of wet concrete. Once cured, we apply a natural stone veneer using high-bond mortar. This gives you the look of a solid stone block but with the internal strength of an engineered bridge. It is the best choice for high-traffic areas or where the bench must also act as a structural barrier. We always include a 2 percent slope on the seat. This ‘pitch’ ensures water runs off the back rather than pooling in the center. Standing water is the enemy of stone.
“A retaining wall doesn’t fail because of the stone; it fails because of the water trapped behind it.” – Hardscape Engineering Axiom
What is the best stone for a garden bench?
The best stone for a garden bench is granite or basalt due to their high density, low water absorption rates, and resistance to environmental weathering. These stones provide the compressive strength needed for long-term structural integrity while requiring minimal maintenance compared to more porous sedimentary rocks like sandstone or certain limestones.
Comparison of Stone Materials for Bench Construction
| Stone Type | Density (lb/ft3) | Porosity | Durability Rank | Best Use Case |
|---|---|---|---|---|
| Granite | 165-175 | Very Low | 1 | Modern, clean lines, maximum longevity |
| Basalt | 180-190 | Low | 1 | Organic, vertical interest, heat retention |
| Limestone | 150-160 | Medium | 3 | Soft textures, traditional gardens |
| Sandstone | 140-150 | High | 4 | Rustic, textured, moss-friendly sites |
| Fieldstone | Varies | Low-Med | 2 | Naturalistic, dry-stack walls |
Technical Installation Checklist
- Site Evaluation: Check for underground utilities via 811 before any excavation.
- Excavation: Remove all organic matter (grass, roots) down to the mineral soil.
- Base Prep: Install 4-6 inches of 2A modified gravel in 2-inch lifts, compacting each lift.
- Compaction: Use a plate compactor until the base ‘rings’ or the machine bounces.
- Leveling: Use a 4-foot level to ensure the base is flat, with a slight pitch for drainage.
- Setting: Place stones using mechanical advantage or a crew; avoid dragging across the base.
- Finishing: Apply stone sealer to porous materials or fill joints with polymeric sand.
Landscaping is a game of inches and pounds. If you skip the compaction, your bench will tilt. If you ignore the drainage, it will heave. Treat your garden bench like a piece of civil engineering. Build it once. Build it right. Your quiet corner deserves a foundation that doesn’t quit. Don’t be the contractor I have to follow to fix a sinking mess. Respect the stone and respect the soil. The physics don’t lie.