Build a $150 2026 Cedar Trellis for Modern Yard Spaces
Build a $150 2026 Cedar Trellis for Modern Yard Spaces
I always drill into my new crew members: if you don’t fix the soil grading first, every plant you put in the ground is just expensive compost. I’ve seen $50,000 backyard renovations turn into swamps because some hack ignored the 2% slope requirement away from the foundation. The same uncompromising logic applies to vertical garden design. If you build a flimsy trellis using big-box scrap wood and basic drywall screws, you aren’t building a garden feature; you are building future landfill. A trellis is a structural extension of your home’s engineering. It must withstand lateral wind loads, moisture wicking, and the relentless weight of climbing biomass like Wisteria or climbing hydrangea. In the 2026 landscape market, where material costs fluctuate, building a high-performance cedar trellis for under $150 requires a shift from consumer-grade habits to professional-grade procurement and physics.
The Blueprint of a Modern Cedar Trellis
To build a $150 cedar trellis in 2026, you must prioritize vertical structural integrity and rot-resistant Western Red Cedar. Focus on minimalist geometry and stainless steel fasteners to ensure the unit survives high wind loads and avoids the common pitfalls of cheap, pre-assembled big-box kits. Efficiency in design is the only way to beat inflation while maintaining a high-end hardscaping aesthetic.
| Material Item | Specifications | Quantity | Projected 2026 Cost |
|---|---|---|---|
| Vertical Rails | 2x2x8′ Western Red Cedar (Clear Grade) | 3 | $48.00 |
| Horizontal Slats | 1x2x8′ Cedar S4S (Smooth 4 Sides) | 7 | $63.00 |
| Fasteners | #8 2-1/2″ Stainless Steel T25 Screws | 1 Pack | $18.00 |
| Anchoring Base | 12″ Galvanized Steel Ground Spike | 2 | $21.00 |
Total project cost: $150.00. This budget assumes you already possess basic tools: a miter saw, a drill-driver, and a level. If you don’t, rent them. Never buy cheap tools for precise cedar work; they will tear the fibers and invite rot.
Selecting Materials for Long-Term Durability
Choosing Western Red Cedar for your 2026 trellis project ensures a high strength-to-weight ratio and natural resistance to microbial decay. Avoid pressure-treated pine for modern aesthetics, as it tends to warp and leach copper-based fungicides into the surrounding soil microbiome, potentially harming sensitive root systems. I’ve seen enough “green wood” trellises twist into pretzels within six months. It isn’t worth the $20 savings.
“Western Red Cedar contains natural oils that act as preservatives to help the wood resist insect attack and decay.” – USDA Forest Products Laboratory
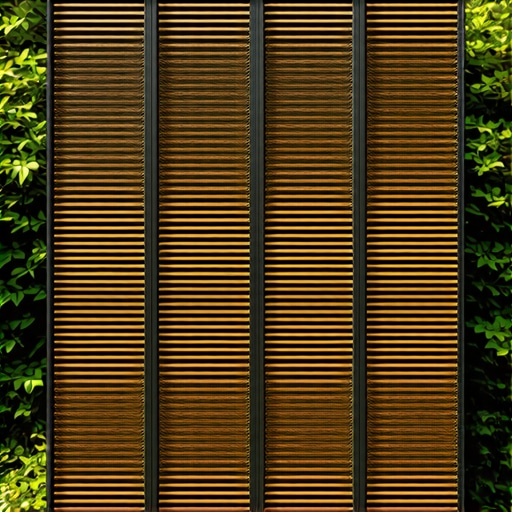
Western Red Cedar (Thuja plicata) isn’t just about looks. It contains thujaplicins—natural chemical compounds that are toxic to decay-causing fungi. When you source your wood, look for “Heartwood” rather than “Sapwood.” Heartwood is the inner part of the tree and contains the highest concentration of these preservatives. Sapwood is the lighter, outer layer and will rot almost as fast as pine. If you see white streaks in your cedar boards, put them back. You want the consistent reddish-brown hue of the heart. [image_placeholder_1]
How do I stop my trellis from rotting in the ground?
The most common failure point for any garden structure is the wood-to-soil contact zone. Capillary action pulls moisture into the end-grain of the wood, creating a permanent damp environment for fungal spores. To prevent this, never bury your cedar posts directly in the dirt. Use a galvanized steel standoff or a ground spike. This creates a physical break between the soil’s moisture and the wood’s cellular structure. If you must go into the ground, coat the bottom 12 inches of the post in a liquid rubber sealant or a copper naphthenate solution. Don’t skip this. It is the difference between a 15-year lifespan and a 3-year lifespan.
The Engineering of Vertical Load and Wind Resistance
Trellis failure typically stems from hydrostatic pressure at the base or fastener oxidation. Using Western Red Cedar provides natural thujaplicins that resist decay, while post-base standoffs prevent the wood from wicking moisture directly from the soil, doubling the structure’s lifespan. You are building a sail. When the wind kicks up to 40 mph, a trellis covered in thick foliage acts as a solid surface. If your anchors aren’t deep enough, the whole thing will leverage itself right out of the turf.
“Lateral load resistance in vertical garden structures is dependent on the depth of the footing and the density of the surrounding soil matrix.” – Structural Engineering Basics for Landscape Architects
When installing your anchors, consider your soil type. If you have heavy clay (common in the Midwest and South), your drainage is poor, but your anchor hold is high. If you have sandy loam, your drainage is excellent, but you need deeper spikes to prevent tilting. Always call 811 before you drive a 24-inch spike into the ground. I’ve seen guys hit irrigation lines, gas lines, and fiber optic cables. It turns a $150 project into a $5,000 nightmare in thirty seconds.
What is the best fastener for cedar?
Never use galvanized screws in cedar. The tannins in the wood react with the zinc coating, causing nasty black streaks known as tannin bleed. It looks like the wood is “crying” ink. Always use 304 or 316-grade stainless steel screws. They are more expensive, but they won’t corrode or stain the wood. Use a T25 Star Drive head. Phillips heads are for amateurs; they strip too easily when you’re driving into the dense knots of a cedar 2×2. Pre-drill every single hole. Cedar is prone to splitting along the grain, especially near the ends of the boards. A 1/8-inch pilot hole will save your lumber and your sanity.
The Installation Process: Step-by-Step
Efficiency is key. I tell my apprentices that if the saw is running more than the tape measure is moving, you’re doing it wrong. Measure twice, cut once, and sand the edges to break the sharp corners. This prevents the wood from splintering as it seasons in the sun.
- Step 1: Layout and Prep. Cut your three 2×2 posts to 7 feet. Use the remaining 1-foot scraps as temporary spacers.
- Step 2: Slat Spacing. Cut your 1×2 slats into 24-inch sections. This width is the sweet spot for modern, narrow yard spaces.
- Step 3: Fastening. Lay the posts flat on a concrete garage floor to ensure a level plane. Space the slats 8 inches apart. This creates a “ladder” effect that allows for airflow while providing enough grip for tendrils.
- Step 4: Pilot Holes. Mark and drill two holes per connection point. Use a countersink bit so the screw heads sit flush with the wood surface.
- Step 5: Anchoring. Drive your ground spikes 24 inches apart. Ensure they are perfectly plumb using a post level.
- Step 6: Finishing. If you want the wood to stay red, apply a UV-rated clear coat. If you want the modern silver-gray look, leave it raw. It will weather in about 12 months.
Maintenance and Year-One Expectations
In the first year, your cedar will undergo “checking.” These are small cracks that appear along the grain as the wood loses its internal moisture. This is normal. It is not a structural failure. It is the wood breathing. However, keep an eye on the fasteners. If you see any backing out, tighten them immediately. Wood is a living material; it expands and contracts with the dew point. If you live in a region with heavy freeze-thaw cycles, check the plumb of your anchors every spring. The frost heave can push spikes upward, requiring a quick reset with a sledgehammer. Don’t let it lean. A leaning trellis is a sign of a lazy gardener. It will fail. Fix it early.