
Build a $300 2026 Stone Path with Sand Joint Edging DIY
Build a $300 Stone Path: Professional Hardscape Engineering for the 2026 Homeowner
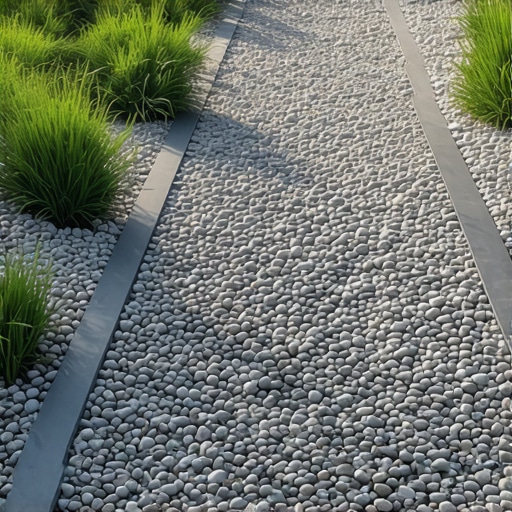
Building a permanent stone path for under $300 requires more than just buying rocks; it demands an understanding of soil mechanics, hydrostatic pressure, and compaction ratios. By 2026, material costs for high-end hardscaping have remained volatile, making efficiency the primary tool for the DIYer. You cannot afford to waste stone or buy unnecessary chemicals. This guide focuses on the Blueprint B: Ground-Up Build approach, treating your backyard walkway like a civil engineering project rather than a weekend hobby.
The Engineering Logic of a Budget Stone Path
A $300 stone path is achieved by optimizing local material sourcing, utilizing compacted sub-bases, and implementing sand joint edging to manage drainage and shifting. Success depends on achieving a 95% Standard Proctor Density in your subgrade to prevent the stones from sinking or heaving during freeze-thaw cycles. Do not skip the base. It is the only thing keeping your investment from becoming a trip hazard.
The Hardscape Autopsy: Lessons from a $30,000 Failure
I recently got called out to tear up a $30,000 patio that was sinking because the previous contractor ignored the coefficient of friction between the subgrade and the bedding layer. The homeowner was devastated. The culprit? They used rounded pea gravel as a base. It acts like ball bearings. Every time someone walked on it, the pavers shifted 2 millimeters. Within three years, the entire structure was a bowl. For your $300 path, we are using angular crushed stone dust or modified gravel. It locks together. It stays put. If you do not fix the soil grading first, every plant or stone you put in the ground is just expensive compost. Don’t be the guy who builds on a marshmallow foundation. Hardscaping is 80% what you don’t see. Dig deep. Pack it tight.
“A retaining wall or stone path doesn’t fail because of the stone; it fails because of the water trapped behind or beneath it.” – Hardscape Engineering Axiom
Material Science: Sourcing and Selection
To stay under the $300 mark in 2026, you must buy in bulk. Avoid the bagged goods at the big-box stores. One bag of stone dust is $7. A ton of it at the quarry is $35. Do the math. You need ASTM C33 concrete sand or screened limestone fines for your joints. These materials provide the necessary interlocking shear strength. The stones themselves should be flagstone remnants or reclaimed pavers, often found for free or cheap on local marketplaces if you have the muscle to move them.
| Material | Purpose | Est. Cost (2026) |
|---|---|---|
| Crushed 2A Modified | Base Stability | $45 / Ton |
| Limestone Screenings | Beding Layer | $40 / Ton |
| Flagstone (Remnants) | Walking Surface | $150 – $200 |
| Geotextile Fabric | Soil Separation | $15 |
[image_placeholder_1]
Step-by-Step Installation: The Subgrade Protocol
Follow these steps exactly. No shortcuts. Your back will hurt, but your path will last twenty years.
- Excavation: Dig to a depth of 6 inches. Use a flat-head shovel to keep the floor level.
- Soil Compaction: Use a hand tamper. The soil should be so hard that a 200lb man leaves no footprint.
- Geotextile Layer: Lay down a non-woven fabric. This prevents the soil from pumping up into your gravel.
- Base Layer: Add 3 inches of 2A modified stone. Wet it slightly. Tamp until the tamper bounces off the surface.
- Bedding Sand: Add 1 inch of sharp sand. Do not walk on it after screeding.
- Stone Setting: Place your stones. Use a rubber mallet. Level each stone individually.
- Joint Filling: Sweep in polymeric sand or limestone fines. Vibrate the stones to settle the dust.
How much modified gravel do I need for a path base?
To calculate your needs, multiply the length x width x depth (in feet) and divide by 27 to get cubic yards. Most local quarries sell by the ton. One cubic yard of crushed stone weighs approximately 1.4 tons. For a 20-foot path that is 3 feet wide with a 4-inch base, you need roughly 1.1 tons of material. Always round up by 10% for compaction loss. Don’t guess. Measure.
What is the best sand for stone joints?
For a path on a budget, washed concrete sand is superior to play sand. Play sand is rounded and will wash away in the first rain. Concrete sand is angular and locks together under pressure. If you have an extra $30, polymeric sand is the gold standard as it contains binders that harden when wet, preventing weed growth and ant hills. It is worth the upgrade.
“Proper sub-base preparation is the single most critical factor in the longevity of segmental pavement systems.” – Penn State Agricultural Extension
Soil Physics and Drainage
Water is the enemy. In 2026, we are seeing more extreme weather events and heavy localized downpours. Your path must have a cross-slope of 2%. That means for every foot of width, one side is a quarter-inch lower than the other. This prevents water from pooling in the center. If water sits under your stones, it will saturate the subgrade, turn the soil to mud, and your stones will tilt. It is physics. You cannot argue with gravity. Use a 4-foot level and a shim to check your pitch constantly. It should look flat to the eye but behave like a slide for water. Ground-level drainage is not an option; it is a requirement. If you ignore the hydrostatic pressure building up in your soil, the earth will eventually reclaim your work. Keep the water moving. Keep the base dry. Dig once. Do it right. Build it for the next decade, not just the next season.

![Build a $200 2026 Gravel Path with Brick Edging [Quick DIY]](https://lawnmajesty.com/wp-content/uploads/2026/07/Build-a-200-2026-Gravel-Path-with-Brick-Edging-Quick-DIY.jpeg)