
Build a $150 2026 Cedar Garden Border for Bedding Edge DIY
The Engineering of a Durable Garden Edge
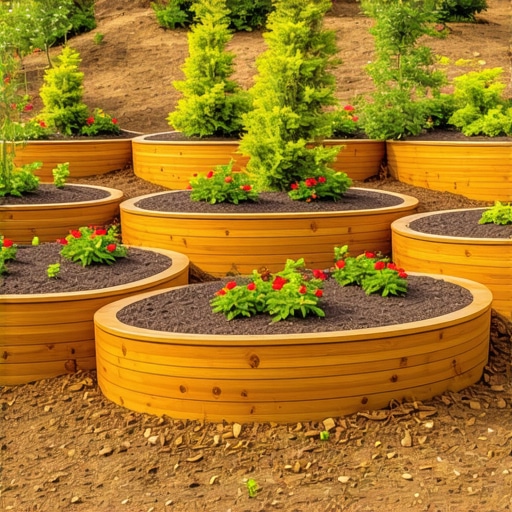
A professional cedar garden border requires Western Red Cedar heartwood, galvanized timber screws, and a compacted aggregate base to prevent rot and frost heave. By following these engineering standards, a homeowner can install a durable $150 bedding edge that outlasts cheap plastic alternatives and manages soil retention effectively. Most DIY attempts fail within twenty four months because they ignore the fundamental laws of moisture migration and soil pressure. I always drill into my new crew members: if you don’t fix the soil grading first, every plant you put in the ground is just expensive compost. You cannot simply slap wood onto dirt and expect it to stay level or intact through a freeze-thaw cycle. I have seen countless $5,000 perennial beds ruined because the edging acted like a dam, drowning the root zones during a wet spring. We are building a system, not a decoration.
“Wood used in ground contact must possess natural decay resistance or be treated to meet AWPA standards, though Western Red Cedar’s heartwood naturally contains thujaplicins which act as organic fungicides.” – Wood Science Technical Manual
Why Cedar Selection Matters for 2026 Standards
Choosing the right grade of cedar is the difference between a fifteen year lifespan and a three year failure. You want heartwood, which is the dark, dense center of the tree. The lighter colored sapwood is basically candy for termites and fungi. For a $150 budget, we focus on 2×4 or 2×6 dimensional lumber sourced from local sawmills rather than the kiln-dried, warped scraps found at big-box retailers. We are looking for structural integrity and a high concentration of extractives. Do not buy the ‘appearance grade’ boards that are thin and flimsy. You need mass to resist the lateral pressure of the soil when it saturates and expands.
The $150 Cedar Border Material Breakdown
| Material Item | Specifications | Estimated Cost |
|---|---|---|
| Western Red Cedar | 2x4x8 Rough Sawn (8 units) | $95.00 |
| Timber Screws | 3-inch Ceramic Coated (50ct) | $15.00 |
| Crushed Stone Base | ASTM D448 No. 57 (4 bags) | $20.00 |
| Geotextile Fabric | Non-woven 4oz (Small roll) | $20.00 |
The Blueprint: Step-by-Step Installation
First, we excavate a trench exactly four inches wider than our lumber. Depth is critical. You are not just burying wood; you are creating a drainage channel. Dig down five inches. Line this trench with your geotextile fabric. This prevents the native soil from migrating into your stone base. Fill with two inches of crushed stone and compact it until a hand tamper bounces off the surface. If it is soft, your border will sag. Lay your cedar boards on this stone bed. Use a four foot level. If you are off by even a quarter inch, the eye will catch it over a twenty foot run. Fasten the joints using a lap joint or a simple butt joint reinforced with a cedar stake on the interior side. Use the ceramic coated screws. Zinc will react with the cedar tannins and leave ugly black streaks down your wood in six months. It looks amateur. Avoid it.
“A retaining wall or garden border doesn’t fail because of the stone or wood; it fails because of the water trapped behind it.” – Hardscape Engineering Axiom
How deep should a garden border be buried?
A garden border should be buried two to three inches below the finished grade to prevent grass roots from creeping underneath while leaving enough height to contain mulch. This depth also ensures the structural base of crushed stone provides adequate drainage to prevent wood rot and soil heave during winter.
- Mark the Line: Use a braided mason line, not a garden hose, for perfectly straight runs.
- Trenching: Use a square-nose spade for clean vertical walls.
- Compaction: Every two inches of fill must be tamped.
- Leveling: Check level every four feet.
- Backfilling: Use 3/4 inch clean stone against the wood, then top with mulch.
What is the best wood for a garden edging?
The best wood for garden edging is Western Red Cedar heartwood or Black Locust due to their high concentrations of natural preservatives. These species resist subterranean termites and basidiomycete fungi without leaching harmful chemicals into the soil, making them safe for vegetable beds and high-end landscaping projects.
Managing Hydrostatic Pressure and Drainage
Soil is heavy. Wet soil is a monster. When it rains, the water builds up behind your cedar border. If you do not have that crushed stone base we talked about, that pressure will push your boards outward. You will end up with a bowed, leaning mess. By using the stone and fabric, you allow the water to move vertically through the profile and away from the wood. This keeps the wood dry and the line straight. I see guys skip the stone to save twenty bucks. They end up spending $300 and a weekend fixing it two years later. It is a fool’s errand. Do it right the first time. The wood should never be in direct contact with the dirt. Ever. That is the golden rule of hardscaping. Use a 1/8 inch gap at the butt joints to allow for linear expansion. Wood moves. Respect that movement or it will snap your fasteners. It is simple physics. If you follow this protocol, your $150 investment will look like a $1,500 professional install and last through the decade. Keep your tools sharp and your levels true.


![Build a $100 2026 Pea Gravel Fire Pit [Weekend DIY]](https://lawnmajesty.com/wp-content/uploads/2026/05/Build-a-100-2026-Pea-Gravel-Fire-Pit-Weekend-DIY.jpeg)