How to Stain 2026 Concrete Pavers to Look New
The sight of a once-regal $40,000 hardscape fading into a chalky, sun-bleached mess is enough to make any professional foreman grit their teeth. Concrete pavers are not static objects; they are porous, cementitious sponges that interact with UV radiation and moisture every single day. If your patio looks like a graveyard of gray stones, you are likely dealing with aggregate exposure and pigment loss. You do not need to rip them out. You need a forensic approach to staining that addresses the chemical profile of the concrete matrix.
The Ghost of a Dead Patio: Why Your Pavers Look Like Chalk
To restore **faded concrete pavers** to a like-new appearance, you must utilize a **high-penetration translucent stain** rather than a topical paint. This process involves deep-cleaning with a **high-PSI pressure washer**, followed by a **chemical etch** to open the concrete’s pores for maximum pigment absorption and long-term durability. Most homeowners fail because they treat the stain like paint, which creates a film that eventually peels and flakes under the pressure of the freeze-thaw cycle.
I recently got called out to tear up a $30,000 patio that was sinking because the previous contractor skipped the base-layer compaction. But the real insult was the surface. The homeowner had tried to ‘refresh’ the pavers with a big-box store concrete paint. Within six months, the moisture trapped under the pavers pushed that paint off in giant, ugly sheets. It looked like a snake shedding its skin. I had to explain that you cannot suffocate concrete. If the moisture cannot escape through the surface via capillary action, it will find a way to blow the coating off. We ended up excavating the whole mess. It was a total failure of engineering and chemistry. I see it every week. Hacks think they can hide bad work with a shiny topcoat. They are wrong. It will fail every time.
The Chemical Reality of Concrete Degradation
Concrete pavers are composed of a mixture of Portland cement, aggregates, and pigments. Over a decade, the top layer of cement paste wears away, exposing the sand and stone underneath. This is why pavers look different when they are wet; the water temporarily fills the microscopic voids, mimicking the original saturated look. Staining is the process of permanently re-introducing that pigment into the top 2-3 millimeters of the paver.
“A retaining wall doesn’t fail because of the stone; it fails because of the water trapped behind it.” – Hardscape Engineering Axiom
This same logic applies to staining. If you do not manage the moisture levels before, during, and after the staining process, the pigment will never bond. You are looking for a chemical marriage, not a temporary coat of makeup.
The Porosity Test: Is Your Paver Even Stainable?
Before you spend a dime on stain, you need to check the porosity. Pour a cup of water on a few different pavers. If the water beads up, you have a surviving sealer that will block any new stain. If it soaks in within 30 seconds, the concrete is hungry. If it takes minutes to soak in, you have compaction or glazing issues that require a heavy acid etch. Do not skip this. If the water won’t go in, the stain won’t either. It is that simple.
The Professional Restoration Protocol
Success in hardscaping is 90% preparation and 10% application. If you spend less than two days cleaning, you are doing it wrong. The 2026 standard for paver restoration requires a sterile surface. You are fighting oils, tannins from leaves, and efflorescence, which is that white, powdery salt that migrates to the surface.
“Efflorescence is the migration of a salt to the surface of a porous material, where it forms a coat. The process involves the dissolved salt being pushed out by water through the capillary pores of the concrete.” – Penn State Agricultural Extension
Step 1: The High-Pressure Debridement
Use a pressure washer with a minimum of 3,500 PSI and a 15-degree tip. You aren’t just rinsing dirt; you are stripping the dead cement paste. Move in a consistent, overlapping pattern. Be careful not to blow out all the joint sand yet, but focus on the face of the stone. If you see ‘cream’ coming off, that is good. You are exposing the pores.
Step 2: The Acid Etching Phase
Mix a solution of muriatic acid and water at a 1:10 ratio. Always add acid to water, never water to acid. This is high school chemistry, but people still mess it up. Scrub this into the pavers with a stiff-bristled brush. It will fizz. That fizzing is the acid reacting with the calcium carbonate in the concrete, eating away the glaze. Rinse it three times. The pH of the surface must be neutral before the stain hits it. If the surface is too acidic, the stain will blotch.
Step 3: The 48-Hour Dry Rule
The pavers must be bone dry. Not ‘looks dry,’ but ‘chemically dry.’ If there is moisture in the pores, the stain will be diluted or blocked. Use a moisture meter if you have one. You are looking for less than 5% internal moisture. If it rains, the clock restarts. Don’t be impatient. Patience is the difference between a 10-year finish and a 1-year disaster.
Material Comparison for Paver Staining
| Stain Type | Mechanism | Durability | Best Use Case |
|---|---|---|---|
| Water-Based Acrylic | UV Stable Pigments | 3-5 Years | Residential Patios |
| Solvent-Based Dye | Molecular Penetration | 7-10 Years | High-Traffic Driveways |
| Acid Stain | Chemical Reaction | Permanent | Deep Color Variation |
The Application Strategy
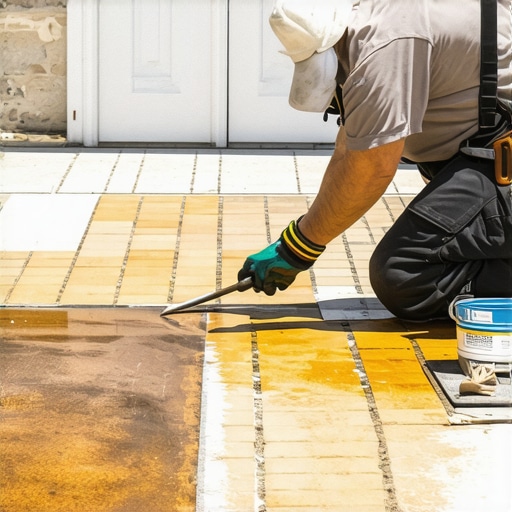
When applying the stain, use a high-volume, low-pressure (HVLP) sprayer. You want a fine mist that saturates the surface without pooling. If you see puddles, back-roll them immediately with a 3/8-inch nap roller. If you let a puddle dry, you will have a dark spot that will never go away. Work in sections. Follow the natural joints of the pavers so you don’t have ‘lap marks’ where two sections of wet stain meet. One coat usually provides a translucent ‘old world’ look. A second coat will make it look like a new factory finish.
Required Tool Checklist
- 3,500+ PSI Pressure Washer
- Muriatic Acid (for etching)
- Stiff-bristled deck brush
- HVLP Sprayer with conical tip
- Solvent-resistant roller and tray
- Personal Protective Equipment (Respirator, gloves, goggles)
How long does concrete paver stain last?
A professionally applied, solvent-based paver stain typically lasts between 5 and 10 years depending on UV exposure and foot traffic. High-traffic areas like driveways will require a maintenance coat of sealer every 3 years to protect the pigment from mechanical wear. If you use a cheap water-based product, expect to be back out there in 24 months.
Can you stain pavers a lighter color?
No. Concrete staining is a subtractive or additive process, not a covering one. You can go from a light gray to a dark charcoal or a brick red, but you cannot go from a dark brown to a light tan using translucent stains. For that, you would need a solid-color ‘opaque’ stain, which I generally advise against because it looks like plastic and hides the natural texture of the stone.
Sealing: The Final Armor
Once the stain has cured for 24 hours, you must lock it in. I prefer a breathable, silane-siloxane sealer for most residential jobs. It allows moisture vapor to escape while preventing liquid water from entering. If you want the ‘wet look,’ you can use a film-forming acrylic, but be warned: it will make the surface slippery. If you are doing a pool deck, add an anti-skid grit to the sealer. Don’t skip the sealer. The sun will eat your new pigment in two seasons without UV inhibitors. It is the cheapest insurance policy you will ever buy for your landscaping. Maintain the drainage. Keep the soil grading away from the patio. If water sits on the pavers, the sealer will blush white and ruin the look. Landscaping is about managing water. Control the water, and you control the project. It is hard work, but the results speak for themselves.
![Build a $200 2026 Gravel Path with Brick Edging [Quick DIY]](https://lawnmajesty.com/wp-content/uploads/2026/07/Build-a-200-2026-Gravel-Path-with-Brick-Edging-Quick-DIY.jpeg)