Fixing 2026 Retaining Wall Bulges Before They Collapse
The Visual Anatomy of a Failing Retaining Wall
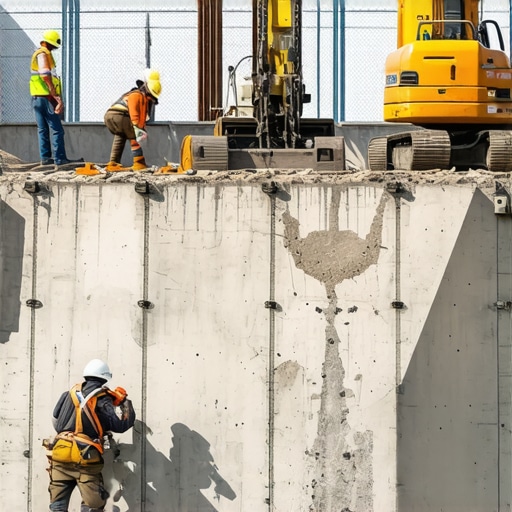
Identifying a retaining wall bulge requires a keen eye for lateral deflection, tilting stones, and separated masonry joints which signal that the internal hydrostatic pressure has surpassed the structure’s tensile strength. When a wall starts to ‘belly out,’ it is not a cosmetic issue; it is a structural warning that the coefficient of friction between the units and the soil surcharge is no longer in equilibrium. Fail to act, and gravity will finish the job. It will happen fast. Usually during a heavy rain. I recently got called out to tear up a $30,000 patio that was sinking because the previous contractor used native clay backfill instead of clean, angular stone. The wall was bowing so hard you could fit your fist in the gaps. They didn’t install a single foot of drainage pipe. That is not landscaping; that is negligence. We had to excavate the entire 100-foot run, clean the individual blocks, and start from the virgin subgrade. It was an expensive lesson for the homeowner in why the cheapest bid is often the most expensive. [IMAGE_PLACEHOLDER_1]
Why Hydrostatic Pressure is Your Wall’s Greatest Enemy
Hydrostatic pressure is the primary cause of retaining wall failure, occurring when water traps behind the wall, increasing the weight and lateral earth pressure against the masonry units or timber sleepers. For every inch of rain, thousands of pounds of pressure can build up if there is no escape route. You cannot fight physics. Water is heavy. It weighs 62.4 pounds per cubic foot. When your backfill is saturated, that weight pushes directly against your wall.
“A retaining wall doesn’t fail because of the stone; it fails because of the water trapped behind it.” – Hardscape Engineering Axiom
How much modified gravel do I need for a patio base?
To calculate the modified gravel base, multiply the square footage of the area by the depth of the base (minimum 6 inches for patios, 12 inches for walls) and divide by 27 to get cubic yards. Always add a 10% compaction factor to your final order to ensure you have enough material to reach 95% Standard Proctor Density. Using a plate compactor is mandatory. Hand tamping is a joke. If the tamper doesn’t bounce off the stone, it’s not ready.
The Forensic Autopsy: Diagnosing the Failure Point
Diagnosing a retaining wall bulge involves checking for clogged weep holes, soil migration through the filter fabric, and base settlement caused by improper subgrade compaction. You need to look at the toe of the wall. Is it kicking out? That’s a base failure. Is the middle bowing? That’s a lack of geogrid or deadman anchors. Is the top leaning? That’s usually poor drainage or an over-compacted backfill that pushed the wall out during installation.
| Material Type | Drainage Rating | Compaction Stability | Risk Level |
|---|---|---|---|
| Clean 57 Stone | Excellent | High | Very Low |
| CR6 / Modified | Moderate | Excellent | Low |
| Native Clay | Poor | Low | Critical |
| Sand | High | Low | Moderate |
Step-By-Step Remediation of a Bulging Wall
The remediation of a bulging retaining wall involves excavation of the backfill, straightening the courses, and installing a proper Schedule 40 PVC drainage system with perforated pipe and clean aggregate. You cannot just push the stones back. You have to remove the weight. First, dig out the soil at least 24 inches behind the wall. Second, inspect the geogrid. If it’s torn, replace it with biaxial geogrid pinned between the courses. Third, install a 4-inch perforated drain tile at the bottom of the wall, sloped to daylight. Fourth, backfill with clean 57 stone in 6-inch lifts, compacting each layer. This creates a vertical drainage chimney that keeps water away from the wall face. It must be clean stone. No fines allowed. Fines clog the pipe. Blockages lead to bulges. Keep it clean.
“Proper soil compaction is critical to the stability and longevity of any segmental retaining wall system.” – ICPI Technical Manual
How much does it cost to fix a leaning retaining wall?
Fixing a leaning retaining wall typically costs between $60 and $150 per square foot, depending on access for machinery, soil type, and the need for structural engineering seals. Costs increase significantly if the failed wall is supporting a swimming pool, driveway, or house foundation. Never cut corners on the repair. A second failure will cost triple. You will be paying for the demolition and the new build.
Essential Pre-Repair Checklist for 2026
- Verify utility markings via 811 before any excavation.
- Assess soil pH and moisture content to determine shear strength.
- Check local building codes for walls exceeding 36 or 48 inches in height.
- Inspect weep holes for signs of calcium efflorescence or silt.
- Measure the batter angle to ensure the wall is leaning into the hill.
Maintaining Structural Integrity Post-Repair
Long-term retaining wall maintenance requires monitoring surface drainage to ensure downspout runoff is directed away from the backfill zone and checking for sinkholes that indicate internal erosion. If you see a hole opening up behind your wall, the filter fabric has failed. Soil is washing out. This will lead to a void, then a bulge, then a collapse. Don’t wait. Fill the void with polyurethane grout or excavate and patch the fabric. Keep the grass cut. Don’t let woody brush or tree roots grow near the wall. Roots will pry the stones apart. It’s a slow-motion car crash. Stay ahead of it. Inspect after every major storm. Check the daylight end of your drainage pipe. If water isn’t coming out during a storm, the pipe is clogged. Clear it immediately. Your wall depends on it. “
![Fix Your 2026 Sinking Deck Post for Under $100 [DIY]](https://lawnmajesty.com/wp-content/uploads/2026/05/Fix-Your-2026-Sinking-Deck-Post-for-Under-100-DIY.jpeg)
![Build a $150 2026 Gravel Parking Pad [Weekend Fix]](https://lawnmajesty.com/wp-content/uploads/2026/05/Build-a-150-2026-Gravel-Parking-Pad-Weekend-Fix.jpeg)