How to Fix a Sinking Post on Your Wooden Fence
The Forensic Autopsy of a Sinking Fence Post
I recently got called out to tear up a $30,000 patio that was sinking because the previous contractor failed to account for the lateral load and soil displacement of a heavy cedar fence. The posts were leaning at a 15-degree angle, dragging the pavers down with them into a muddy grave. This wasn’t a material failure; it was an engineering failure. When a post sinks, you aren’t just looking at a crooked piece of wood; you are looking at a fundamental breakdown of the soil’s bearing capacity and a failure of the subgrade compaction. Don’t let a ‘mow-and-blow’ crew tell you that dumping a bag of dry concrete into a hole will fix it. It won’t. It will fail. Again. To fix a sinking fence post, you must excavate the failed footing, stabilize the subgrade with compacted modified gravel, and reset the post using a structural-grade concrete sleeve that extends below the local frost line to prevent future frost heave or soil displacement. This requires understanding the physics of the dirt beneath your boots.
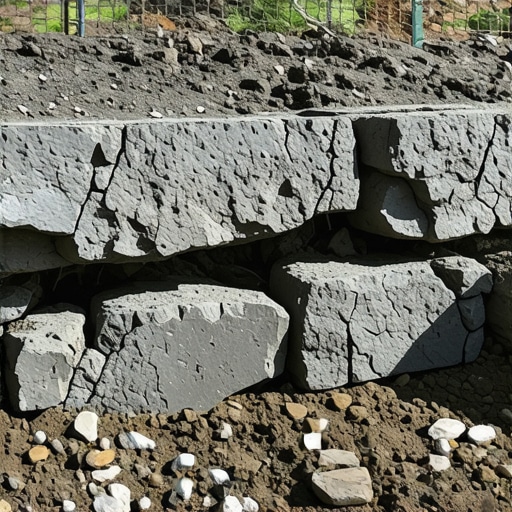
“A retaining wall or vertical structural member doesn’t fail because of the material; it fails because of the water trapped behind it or the lack of a proper granular base to distribute the load.” – Hardscape Engineering Axiom
The Physics of Why Your Post is Sinking
Your soil is not a solid mass. It is a collection of minerals, organic matter, air, and water. When you dig a hole, you disturb the ‘virgin’ or undisturbed soil. If you don’t compact the bottom of that hole, the weight of the fence and the concrete plug will compress the loose dirt over time. This is subsidence. In many cases, the sinking is caused by hydrostatic pressure. During heavy rains, water accumulates in the loose backfill around your post. If there is no drainage, the soil turns into a slurry, losing its shear strength. The post doesn’t just sink; it swims. In northern climates, the freeze-thaw cycle adds another layer of misery. If your footing isn’t below the frost line—typically 36 to 48 inches in most temperate zones—the expanding ice in the soil will literally jack the post out of the ground.
How deep should a fence post be to stop sinking?
To prevent sinking and lateral movement, a fence post should be buried to a depth of at least 1/3 to 1/2 of its above-ground height, ensuring the base of the footing sits on undisturbed soil or a compacted gravel pad below the frost line. For a standard 6-foot fence, this means a minimum depth of 36 inches. This depth is critical for creating a cantilever effect that can withstand wind loads and gravity. Anything less is just a temporary stake. Skip the shortcuts. Use a tape measure.
The Forensic Remediation Process
First, we have to perform the extraction. You cannot fix a sinking post by pouring more concrete on top of the old plug. That just adds more weight to a failing foundation. Use a high-lift jack or a post puller to remove the entire assembly, including the concrete ‘bell’ at the bottom. Once the hole is empty, you need to examine the soil. If you see gray, slimy clay, you have a drainage problem. If you see dry, sandy loam, you have a compaction problem. Most DIYers forget the scrub-and-scrape phase. You must scrape the sides of the hole to remove the loose ‘slough’ that fell in during excavation. This ensures your new concrete bonds with stable earth.
| Material | Stability Rating | Drainage Capacity | Recommended Use |
|---|---|---|---|
| Loose Backfill (Dirt) | Very Low | Poor | Never for structural support |
| Dry-Poured Concrete | Medium | Low | Temporary or light-duty only |
| Wet-Mixed 4000 PSI Concrete | Very High | None | Primary structural footings |
| 3/4-inch Modified Gravel | High | Excellent | Base layer for drainage and load distribution |
The “No-Rot” Engineering Method
The biggest enemy of a wooden post isn’t the soil; it’s the anaerobic environment created at the bottom of a concrete ‘bucket.’ If you wrap the bottom of your post in concrete without a drainage path, the post sits in a pool of trapped water. It will rot. To prevent this, we use the Gravel-Bottom Sleeve Method. Pour 6 inches of 3/4-inch crushed, washed stone into the bottom of the hole and compact it with a manual tamper. This provides a capillary break. The post should sit directly on this gravel, not on the concrete. Then, pour your wet-mixed concrete around the post, tapering the top of the concrete away from the wood to shed water. Use a bitumen-based sealant or a post-protector sleeve on the portion of the wood that meets the concrete-to-air interface. This is the decay zone. Protect it.
“The longevity of any timber structure in ground contact is directly proportional to the moisture management strategy employed at the soil-to-air transition point.” – USDA Forest Products Laboratory Manual
How much modified gravel do I need for a patio or fence base?
For a standard fence post hole (12 inches wide), you need approximately 0.4 to 0.5 cubic feet of gravel to create a solid 6-inch drainage base. For larger hardscape projects like a patio, you should calculate for a 6-inch base of 21A or modified crushed stone across the entire square footage, factored by a 20% compaction loss. Don’t eyeball it. Use a calculator. If you don’t have enough gravel, your base will fail under the first heavy frost.
Step-by-Step Remediation Checklist
- Extract the Failure: Pull the post and the old concrete. Don’t leave chunks behind.
- Deepen the Hole: Reach the frost line. In Georgia, it’s shallow; in Minnesota, it’s a deep dive. Know your zone.
- The Gravel Pad: Add 6 inches of crushed stone. Tamp it until the tamper bounces.
- Post Treatment: Apply a liquid wood preservative to the bottom 4 feet of the post.
- Plumb and Brace: Use two-way levels. Brace the post in four directions. Don’t trust your eyes.
- Wet-Mix Pour: Mix your concrete in a wheelbarrow to a ‘peanut butter’ consistency. Never pour dry mix into the hole.
- Crown the Finish: Slope the concrete 1 inch above grade to shed water away from the wood.
Maintaining the Structural Integrity
Once the post is set, the work isn’t done. The first 12 months are the settling period. You need to monitor the interface gap between the wood and the concrete. Wood shrinks. Concrete doesn’t. This creates a microscopic gap where water can enter. Every autumn, apply a high-quality exterior caulk to this gap to keep moisture out. If you see the soil around the base pulling away, backfill it with topsoil and seed to prevent water from pooling against the footing. Soil grading is your first line of defense. If the yard slopes toward your fence, you need a French drain or a swale to redirect that energy. You aren’t just a gardener; you are a water manager. Treat the yard like an engine. Keep it tuned. Keep it dry.

![Fix Cracked Driveways: 3 Cold-Patch Rules [2026 DIY]](https://lawnmajesty.com/wp-content/uploads/2026/06/Fix-Cracked-Driveways-3-Cold-Patch-Rules-2026-DIY.jpeg)