How to Build a Floating Deck Over an Old Concrete Pad
How to Build a Floating Deck Over an Old Concrete Pad
Building a floating deck over an existing concrete pad requires a stable, level foundation with a minimum 1/4-inch per foot slope to ensure proper drainage and prevent joist rot. By utilizing a sleeper system of pressure-treated lumber and moisture-resistant spacers, you can create a level outdoor living space that bypasses the need for deep post-hole excavation.
The Hardscape Autopsy: Why Most Over-Concrete Decks Fail
I recently got called out to tear up a $30,000 deck and patio combo that was sinking and smelling like a swamp because the previous contractor thought he could just slap 2x4s directly onto an old, cracked slab. He didn’t account for hydrostatic pressure or the fact that the concrete was pitching toward the house, not away from it. Within three years, the sleepers were mush, and the homeowner had a termite buffet under their feet. If you don’t address the sub-base drainage and the structural integrity of that concrete before you buy a single board, you aren’t building a deck—you’re building a rot-trap. I’ve spent 20 years fixing these ‘shortcuts.’ Don’t be the guy I have to charge double to demo next summer. You have to understand that concrete is a sponge; it holds moisture and leaches it directly into your framing unless you create a thermal and physical break. This is the intersection of hardscaping and civil engineering.
“A retaining wall or flatwork structure doesn’t fail because of the stone; it fails because of the water trapped behind or beneath it.” – Hardscape Engineering Axiom
Step 1: Assessing the Concrete Substrate and Grade
Before you even look at a miter saw, you need to check the slab’s integrity. A floating deck is only as good as the ground it sits on. Use a 10-foot straightedge and a level to check for low spots where water puddles. If you have standing water for more than 24 hours after a rain, that’s a drainage failure that will kill your garden design. You need to grind down high spots or use a self-leveling masonry compound designed for exterior use. Check the PSI of the concrete; if it’s crumbling into dust, you need to break it out and start with a modified gravel base. This is the landscaping reality: skip the prep, and the finish fails. Check for root girdling from nearby trees that might be lifting the slab. If a root is pushing up 4,000 pounds of concrete, your deck doesn’t stand a chance. Cut the root, install a root barrier, and then move forward. Don’t skip this.
How much modified gravel do I need for a patio base?
If you are replacing sections of the slab, you need a minimum of 4 to 6 inches of compacted 21A or 411 modified gravel. Calculate your square footage, multiply by the depth in feet, and then divide by 27 to get your cubic yardage. Always add 10% for compaction. The tamper should literally bounce off the compacted base when you’re done. If it feels soft, keep hitting it.
Step 2: Designing the Sleeper System and Airflow
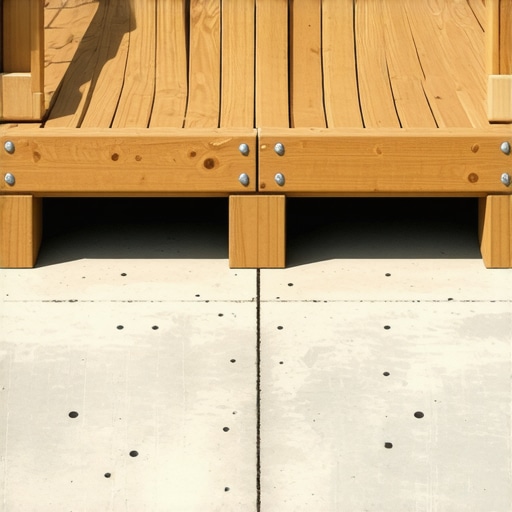
A sleeper system is a series of joists that lay flat or on edge directly over the concrete. However, they must never touch the concrete directly. Use plastic shims or rubber joist spacers every 12 inches to lift the wood at least 1/4 inch off the slab. This allows water to run underneath and provides critical ventilation. Airflow is the only thing that prevents the wood from reaching its fiber saturation point. Once wood stays above 20% moisture content, fungal decay begins. It will rot. Use pressure-treated lumber rated for ground contact (UC4A). Even though it’s technically ‘above’ the ground, the proximity to the concrete creates a micro-environment of high humidity.
| Material Choice | Projected Lifespan | Maintenance Requirement | Estimated Cost (sq/ft) |
|---|---|---|---|
| Pressure Treated Pine | 10-15 Years | Annual Sealing | $15 – $22 |
| Capped Composite | 25-30 Years | Soap and Water | $35 – $55 |
| Ipe / Exotic Hardwood | 40+ Years | UV Oil Bi-Annually | $60 – $90 |
“Wood in contact with concrete or masonry must be pressure-treated for Ground Contact to resist fungal decay and termites.” – International Residential Code (IRC) Section R317.1
Step 3: Installation and Fastening Protoco
Start by laying your outer rim joists. Use stainless steel wedge anchors to secure the sleepers to the concrete if you live in a high-wind zone, though a true floating deck often relies on its own weight and the friction of the spacers. Space your internal sleepers 12 inches on-center (OC) if you are using composite decking, or 16 inches OC for traditional wood. Use a laser level. The concrete is almost certainly not flat. You will need to shim almost every joist to get a perfectly level surface for your hardscaping project. Apply joist tape to the top of every sleeper. This prevents water from sitting in the screw holes, which is where 90% of joist rot begins. Don’t buy the cheap stuff. Get the high-butyl rubber tape. It’s a small price for 10 extra years of life.
Do I need a permit for a floating deck on concrete?
In most jurisdictions, a deck is considered ‘floating’ and doesn’t require a permit if it is less than 30 inches above grade and is not attached to the house. However, always check your local municipal drainage codes and HOA regulations. Some areas count a deck as ‘impervious surface,’ which can affect your lawn care and runoff management plans. 811 is your best friend; even if you aren’t digging deep, know where those lines are.
Step 4: Decking and Final Details
When laying your deck boards, leave a 3/16-inch gap between boards. This isn’t just for water; it’s for debris management. Pine needles and maple seeds will clog smaller gaps, creating a wet mulch that rots the joists from the top down. If you’re doing garden design around the edges, don’t bury the deck in mulch. Keep a 2-inch air gap between the deck and any soil or mulch beds. This prevents moisture wicking and keeps the perimeter joists dry. Finish the edges with a fascia board, but make sure the fascia doesn’t touch the ground or the concrete. It should hang just a 1/2 inch above the slab to allow drainage. If you block the water’s exit path, you’ve built a dam. Damp wood is dead wood.
- Use 305 or 316 grade stainless steel screws for all connections.
- Ensure the concrete has a radon and vapor barrier if it’s an enclosed space.
- Double-check every 4th board for squareness to the house.
- Apply a penetrating oil stain to the underside of wood boards before installing.
- Install a drip edge if the deck meets a transition to a lawn.
Year One: What to Expect
Your deck will move. As the seasons change from the freeze-thaw cycles of winter to the humidity of summer, the wood will expand and contract. This is why we use hidden fasteners or high-quality screws—to allow for that movement without snapping the heads off. If you notice boards ‘cupping,’ it’s usually because the underside is wetter than the topside. This proves your ventilation is insufficient. If that happens, you might need to install a small vent or increase the gap at the edges. Proper landscaping isn’t a ‘set it and forget it’ deal; it’s an ongoing relationship with the biology of your yard. Keep the space under the deck clear of leaves. A leaf blower is your best tool here. Blow out the gaps twice a year. Keep it dry, keep it clean, and it will last a generation.