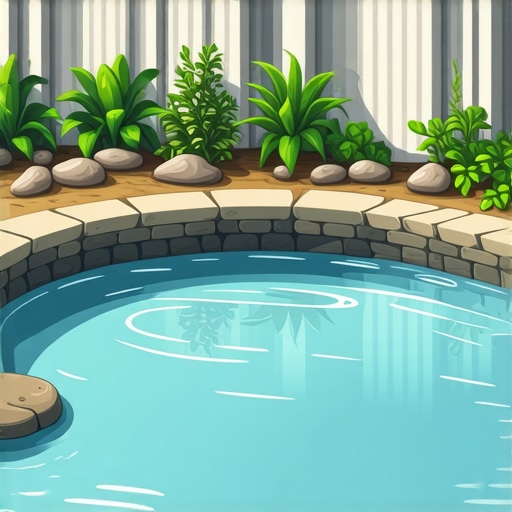
3 Mistakes Most Homeowners Make When Installing a Pond
The Forensic Autopsy of a DIY Pond Failure
I recently got called out to tear up a $30,000 patio and pond installation that was literally floating out of the ground. The homeowner had hired a general contractor who thought a pond was just a hole with a plastic bag in it. Within eighteen months, the hydrostatic pressure from a high water table had pushed groundwater under the liner, creating ‘whales’ or giant air bubbles that forced the stone edging into the depths. The water was a stagnant, pea-soup green because the nitrogen cycle was non-existent. It smelled like sulfur and failure. This is what happens when you ignore the civil engineering and biology required for aquatic systems. You cannot just dig a hole and hope for the best. Landscaping is physics. If you do not respect the grade, the water will win every single time. It is a brutal lesson to learn at that price point. I had to bring in a mini-excavator just to undo the mess before we could even talk about a proper install. This article diagnoses exactly why these projects fail and how to build a system that lasts for decades rather than seasons.
Mistake 1: Improper Siting and Drainage Geometry
To avoid pond failure, you must site the feature at the highest point of the manageable grade to prevent surface runoff from entering the system. When you place a pond in a low spot, every heavy rain carries lawn chemicals, sediment, and organic debris directly into your water, causing catastrophic nitrate spikes and anaerobic sludge buildup. This is not just an aesthetic issue: it is a chemical war your pump cannot win.
How do I determine the best location for a backyard pond?
Identify the natural drainage patterns of your lot during a rainstorm and avoid any area where water collects or flows. You need at least six hours of sunlight for aquatic plants but must balance this against the heat load that accelerates algae growth. Avoid proximity to deciduous trees like Maples or Oaks. Their root systems will eventually puncture even the best 45-mil EPDM liners, and the leaf drop will overwhelm your skimmer within forty-eight hours of autumn. Most homeowners choose the ‘lowest spot’ because it looks natural. That is a mistake. You want to control the water entering the pond, not let the yard dictate the chemistry. Use a transit level to ensure your pond edges are perfectly level. A one-inch deviation across a ten-foot span will reveal the black liner on one side, ruining the illusion and exposing the material to UV degradation. UV rays are the silent killer of PVC and cheap liners. They make the material brittle. It will crack. Use a laser level. Don’t guess.
“A retaining wall doesn’t fail because of the stone; it fails because of the water trapped behind it.” – Hardscape Engineering Axiom
| Liner Material | Typical Lifespan | Puncture Resistance | Best Use Case |
|---|---|---|---|
| PVC (20-30 mil) | 5-7 Years | Low | Temporary features only |
| EPDM (45 mil) | 20+ Years | High | Professional residential ponds |
| RPE (Reinforced Polyethylene) | 40+ Years | Extreme | Large scale or rocky terrain |
Mistake 2: Undersized Biological Filtration and Flow Rates
A pond’s filtration system must be sized for the total volume of water and the expected biological load, usually requiring a pump that can turn over the entire volume once per hour. Most ‘kit’ ponds sold at big-box stores provide pumps that are woefully inadequate for maintaining the dissolved oxygen levels required for nitrifying bacteria to thrive.
What size pump do I need for my pond?
Calculate your volume by multiplying average length x average width x average depth x 7.48. If you have 2,000 gallons of water, you need a pump rated for at least 2,500 GPH to account for ‘head pressure’ or the vertical distance the water must travel to a waterfall. Do not skimp here. Oxygenation is the only thing keeping your pond from becoming a septic tank. You need a mechanical skimmer to catch floating debris and a biological filter (a ‘BioFalls’ or similar) where beneficial bacteria can colonize on lava rock or specialized filter mats. These bacteria convert toxic ammonia from fish waste into nitrites and then into relatively harmless nitrates. Without this cycle, your fish will die of ammonia burns on their gills. It is basic chemistry. You also need a UV clarifier to flocculate single-celled algae so the filter can actually grab it. Without a UV system, you will be fighting ‘green water’ for the life of the pond. Use a bottom drain if the pond is over three feet deep. It keeps the floor clean. Stagnant water is your enemy.
“The success of an aquatic ecosystem is dependent on the surface area available for nitrifying bacteria to colonize relative to the total organic load.” – Water Quality Management Manual
Mistake 3: Poor Structural Shelving and Edge Stability
Structural failure in ponds usually stems from a lack of internal shelving, which results in the surrounding soil collapsing inward and the stone edging sliding into the water. You must excavate in ‘steps’ or benches, usually twelve inches deep per shelf, to provide a stable base for rockwork and to create different zones for aquatic plants.
How deep should a garden pond be for fish?
In most temperate climates, a pond must be at least twenty-four to thirty-six inches deep to ensure a ‘safe zone’ that does not freeze solid in winter or overheat in summer. If you live in a region with heavy freeze-thaw cycles, go deeper. Shallow ponds are death traps for Koi. When you build your shelves, make sure they are slightly canted back toward the pond wall. This prevents rocks from sliding off. The ‘pearl necklace’ look: where a single row of round stones sits on the edge of a liner: is a hallmark of an amateur. You want to ‘interlock’ your stone. Use large boulders at the base and smaller cobble to fill the gaps. This creates a ‘retaining wall’ effect that holds the earth back. Always use a heavy-duty non-woven underlayment. It protects the liner from sharp rocks and gas buildup from the soil. If you skip the underlayment, you are asking for a leak. Finding a leak in a finished pond is like finding a needle in a haystack made of wet stone. It is miserable work. Do it right the first time.
- Compaction: Tamp the soil around the pond perimeter to at least 95% Proctor density to prevent the edge from settling.
- Overflow Pipe: Install a dedicated 2-inch PVC overflow pipe to direct excess rainwater away from the house foundation.
- Liner Slack: Never stretch the liner tight. Leave ‘relaxed’ folds to accommodate the weight of the water.
- Bio-Load: Do not overstock fish. One inch of fish per 10 gallons is the hard limit for new systems.
Maintenance and Long-Term Stability
Once the pond is in the ground, the work is not over. You are now a manager of a biological system. Test your water weekly for pH, KH (Carbonate Hardness), Ammonia, and Nitrite. If your KH is too low, your pH will swing wildly and kill your bacteria. Add beneficial bacteria weekly during the growing season. This is not optional. You are essentially ‘seeding’ the system to handle the organic load. In the spring, do a partial water change of no more than 25%. Never do a 100% water change; you will ‘reset’ the biology and cause a massive algae bloom. Clean your skimmer basket daily during the fall. If the pump runs dry because the basket is clogged, the motor will burn out in hours. These are mechanical systems. They require mechanical oversight. High-end landscaping is about longevity. If you want a ‘set it and forget it’ feature, buy a statue. If you want a pond, be prepared to be a steward of the environment you just created. Check your seals. Inspect your plumbing. Keep the water moving. It is that simple.
![Build a $350 Pondless Waterfall [2026 DIY]](https://lawnmajesty.com/wp-content/uploads/2026/06/Build-a-350-Pondless-Waterfall-2026-DIY.jpeg)