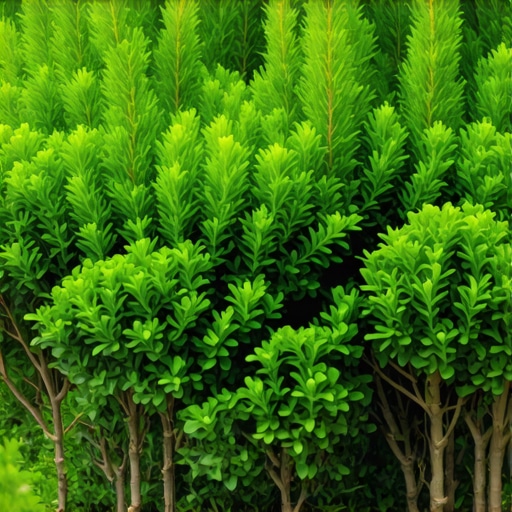
How to Propagate Boxwoods for Free Privacy Hedges
Why Propagation is the Secret to Professional Privacy Hedges
To propagate boxwoods for free privacy hedges, you must master semi-hardwood stem cuttings taken during the late summer or early fall when the current year’s growth has begun to stiffen. This professional technique allows you to clone high-performing Buxus varieties, ensuring genetic uniformity and significant cost savings for large-scale landscape design.
I always drill into my new crew members: if you don’t fix the soil grading first, every plant you put in the ground is just expensive compost. I’ve seen guys spend five figures on nursery stock only to watch it drown in a week because they didn’t understand hydrostatic pressure or how water moves through heavy clay. When we talk about propagating your own hedges, we aren’t just saving money; we are ensuring that the biology of the plant is adapted to your specific micro-climate from day one. You aren’t buying a plant that’s been pampered in a greenhouse; you’re building an army of clones that are ready for the local fight.
The Biology of the Boxwood Cutting
Boxwood propagation relies on the plant’s ability to undergo dedifferentiation. This is where specialized cells in the stem revert to meristematic cells to form a root primordia. If you don’t understand the auxin levels in the stem, you’re just sticking sticks in the mud. High levels of indole-3-butyric acid (IBA) are necessary to trigger this response. Most amateurs fail because they take ‘softwood’ cuttings that are too fleshy and rot, or ‘hardwood’ cuttings that are too dormant to react.
“The successful rooting of Buxus species is heavily dependent on the maintenance of high turgor pressure within the cutting to prevent desiccation before the adventitious root system is established.” – Agricultural Manual for Woody Ornamentals
How long does it take for boxwood cuttings to root?
Under professional conditions, boxwood cuttings typically take 8 to 12 weeks to develop a functional root system capable of supporting new growth. This timeline depends on soil temperature, moisture consistency, and the concentration of rooting hormones applied to the nodal tissue during the initial sticking phase.
Engineering the Root Zone: Media and Drainage
You cannot use standard potting soil. It’s too heavy. It holds too much water. Roots need oxygen as much as they need moisture. A professional mix is usually a 50/50 split of coarse perlite and peat moss, or even better, a mix of sharp sand and aged pine bark. This creates the macropores necessary for gas exchange. If the pore space is filled with water, the cutting will succumb to Phytophthora or other fungal pathogens before the first root hair even forms.
| Material | Function | Professional Grade Tip |
|---|---|---|
| Coarse Perlite | Aeration | Use Grade 3 or 4 for maximum oxygenation. |
| Horticultural Sand | Stability/Drainage | Avoid play sand; it’s too fine and will pack like concrete. |
| IBA Rooting Powder | Hormonal Trigger | Use 0.3% to 0.8% concentration for semi-hardwood. |
| Mist System | Transpiration Control | Prevents the leaves from drying out while roots are absent. |
Step-by-Step Propagation Protocol
- Select the Stock: Only take cuttings from healthy, blight-free mother plants. Look for growth that is green but firm.
- The Cut: Use a sterilized bypass pruner. Make a 4-6 inch cut just below a node.
- Wounding: Lightly scrape a one-inch strip of bark off the bottom of the stem to expose the cambium. This increases the surface area for root formation.
- Hormone Application: Dip the wounded end into IBA powder. Tap off the excess. Too much can actually inhibit rooting.
- Sticking: Use a pencil to make a hole in the media first. Do not just shove the cutting in, or you’ll rub the hormone off.
- Environment: Cover with a humidity dome. Keep it in indirect light. Direct sun will cook them.
When is the best time to take boxwood cuttings?
The optimal window for taking boxwood cuttings is late July through September. During this period, the new growth has matured enough to have sufficient carbohydrate reserves but remains metabolically active enough to respond to auxin treatments, ensuring a higher success rate for your privacy hedge project.
Hardscaping Integration and Grading
Once those roots are established, you can’t just dig a hole and hope for the best. Boxwoods are susceptible to root rot. If you are planting a long hedge along a property line, you need to check the grade. I’ve seen $20,000 hedges die because they were planted in a swale that collected runoff from the neighbor’s driveway. In my firm, we always install a French drain or a slight berm if the drainage isn’t perfect. Boxwoods want ‘moist but well-drained’ soil. That’s a technical term for ‘don’t let them sit in a puddle.’
“A retaining wall doesn’t fail because of the stone; it fails because of the water trapped behind it.” – Hardscape Engineering Axiom
The same logic applies to your planting beds. If you don’t have a 2% slope away from the root balls, you’re building a grave, not a garden. We use modified gravel bases under nearby hardscaping to ensure that water moves away from the hedge’s root zone. Compacted soil is the enemy. If your soil is heavy clay, you need to incorporate expanded shale or organic matter to break up those plate-like soil particles. It’s about soil physics.
Long-Term Maintenance and Scalping Prevention
Don’t be a ‘mow-and-blow’ hack. Once your hedge is in, stop the hedge trimmers for the first two years. Let the plant establish its structure. When you do prune, use hand shears to thinning-cut the interior. This allows light and air to reach the center of the plant. If you just shear the outside, you get a thin shell of green over a dead, hollow interior. That is where pests like leafminers and mites thrive. Airflow is your best fungicide. It’s cheap. It’s effective. Use it. Watering must be deep and infrequent. Force those roots to go down. Surface watering creates weak plants. Weak plants die in a freeze. Be professional about it. Monitor your pH. Boxwoods like it slightly acidic to neutral (6.5 to 7.2). If you’re at a 5.5, your plants will starve even if the soil is full of nutrients because the chemistry won’t allow the roots to take them up. Get a soil test. Don’t guess.