
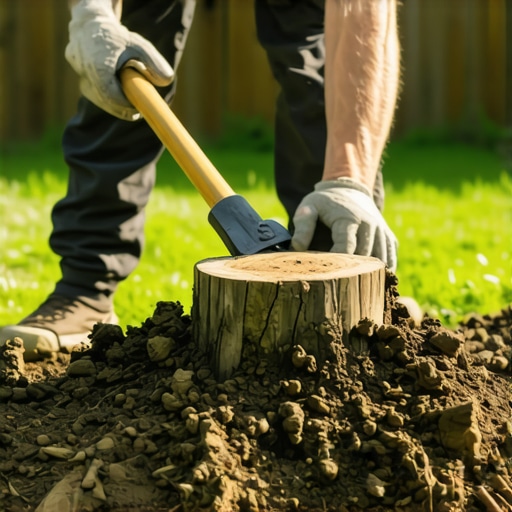
How to Remove Tree Stumps Without a Grinder
I always drill into my new crew members: if you don’t fix the soil grading first, every plant you put in the ground is just expensive compost. The same logic applies to tree stumps. I’ve watched greenhorns spend eight hours hacking at a 24-inch white oak stump with a dull axe, only to realize they haven’t even reached the taproot. We don’t just ‘get rid’ of wood; we manage the transition of high-carbon biological matter back into the soil matrix. Grinders are fast, but they are loud, expensive, and useless in tight urban gardens where gas lines or irrigation headers are buried inches away. If you can’t get a machine in there, you have to outsmart the biology of the tree.
Why Traditional Stump Grinding Isn’t Always the Best Option
Removing tree stumps without a grinder involves utilizing chemical decomposition, controlled incineration, or manual excavation to break down the cellulose and lignin structure of the wood. This approach is often safer for sites with underground utility lines or limited access for heavy machinery where a 2,000-pound stump grinder would crush paver stones or compact the soil profile. In professional landscaping, we weigh the cost of manual labor against the rental fees and potential for collateral damage to the existing garden design. Sometimes, the slow burn or chemical route is the only way to protect the integrity of a client’s hardscaping.
“A retaining wall doesn’t fail because of the stone; it fails because of the water trapped behind it. Similarly, a lawn doesn’t fail because of a stump; it fails because of the localized nitrogen depletion during the decay process.” – Hardscape Engineering Axiom
The Science of Nitrogen Robbery
When you leave a stump to rot, the fungi and bacteria responsible for breaking down the carbon-heavy wood require a massive amount of nitrogen to fuel their metabolic processes. They will pull this nitrogen from the surrounding soil, leaving your grass yellow and stunted. It is a biological tax you pay for laziness. If you choose the slow-rot method, you must supplement the area with a high-nitrogen fertilizer to prevent your lawn care efforts from going to waste. Physics doesn’t lie, and neither does soil chemistry. You are fighting a war against lignin, the organic polymer that makes wood stiff and resistant to decay.
Chemical Decomposition: The Potassium Nitrate Method
The potassium nitrate method is the most effective way to chemically accelerate the breakdown of tree stumps by increasing the internal oxygen supply available to decomposing microorganisms. By drilling deep vertical and lateral shafts into the wood and filling them with high-purity saltpeter, you create an environment where the wood fibers oxidize from the inside out. This isn’t just about ‘rotting’; it is about turning the stump into a porous sponge that will eventually shatter under a sledgehammer. Do not expect results in a weekend. This is a 4 to 6 week process depending on the moisture levels in the soil.
How much saltpeter do I need for a stump?
For a standard 12-inch diameter stump, you will generally need 1 to 2 pounds of potassium nitrate, ensuring each 1-inch diameter hole is filled to within 2 inches of the surface. This concentration is high enough to trigger a rapid breakdown of the cellulose fibers without toxic runoff into the root zone of adjacent perennials. You must seal the holes with wax or plastic to prevent rain from leaching the chemicals out before they can penetrate the heartwood. It will rot. You just have to be patient.
| Method | Estimated Time | Physical Labor Level | Cost Factor |
|---|---|---|---|
| Potassium Nitrate | 4-8 Weeks | Moderate (Drilling) | Low |
| Epsom Salt | 3-6 Months | Low | Very Low |
| Burn Method | 12-24 Hours | High (Monitoring) | Minimal |
| Manual Trenching | 1-2 Days | Very High | None |
The Epsom Salt Dehydration Strategy
Using magnesium sulfate, commonly known as Epsom salt, is a non-toxic but significantly slower method that works by dehydrating the root system to the point of structural failure. Unlike saltpeter, which fuels decay, Epsom salt pulls moisture out of the vascular tissue of the tree. This is a common choice for homeowners who are concerned about soil microbiology or have pets roaming the yard. However, you must be careful not to over-saturate the surrounding garden beds, as high magnesium levels can lock out other essential nutrients like calcium. Use a 100 percent magnesium sulfate product; anything with scents or additives will fail. Don’t skip this.
- Drill Depth: Holes must be at least 10 inches deep.
- Bore Pattern: Space holes 3 inches apart in a concentric circle.
- Water Injection: Add just enough water to create a slurry.
- Light Blockage: Cover the stump with a dark tarp to stop photosynthesis in any remaining suckers.
How long does it take for a stump to rot naturally?
In a typical temperate climate, a hardwood stump can take 7 to 10 years to rot naturally, whereas softwoods like pine may decay in 3 to 5 years depending on soil moisture and fungal presence. Professional interventions like chemical acceleration can reduce this timeline to less than one season by bypassing the natural stasis period of dead wood. If the stump is in a high-traffic area of your landscaping, you cannot afford to wait a decade. The trip hazard alone is a liability.
The Controlled Burn: Rocket Stove Physics
Burning a stump is an engineering task, not a bonfire. To successfully incinerate a stump underground, you must create a thermal chimney effect by drilling intersecting vertical and horizontal ventilation shafts. This allows oxygen to feed the charcoal core, reaching temperatures high enough to consume the root flare below the soil line. You are essentially turning the stump into a rocket stove. If you just light a fire on top, the heat will move upward, and the buried wood will remain untouched. It’s a waste of time. You need the fire to move downward into the taproot.
“Wood decomposition is a redox reaction. Whether it takes ten years or ten hours, you are simply oxidizing carbon. The speed of that oxidation is entirely dependent on oxygen availability and surface area.” – Agricultural Extension Office Bulletin
Manual Excavation and The High-Leverage Method
If you want it gone today, you use the trenching method. This involves excavating a 360-degree perimeter around the stump to expose the lateral roots. We use a digging bar and a reciprocating saw with a 12-inch demolition blade to sever the connections. The secret is the leverage ratio. If you leave 3 feet of the trunk attached, you have a lever that can generate thousands of foot-pounds of force to snap the taproot. If you cut the stump flush with the ground first, you’ve lost your only mechanical advantage. You’re just digging a hole at that point. Don’t be that guy.
The Forensic Autopsy of a Failed Removal
I recently got called out to a job where a homeowner tried to ‘pull’ a stump with his pickup truck. He ended up with a shattered rear window and a stump that didn’t move an inch. The reason? He didn’t understand hydrostatic suction and root anchoring. In heavy clay soils, the root system acts like a vacuum seal. You have to break the seal by digging deep enough to let air under the root ball. Once that vacuum is broken, the physics change in your favor. It’s not about raw power; it’s about structural engineering.
Final Maintenance: Backfilling the Void
Once the stump is out, your job isn’t done. You’ve just created a subsurface cavity that will settle over the next year. If you just throw topsoil in the hole, you’ll have a sinkhole by spring. You need to backfill with compactable fill dirt in 4-inch ‘lifts,’ tamping each layer down until the PSI is consistent with the surrounding yard. Only the top 2 inches should be high-quality loam for grass seed. This ensures your lawn care remains uniform and you don’t end up with a trip hazard in the middle of your garden design. Settling is inevitable; managing it is professional. “
![Why Your 2026 Hydrangeas Won't Bloom [Soil Fix]](https://lawnmajesty.com/wp-content/uploads/2026/07/Why-Your-2026-Hydrangeas-Wont-Bloom-Soil-Fix.jpeg)