How to Restore a Gray and Weathered Cedar Fence
The Forensic Science of Cedar Restoration: Beyond the Gray
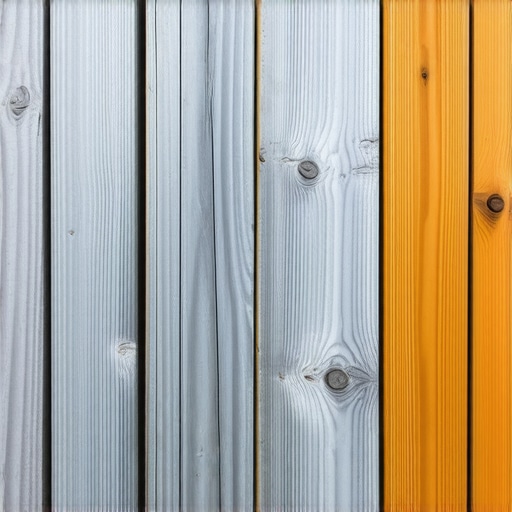
The graying of a cedar fence is not merely a cosmetic shift; it is a visible record of biological and chemical failure. To a veteran landscaper, that silver patina is a red flag indicating that the wood’s lignin, the organic polymer that binds the cellulose fibers together, is being shredded by ultraviolet radiation. I always drill into my new crew members: if you don’t fix the wood’s cellular health first, every gallon of stain you put on that fence is just expensive waste. I recall an apprentice who thought he could save time by just slapping a heavy-duty ‘deck over’ paint onto a weathered fence. Within six months, the moisture trapped behind that film-forming barrier had turned the cedar into a soft, pulpy mess that smelled like a swamp. We had to replace forty panels. That is the cost of ignoring the physics of wood. True restoration requires understanding moisture content, pH balancing, and the molecular weight of oils. Cedar is a biological machine, and when it turns gray, that machine is seizing up. To restore it, you must perform a chemical and mechanical reset of the wood surface. This is a technical process involving the removal of dead fiber, the neutralization of tannins, and the deep-penetration of paraffinic oils. We are not just making it look new; we are re-engineering the wood’s ability to shed water and resist UV-induced photodegradation.
The Anatomy of Weathered Wood: Why Cedar Turns Gray
Cedar turns gray because photodegradation and leaching strip the wood of its natural oils and lignin, leaving behind a porous skeleton of cellulose. When UV rays hit the wood, they break the chemical bonds in the lignin, which allows the cellulose fibers to detach and wash away, a process accelerated by the expansion and contraction of the wood during wet-dry cycles. This loss of structural integrity opens the door for microbial growth, specifically molds and mildews that feed on the moisture trapped in the loosened fibers. If you leave it untreated, the wood will eventually develop checking, which are deep cracks that allow water to reach the core of the post, leading to structural rot that can’t be fixed with a brush. Restoration is a three-phase operation: cleaning the oxidized layer, neutralizing the pH, and sealing the cells.
“A retaining wall doesn’t fail because of the stone; it fails because of the water trapped behind it.” – Hardscape Engineering Axiom
How much pressure is too much for a cedar fence?
When cleaning cedar, you must never exceed 1500 PSI with a wide-angle tip (25 to 40 degrees). Cedar is a softwood with a low Janka hardness rating; high-pressure streams will ‘fur’ the wood, shredding the internal fibers and creating a fuzzy texture that absorbs too much stain and leads to premature failure. You are cleaning the surface, not excavating it.
| Chemical Agent | Function | Impact on Wood Biology |
|---|---|---|
| Sodium Percarbonate | Oxygen-based cleaner | Lifts dirt and dead fibers without destroying lignin. | Sodium Hypochlorite | Chlorine Bleach | Kills mold but collapses wood cells and ‘blanches’ color. | Oxalic Acid | Wood Brightener | Neutralizes pH and removes iron/tannin stains. | Citric Acid | Mild Brightener | Safe for surrounding plants, effective for pH balancing. |
The Step-by-Step Restoration Protocol
Step one is the removal of the oxidized layer. We avoid chlorine bleach because it is a caustic that breaks down the very fibers we are trying to save. Instead, we use sodium percarbonate. This oxygen-based cleaner reacts with water to release hydrogen peroxide, which bubbles into the pores of the cedar, physically lifting out dirt, mold, and gray fibers. We apply it with a low-pressure sprayer and let it dwell for 15 to 20 minutes, ensuring the wood stays wet. You will see the wood change from gray to a muddy brown; this is the sign that the dead material is ready to be moved. After a gentle pressure wash, the wood is clean but has a high pH. This is where most DIY jobs fail. Wood is naturally acidic. High pH cleaners leave the wood in a state where it cannot properly absorb oil. We apply a wood brightener, typically oxalic or citric acid. This chemical reaction is instantaneous. The acid neutralizes the base, closes the wood’s ‘pores’ slightly, and brings back the golden-red hue of the cedar by reacting with the tannins. It is not magic; it is chemistry. Once the wood is brightened, it must dry until the moisture content (MC) is below 12%. I use a digital moisture meter for this. If you seal wood at 18% MC, you are locking in the seeds of dry rot.
“The effectiveness of any wood finish depends heavily on the surface preparation and the ability of the product to reach the interior cells of the timber.” – USDA Wood Handbook
Do I need to sand my fence after cleaning?
Yes, you should lightly sand the wood with 60 to 80 grit sandpaper if the cleaning process has raised the grain. This mechanical step removes the ‘fuzz’ or furring that prevents stain from penetrating evenly, ensuring the final finish is smooth to the touch and visually consistent across the entire run of the fence.
Selecting the Right Sealant: The Oil-Based Mandate
In the professional world, we laugh at water-based ‘film-forming’ stains for fences. These products sit on top of the wood like a plastic bag. When the wood expands in the summer heat, that film cracks. Water gets in, but it can’t get out. The result is peeling and rot. For a cedar fence, you want a deep-penetrating paraffinic oil. These oils use the wood’s natural capillary action to dive deep into the tracheids. They don’t ‘dry’ so much as they ‘cure’ inside the wood. High-quality stains also contain trans-oxide pigments. Unlike standard pigments, trans-oxides provide UV protection while remaining transparent, allowing the natural grain to show through. This is the difference between a fence that looks like it was painted by a ‘mow-and-blow’ crew and a fence that looks like it belongs on a high-end estate. A professional-grade oil stain will protect the wood for three to five years before a simple ‘clean and recoat’ is needed. No stripping, no sanding, just maintenance.
- Inspection: Check for ground contact. If the bottom of your cedar pickets is touching the soil, they will wick moisture up like a straw. Trim them to leave a 2-inch gap.
- Fasteners: Ensure all nails or screws are stainless steel or high-quality galvanized. Cedar’s tannins react with cheap steel, creating black ‘bleeding’ streaks.
- Application: Always use the ‘wet-on-wet’ method. Apply a coat, let it soak in for 20 minutes, and then apply a second coat while the first is still damp. This maximizes the oil load within the wood.
- Weather Window: Do not stain if rain is expected within 48 hours. The oil needs time to bond with the cellulose without being emulsified by rainwater.
The Maintenance Cycle: Protecting the Investment
A cedar fence is a five-figure investment for most homeowners. To protect it, you must stay ahead of the UV curve. Every two years, do a ‘bead test.’ Spray some water on the fence. If it beads up and rolls off, the oil is still doing its job. If the water soaks in and turns the wood dark, the protection has failed. At that point, you don’t need a full restoration. A light wash with a mild detergent and a fresh top-coat of the same oil will keep that fence standing for thirty years. Don’t wait until it turns gray again. Maintenance is cheaper than restoration, and restoration is much cheaper than replacement. This is the reality of managing a property. It’s about engineering longevity into every square inch of the landscape. Treat your cedar with the respect its biology demands, and it will reward you with a lifetime of service.