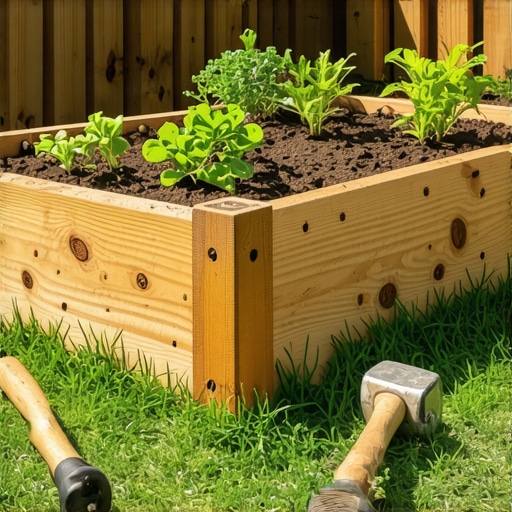
How to build a raised garden bed with cedar
Engineering the Ultimate Cedar Raised Bed: A Professional Guide to Soil Biology and Structural Integrity
I always drill into my new crew members: if you don’t fix the soil grading first, every plant you put in the ground is just expensive compost. I’ve spent two decades in the landscaping industry watching homeowners drop thousands of dollars on high-end nursery stock only to watch it wither because they ignored the fundamental laws of civil engineering and horticulture. A raised bed isn’t just a box; it is a controlled biological reactor. When we talk about garden design, we are talking about managing hydrostatic pressure, soil gas exchange, and the thermal mass of the growing environment. If you build it like a weekend warrior using cheap pine and bagged topsoil from a big-box store, it will rot within three seasons. This guide is about doing it right the first time using industrial-grade hardscaping principles.
Why Site Selection and Soil Grading Determine Longevity
Successful **cedar raised garden bed** installation depends on **solar exposure**, **site topography**, and **soil-to-bed connectivity** to ensure long-term structural and biological health. You must identify a location receiving at least 8 hours of direct solar radiation while ensuring the sub-grade is leveled to a 1-percent slope to prevent water pooling at the base of your timbers.
Before you even touch a saw, you need to understand the hydrology of your yard. If you place a raised bed at the bottom of a swale, you are essentially building a bathtub. Water will accumulate, the cedar—despite its natural oils—will eventually succumb to anaerobic decay, and your plants will drown. We use a transit level or a simple line level to find the high point. Excavate the turf. Don’t just flip it over; remove it. You want direct contact between your new soil and the native earth to facilitate the migration of beneficial earthworms and mycorrhizal fungi. This is where landscaping meets biology. If you skip the excavation, you create a physical barrier that limits the vertical movement of moisture and nutrients.
Material Selection: Why Western Red Cedar is the Industry Standard
Selecting **Western Red Cedar** for raised beds provides **natural rot resistance**, **structural stability**, and **thermal insulation** due to the high concentration of thujaplicins within the wood fibers. These organic compounds act as natural fungicides, ensuring the timber remains intact for 15 to 20 years even under constant contact with moist soil aggregates.
| Material Type | Expected Lifespan | Rot Resistance | Structural Integrity |
|---|---|---|---|
| Western Red Cedar | 15-25 Years | High (Thujaplicins) | High |
| Pressure Treated (ACQ) | 20+ Years | Chemical | Moderate |
| Douglas Fir | 3-5 Years | Low | Moderate |
| Composite Timber | 25+ Years | Inert | Variable |
Don’t buy 1-inch thick boards. They will bow. The lateral pressure of wet soil is immense. Use 2×6 or 2×8 dimensional lumber at a minimum. We prefer 4×4 posts for the corners to provide a beefy anchor for our fasteners. In the world of hardscaping, mass equals stability. We aren’t just building a frame; we are building a retaining wall for soil. Cedar is unique because it resists the freeze-thaw cycles that characterize many USDA hardiness zones. While other woods check and split, cedar maintains its cellular density.
How deep should a cedar raised garden bed be?
For most vegetable crops, a depth of 12 to 18 inches is optimal. This depth allows for a robust rhizosphere—the area around the roots where most chemical and biological activity occurs. If you are planting taproot-heavy crops like carrots or parsnips, aim for 24 inches. Deeper beds also provide better ergonomics for lawn care and maintenance, reducing the strain on your back during the weeding process.
The Engineering Phase: Excavation and Base Preparation
The foundation of a **raised garden bed** requires a **compacted mineral base** or **direct soil contact** with a hardware cloth barrier to prevent pest intrusion and ensure vertical drainage. A level base prevents the cedar timbers from racking over time, which preserves the integrity of the mechanical fasteners and prevents soil leakage.
“A retaining wall doesn’t fail because of the stone; it fails because of the water trapped behind it.” – Hardscape Engineering Axiom
The same logic applies to your garden bed. If water cannot escape the bottom 4 inches of your bed, the soil becomes sour. We often install a 2-inch layer of washed 57-stone (clean gravel) at the very bottom if the native soil is heavy clay. This creates a capillary break. On top of that, we lay 1/4-inch stainless steel hardware cloth. This isn’t optional if you have gophers or moles. They will find the nutrient-rich soil in your bed and treat it like a buffet. Secure the mesh to the bottom of the cedar frame using galvanized staples. It won’t move. It won’t rust. It works.
Structural Assembly: Preventing Bowing and Structural Failure
Professional **raised bed construction** utilizes **3-inch ceramic-coated timber screws** and **internal corner bracing** to counteract the lateral force exerted by saturated soil. By pre-drilling all pilot holes, you prevent the cedar’s end-grain from splitting, which is a common failure point in amateur landscaping projects.
We don’t use nails. Nails pull out. As the wood swells with winter moisture and shrinks in the summer heat, smooth-shank nails lose their grip. Use structural screws with a high shear strength. For beds longer than 6 feet, you must install a center brace. This is a piece of lumber or a galvanized steel rod that connects the two long sides in the middle. Without it, the weight of the soil will cause the wood to belly out. It looks like amateur work and eventually, the joints will fail. Professional garden design is about anticipating these forces before they happen.
How much modified gravel do I need for a patio base?
While this guide focuses on beds, many homeowners integrate them into a patio. For a standard 4-inch base, you need roughly 1.5 tons of modified gravel per 100 square feet. For a garden bed base, you only need enough to level the perimeter, typically 2-3 bags of leveling sand or fine gravel per bed. Precision matters. A bed that is out of level by even half an inch will show an uneven water line every time you irrigate.
Soil Science: Crafting the Perfect Growth Medium
The ideal **soil mix for raised beds** consists of **40% screened topsoil**, **40% organic compost**, and **20% coarse perlite or vermiculite** to maximize Cation Exchange Capacity (CEC) and aeration. This engineered medium prevents compaction, allowing oxygen to reach the root zone, which is critical for the microbial oxidation of nitrogen.
Don’t just buy “garden soil” in a yellow bag. It’s often just shredded wood and peat. You want a living soil. I recommend a blend that includes mushroom compost or aged manure. This introduces the bacterial life necessary to break down minerals into plant-available forms. We are looking for a friable texture—if you squeeze a handful of soil, it should hold its shape but crumble easily when poked. This is the hallmark of good tilth. If it stays in a hard ball, you have too much clay. If it falls apart instantly, you have too much sand. Adjust accordingly.
“Soil testing is the only way to accurately determine the nutrient needs of your plants and avoid the environmental impact of over-fertilization.” – Penn State Agricultural Extension
The Final Checklist for Professional Installation
- Confirm the site receives at least 6-8 hours of direct sunlight.
- Excavate the grass and level the ground within a 1/8-inch tolerance.
- Cut Western Red Cedar timbers using a miter saw for clean, 90-degree joints.
- Pre-drill pilot holes to prevent timber splitting.
- Install 3-inch ceramic-coated screws at all corner and brace points.
- Attach 1/4-inch hardware cloth to the base with galvanized staples.
- Fill with a high-CEC soil blend, leaving 2 inches of freeboard at the top.
- Mulch with 2 inches of straw or wood chips to regulate soil temperature.
The Microbiome: Fertilization and Long-Term Maintenance
Maintaining a **cedar garden bed** involves **annual compost top-dressing** and **moisture monitoring** to preserve both the wood’s integrity and the soil’s microbial health. Because raised beds drain faster than in-ground gardens, you must monitor the moisture levels daily during the first growing season to prevent hydrophobic soil conditions.
Cedar will naturally silver over time. This is purely aesthetic and does not indicate rot. If you want to keep the warm orange hue, you can apply a food-safe sealer, but most pros leave it natural. The most important maintenance task is actually crop rotation. Don’t plant tomatoes in the same bed three years in a row. It builds up pathogens in the soil. Treat your raised bed like a professional asset. Keep the edges trimmed with a string trimmer, but be careful not to scalp the wood. If you hit the cedar with a high-velocity line, you’ll chew through the soft summerwood fibers and invite rot. It’s a tool, not a toy. Treat it with respect, and it will feed you for twenty years.

![DIY Cedar Raised Beds for $50 [2026 Budget]](https://lawnmajesty.com/wp-content/uploads/2026/09/DIY-Cedar-Raised-Beds-for-50-2026-Budget.jpeg)
![Build a $50 Vertical 2026 Herb Garden [Small Space]](https://lawnmajesty.com/wp-content/uploads/2026/06/Build-a-50-Vertical-2026-Herb-Garden-Small-Space.jpeg)