
Build a $150 2026 Cedar Trellis for Garden Entry Points
Why Precision Engineering Matters for a Simple Cedar Trellis
Building a 2026-spec cedar trellis requires understanding structural load-bearing and soil-to-wood contact points to prevent premature failure. Using Western Red Cedar (Grade A or better) ensures natural rot resistance while maintaining a tensile strength sufficient for heavy perennial vines like Wisteria or climbing Hydrangea without sagging under biological weight. If you ignore the physics of the soil, the structure is doomed.
I always drill into my new crew members: if you don’t fix the soil grading first, every plant you put in the ground is just expensive compost. The same goes for structures. You can buy the best lumber, but if you set a post in a low spot where water collects, you’ve just built a very expensive toothpick that will snap in three years. I have seen countless homeowners waste money on big-box kits that rot out because they didn’t understand the hydrostatic pressure of the soil or the simple chemistry of wood decay. We do things differently here. We build for the next decade, not the next season.
Selecting the Right Grade of Timber
In the world of landscaping and garden design, your material choice determines your maintenance lifecycle. For a $150 budget in the 2026 market, you need to be surgical with your shopping list. We use Western Red Cedar (Thuja plicata) specifically for its high concentration of thujaplicins. These are natural fungicides that inhibit the growth of wood-decaying organisms. Do not settle for ‘white wood’ or ‘common pine’ even if it is cheaper. It will rot. Within 24 months, the cellulose will break down, and your structure will fail under the weight of the foliage.
“Wood in contact with the ground or used in high-moisture environments should be naturally decay-resistant or pressure-treated to prevent fungal degradation.” – USDA Forest Products Laboratory
How much modified gravel do I need for a trellis post base?
For a standard 4×4 trellis post, you should use exactly 0.5 cubic feet of 3/4-inch modified gravel per hole to facilitate vertical drainage and prevent frost heave. This gravel base acts as a sump, allowing water to exit the bottom of the post rather than sitting against the wood grain, which causes the base to soften and eventually shear off at the soil line.
| Material Item | Quantity / Dimensions | Estimated 2026 Cost |
|---|---|---|
| Western Red Cedar 4×4 Posts | 2 @ 8 Feet | $58.00 |
| Western Red Cedar 2×4 Rails | 3 @ 8 Feet | $36.00 |
| Cedar 1×2 Lath Strips | 10 @ 6 Feet | $30.00 |
| 3/4″ Clean Crushed Stone | 1 Bag (0.5 cu ft) | $7.00 |
| 3-inch Deck Screws (Stainless) | 1 lb Box | $19.00 |
The Engineering of the Post Hole
Stop pouring concrete directly around your wood posts. This is a rookie mistake. Concrete creates a bucket that traps water against the wood. Instead, we use a sleeved gravel method. Excavate your hole to a depth of 24 inches. This puts you below the frost line in most temperate zones. Pour 4 inches of 3/4-inch clean stone into the bottom. Tamp it until the tamper literally bounces off the compacted base. This ensures no settling. Place your 4×4 post on top of the stone. Fill the surrounding 2-inch gap with more gravel, tamping every 6 inches of lift. This creates a French drain effect. It keeps the wood dry.
The Assembly: Fasteners and Spacing
In hardscaping, mechanical fasteners are the weak point. Never use interior-grade screws. The tannins in cedar will react with cheap zinc coatings, causing black streaks and eventually dissolving the screw. Use 305 or 316-grade stainless steel screws. They are non-reactive. When attaching your lath (the 1×2 strips), pre-drill every single hole. Cedar is prone to splitting along the grain. A 1/8-inch pilot bit is your best friend here. Space your horizontal lath at 12-inch intervals. This allows for airflow. Proper airflow prevents powdery mildew on your plants and keeps the wood from staying damp after rain.
- Step 1: Layout the site and check for underground utilities (Call 811).
- Step 2: Excavate two 24-inch deep holes, spaced 48 inches apart on center.
- Step 3: Install the drainage stone base and tamp to 95% compaction.
- Step 4: Plumb and level the 4×4 posts using a post level.
- Step 5: Install the 2×4 top header using lap joints for maximum shear strength.
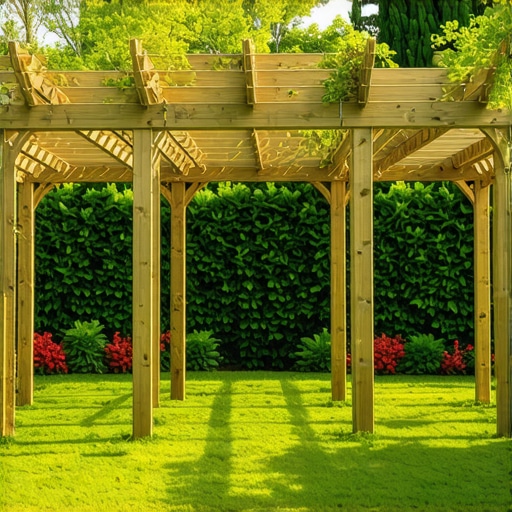
- Step 6: Attach the 1×2 lath pattern with stainless steel fasteners.
[IMAGE_PLACEHOLDER]
What is the best way to anchor a trellis to prevent wind-load failure?
To prevent wind-load failure, ensure your trellis is anchored with a structural header that is tied into the 4×4 posts using half-lap joints or heavy-duty structural lag screws. Because a trellis act as a sail during high-wind events, the lateral pressure can exceed 200 pounds of force; a deep-set gravel footing provides the necessary frictional resistance within the soil matrix to prevent the structure from leaning over time.
“A retaining wall doesn’t fail because of the stone; it fails because of the water trapped behind it.” – Hardscape Engineering Axiom
Horticultural Integration: Plant Choice and Root Zones
Your trellis is not just a piece of furniture; it is a support system for living organisms. If you are planting at the base, do not pile mulch against the cedar posts. This is a ‘mulch volcano’ and it will rot the wood and suffocate the plant roots. Keep mulch 3 inches away from the post. Use native species that match your USDA Hardiness Zone. For 2026, we are seeing more extreme heat cycles, so drought-tolerant climbers like Lonicera sempervirens (Trumpet Honeysuckle) are better than high-water-demand exotics. Check your soil pH. Most cedar prefers a slightly acidic to neutral soil (6.0 to 7.0 pH). If your soil is heavy clay, mix in expanded shale to improve pore space. Plants need oxygen at the root level as much as they need water.
Check for level twice. Dig once. Cedar lasts. If you follow these specs, you aren’t just building a garden entry; you’re installing a piece of landscape infrastructure that will stand the test of time and weather. Don’t skip the gravel. Don’t use cheap screws. Build it right the first time.
![Build a $500 Outdoor Kitchen Base [2026 Budget]](https://lawnmajesty.com/wp-content/uploads/2026/06/Build-a-500-Outdoor-Kitchen-Base-2026-Budget.jpeg)