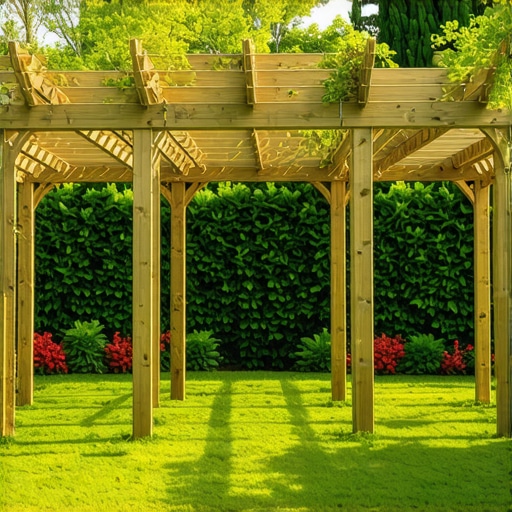
Build a $150 2026 Cedar Trellis for Modern Yard Space DIY
Professional DIY Guide: Building a $150 Modern Cedar Trellis for 2026 Garden Aesthetics
I always drill into my new crew members: if you don’t fix the soil grading first, every plant you put in the ground is just expensive compost. This technical wisdom applies just as heavily to hardscape structures like a cedar trellis. I have seen $5,000 custom pergolas rot out in three years because some hack buried the posts directly in high-clay soil without a gravel footer. When you are building for the 2026 season, you are not just looking for a weekend project; you are performing an engineering task that must withstand wind loads, UV degradation, and the relentless hydraulic pressure of wet soil. My firm does not build structures that fail. We build systems that integrate with the biology of the yard. This guide breaks down the physics and chemistry of a $150 modern trellis, focusing on structural integrity and horticultural success.
Why Planning Trumps Installation in Modern Garden Design
Successful trellis builds require site analysis, wind load calculation, and soil drainage checks before the first cut. Planning ensures the Western Red Cedar structure survives 2026 weather patterns without warping or ground-contact rot, providing a stable vertical plane for climbing biomass. Most DIYers fail because they ignore the frost line or the prevailing wind direction. If your trellis acts as a sail, it will pull its anchors during the first spring thunderstorm. We prevent this by calculating the surface area of the slats and ensuring the foundation is deep enough to resist lateral forces. Measure twice. Dig once.
“A retaining wall doesn’t fail because of the stone; it fails because of the water trapped behind it.” – Hardscape Engineering Axiom
What is the best wood for a DIY garden trellis?
For a $150 budget in 2026, Western Red Cedar (Thuja plicata) remains the gold standard because of its natural thujaplicins, which are chemical compounds that resist fungal decay. While pressure-treated pine is cheaper, it often contains copper-based chemicals that can leach into the root zone of sensitive climbing plants. Cedar is dimensionally stable, meaning it expands and contracts less than other softwoods when the humidity spikes. This prevents the fasteners from backing out over time. Look for ‘Rough Sawn’ grades at local mills to keep costs under the $150 threshold while maintaining a thick, modern profile.
Material Breakdown and Cost Analysis
In the current market, material sourcing is everything. You cannot walk into a big-box store and grab the first wet 2×4 you see. You need kiln-dried stock. If the wood feels heavy, it is full of water. It will warp. It will ruin your modern aesthetic within a month. Use the following table to track your procurement for this 2026 build.
| Material Item | Quantity/Specs | Estimated Cost | Technical Purpose |
|---|---|---|---|
| Cedar 2x4x8 | 3 Boards | $45.00 | Main structural vertical posts |
| Cedar 1x2x8 | 12 Slats | $72.00 | Horizontal climbing grid |
| SS Screws | 1 Box (2-inch) | $18.00 | 304 Grade Stainless for corrosion |
| Concrete Mix | 1 Bag (40lb) | $7.00 | Post stabilization below frost line |
| Wood Sealer | 1 Quart | $8.00 | UV protection and end-grain sealing |
Total project cost stays at approximately $150 if you use a standard drill and miter saw. Do not compromise on the stainless steel screws. Galvanized fasteners will eventually react with the natural tannins in the cedar, leaving ugly black streaks that scream amateur hour.
Structural Engineering: The Foundation and The Frame
Most modern yard spaces are plagued by poor soil compaction or heavy clay. When you install a vertical structure, you are introducing a lever into the ground. If the soil is saturated, the base will shift. We use a modified gravel base even for small trellis posts to facilitate drainage away from the wood. This prevents the anaerobic conditions that lead to lignin breakdown. The post should never touch the dirt. It sits on a bed of gravel, surrounded by a concrete collar that is sloped away from the wood at the surface. This is basic civil engineering applied to a garden setting.
“Wood-destroying fungi require four elements to survive: oxygen, favorable temperatures, moisture, and a food source (the wood). Controlling moisture is the most effective way to prevent decay.” – USDA Forest Products Laboratory
How deep should trellis posts be buried?
To ensure stability, trellis posts should be buried at a depth of at least 18 to 24 inches, or 1/3 of the total height of the structure. In regions with freezing winters, you must reach the frost line to prevent the ground from heaving the structure upward. Use a 6-inch diameter auger for 2×4 posts and backfill with 4 inches of crushed stone before adding concrete. This creates a sump for water to exit, protecting the wood end-grain from rot.
Step-By-Step Installation Protocol
Follow this checklist to ensure the build meets professional standards. Do not skip the sealing phase. It is the difference between a five-year lifespan and a twenty-year lifespan.
- Site Survey: Check for underground utilities via 811. Verify the trellis won’t block drainage swales.
- Post Preparation: Apply a clear, oil-based sealer to the bottom 24 inches of the posts, focusing heavily on the end-grain.
- Excavation: Dig holes to the required depth. Add 4 inches of 3/4-inch modified gravel and tamp until it literally bounces the tamper back.
- Leveling: Set the posts. Use a 4-foot level on two axes. Brace them with scrap wood so they don’t move during the pour.
- The Grid: Space the 1×2 slats exactly 6 inches apart. Use a spacer block to ensure perfect uniformity. This is the hallmark of the modern aesthetic.
- Fastening: Pre-drill every hole. Cedar splits easily. Use two screws per joint to prevent twisting.
- Finishing: Apply a second coat of UV-rated sealer to the entire structure.
The Horticulture Component: Selecting the Right Biomass
A trellis is a tool for plants. You must understand the attachment mechanism of the species you choose. Are they twiners, or do they use tendrils? A 1×2 cedar slat is perfect for Clematis or Honeysuckle, which use petioles or tendrils to wrap around the support. However, if you are planting a heavy woody vine like Wisteria, you need to increase the post size to 4×4. The sheer weight of a mature Wisteria can snap a $150 trellis like a matchstick. Always check your USDA Hardiness Zone before buying. A plant that dies in the winter leaves you with a bare, ugly frame. Select native species to support local pollinators and reduce the need for supplemental irrigation. Modern garden design is as much about ecological impact as it is about clean lines.
Check the root flare when planting at the base of your new trellis. If you bury the stem too deep, you are inviting crown rot. Keep mulch at least 3 inches away from the base of the wood and the plant stem. This prevents moisture from being trapped against the surfaces. Maintenance is a habit, not a chore. Every spring, check the fasteners and re-apply sealer. If you see the wood turning gray, the UV rays are winning. Don’t let them.
![Build a $500 Outdoor Kitchen Frame with Steel Studs [DIY]](https://lawnmajesty.com/wp-content/uploads/2026/05/Build-a-500-Outdoor-Kitchen-Frame-with-Steel-Studs-DIY.jpeg)