![Build a $200 Modern Trellis for 2026 Privacy [DIY]](https://lawnmajesty.com/wp-content/uploads/2026/06/Build-a-200-Modern-Trellis-for-2026-Privacy-DIY.jpeg)
Build a $200 Modern Trellis for 2026 Privacy [DIY]
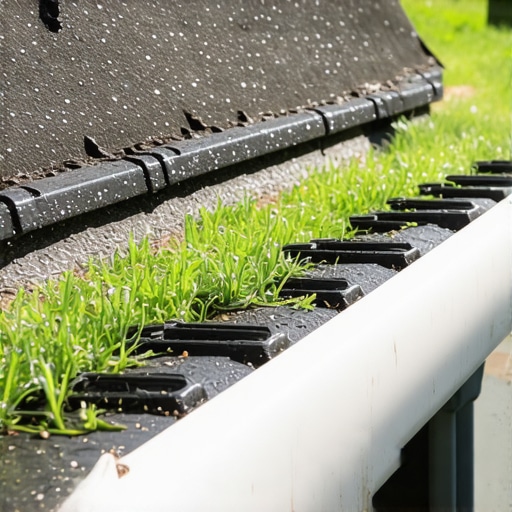
The Engineering of Privacy: Why Site Prep Precedes Construction
Building a modern trellis for 2026 privacy requires a shift from aesthetic thinking to structural engineering and soil biology. Most DIY projects fail not because of the wood quality, but because the builder ignores the hydrostatic pressure and wind load that a vertical structure must endure. I always drill into my new crew members: if you don’t fix the soil grading first, every plant you put in the ground is just expensive compost. This applies to hardscaping too. If your post footings are sitting in a basin that collects water, the wood will rot from the bottom up within three seasons. We are building for 2026 and beyond, which means we need to account for the leap year of plant growth and the settling of the soil. A trellis is a sail. When a 40 mph gust hits a flat-slat privacy screen, it exerts hundreds of pounds of force on the post anchors. If you use cheap 2-foot spikes, your privacy screen will be a pile of kindling after the first autumn storm.
[IMAGE_PLACEHOLDER]
How Deep Should Trellis Posts Be for Privacy?
To ensure a modern trellis remains stable, you must bury 4×4 pressure-treated posts at least 36 inches deep or below the local frost line to prevent frost heave. This depth ensures that the center of gravity for the structure is anchored against the lateral force of wind. In the professional landscaping world, we don’t just dump concrete in a hole. We create a 4-inch modified gravel base at the bottom of the excavation. This allows water to drain away from the end-grain of the timber. Without this drainage layer, the post sits in a concrete cup, soaking up moisture through capillary action, which leads to heartwood rot. Check your local 811 services before you dig to avoid hitting utility lines. This is the difference between a $200 project and a $5,000 repair bill for a severed fiber-optic cable.
Materials Science: Why Budgeting $200 Requires Precision
Achieving a high-end look on a $200 budget means you cannot afford waste. You must choose between Western Red Cedar and Ground Contact Pressure Treated (PT) lumber. Cedar is naturally rot-resistant due to its high tannin content, which deters fungal growth. However, for a $200 limit, we often use PT lumber for the structural posts and save the cedar for the visible horizontal slats. This hybrid approach gives you the structural integrity of chemically treated wood where it counts (underground) and the aesthetic quality of cedar where it shows. Beware of the chemical reactions between wood treatments and fasteners. Modern ACQ (Alkaline Copper Quaternary) treated wood is highly corrosive to standard zinc screws. You must use 304-grade stainless steel or high-quality ceramic-coated fasteners to prevent the heads from snapping off in two years.
“Wood in contact with soil must be rated for Ground Contact (UC4A) to survive the microbial onslaught of a humid climate.” – American Wood Protection Association Guidelines
Material Cost Breakdown for a 6ft x 8ft Trellis
| Item | Quantity | Unit Price | Total |
|---|---|---|---|
| 4×4 x 10ft PT Post | 2 | $18.00 | $36.00 |
| 2×2 x 8ft Cedar Slats | 14 | $8.50 | $119.00 |
| 80lb Bag Concrete Mix | 3 | $6.00 | $18.00 |
| Stainless Steel Screws | 1 Box | $15.00 | $15.00 |
| Leveling Gravel | 2 Bags | $6.00 | $12.00 |
| Grand Total | $200.00 |
The Step-by-Step Installation Process
The installation of a privacy trellis begins with the excavation of two post holes spaced exactly 8 feet apart on center. Use a post-hole auger to reach a 36-inch depth. Pour 4 inches of all-purpose gravel into the hole and tamp it down with the post itself. This creates the drainage sump. Set your 4×4 posts and use a 4-foot level to check for plumb on two adjacent sides. Brace the posts with scrap 2x4s before pouring the concrete. Do not fill the concrete to the surface. Leave a 4-inch gap at the top to fill with soil. This prevents a visible concrete collar and allows your lawn care routine to include grass growing right up to the post base. Once the concrete cures for 24 hours, begin attaching the horizontal slats. For a modern garden design, use a 1.5-inch spacer block between each slat. This gap is small enough for privacy but large enough to allow air to pass through, reducing the coefficient of drag during high winds.
Essential Tool Checklist
- Post-hole digger or power auger
- 4-foot spirit level
- Impact driver with T25 Torx bits
- Miter saw for precision end-cuts
- 1.5-inch spacer blocks
- Speed square
- Shovel and tamping tool
The 2026 Privacy Strategy: Planting for the Future
A trellis is only half of the privacy equation: the other half is horticulture. To have a fully screened area by 2026, you must select climbing perennials that are compatible with your USDA Hardiness Zone. Avoid invasive species like English Ivy or Wisteria sinensis, which have the tensile strength to crush a wooden frame as they mature. Instead, look toward Clematis or Native Honeysuckle (Lonicera sempervirens). These plants use petiole climbers or twiners that won’t damage the wood’s cellular structure. Year one is about root establishment. Do not expect massive growth. Year two involves lateral training where you manually weave the vines across the horizontal slats to encourage auxin distribution to side buds. By 2026, the plant’s lignified stems will create a secondary living screen that provides cooling through transpiration.
“A trellis is a structural engineering challenge where wind load is often underestimated by a factor of three.” – Structural Engineering for Landscape Architects
How Much Modified Gravel Do I Need for a Trellis Base?
For a standard 10-inch diameter post hole, you need approximately 0.25 cubic feet of modified gravel per hole to create a 4-inch drainage base. This equates to about half of a standard 50lb bag per post. Using gravel instead of soil at the base prevents the post from sinking over time and protects the wood fibers from constant saturation. This is a non-negotiable step in professional hardscaping. It ensures that the structural integrity of your landscaping project remains intact through multiple freeze-thaw cycles. Skip this, and you will be replacing the posts by 2028.
Final Structural Audit and Maintenance
Once the DIY trellis is built, your maintenance schedule determines its lifespan. Check the fastener torque every spring. Wood expands and contracts with humidity, which can loosen the grip of the screws. Apply a penetrating oil-based stain every two years. Unlike film-forming paints, oil-based stains soak into the cellulose fibers, providing internal protection against UV degradation and moisture. This prevents the cedar from turning a brittle silver-grey. For the plants, ensure you are practicing deep watering at the base rather than overhead spraying. This keeps the foliage dry and prevents powdery mildew, which can quickly defoliate a privacy screen. By following these engineering and horticultural protocols, your $200 investment will provide a high-value privacy barrier that looks better every year as the biology integrates with the structure.”, “image”: {“imagePrompt”: “A professional, high-angle close-up of a modern DIY trellis being constructed, showing horizontal cedar slats and a 4×4 post with a level attached, set against a backdrop of a clean residential garden.”, “imageTitle”: “Professional DIY Modern Trellis Construction”, “imageAlt”: “Close-up of cedar slats and 4×4 post for a modern privacy trellis.”}, “categoryId”: 0, “postTime”: “”}
![Build a $250 Gravel Shed Base [2026 No-Slab Fix]](https://lawnmajesty.com/wp-content/uploads/2026/05/Build-a-250-Gravel-Shed-Base-2026-No-Slab-Fix.jpeg)

![Build a $150 2026 Gravel Parking Pad [Weekend Fix]](https://lawnmajesty.com/wp-content/uploads/2026/05/Build-a-150-2026-Gravel-Parking-Pad-Weekend-Fix.jpeg)