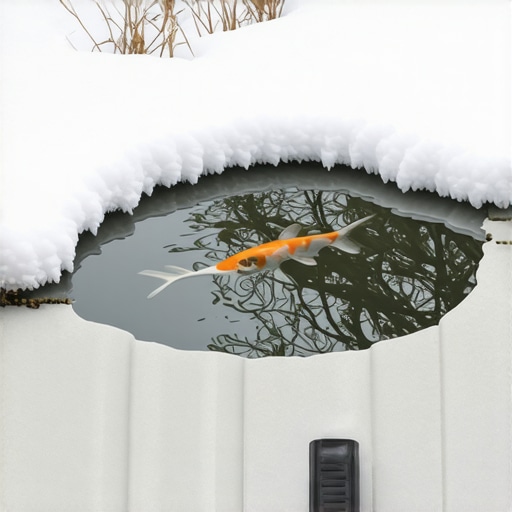
![Build a $250 2026 Backyard Waterfall [Step-by-Step]](https://lawnmajesty.com/wp-content/uploads/2026/05/Build-a-250-2026-Backyard-Waterfall-Step-by-Step.jpeg)
Build a $250 2026 Backyard Waterfall [Step-by-Step]
The Fundamentals of Backyard Hydrology and Site Planning
To build a $250 backyard waterfall, you must focus on site hydrology, liner integrity, and pump GPH. The process involves excavating a stepped basin, installing a 45 mil EPDM liner, and utilizing recycled local stone to manage costs while ensuring structural stability and efficient water circulation.
I always drill into my new crew members: if you don’t fix the soil grading first, every plant you put in the ground is just expensive compost. The same logic applies to water features. Most homeowners think they can just dig a hole and toss in a pump. That is how you end up with a mosquito-breeding mud pit by July. You have to understand the soil you are working with. If you have heavy red clay, your drainage is non-existent. If you have sandy loam, you have to worry about shifting. We are building a closed-loop system here. It requires precision. Every inch of slope counts. If your spillway is off by even a quarter inch, the water will find the path of least resistance. Usually, that path leads right into your foundation or under your patio. Fix the grade. Measure twice. Dig once.
“A retaining wall doesn’t fail because of the stone; it fails because of the water trapped behind it.” – Hardscape Engineering Axiom
Selecting Materials for the $250 Budget Threshold
Building a budget waterfall requires balancing material durability with cost efficiency by sourcing recycled stone and submersible pumps. Prioritize spending on a 45 mil EPDM liner and a high-efficiency pump while scavenging for boulders and river rock to keep the total project under the $250 limit.
We are not buying fancy flagstone from the stone yard at $400 a ton. To stay under $250, you have to be smart. You need 15 square feet of liner. You need a pump that moves at least 300 GPH. You need 10 feet of 3/4 inch kink-free tubing. The rest of your budget goes to underlayment and waterfall foam. For the stone, look at local construction sites or classified ads. People give away fieldstone just to get it off their property. But don’t just grab any rock. Avoid soft limestone that will dissolve and mess with your water pH levels over time. Use granite or river basalt if you can find it. It will last. It won’t crumble. Check the PSI of your compaction before you lay the first stone.
| Material Item | Estimated Cost (2026) | Source Recommendation |
|---|---|---|
| 45 Mil EPDM Liner (5×5) | $65.00 | Specialty Pond Supplier |
| 350 GPH Submersible Pump | $45.00 | Electrical Supply House |
| Recycled Fieldstone | $0.00 | Local Classifieds / Scavenged |
| Non-Woven Underlayment | $25.00 | Civil Engineering Supplier |
| Waterfall Expanding Foam | $15.00 | Hardscape Supply |
| PVC Tubing (10 ft) | $20.00 | Plumbing Wholesale |
| Graded Pea Gravel | $40.00 | Bulk Material Yard |
| Total Estimated Cost | $210.00 | N/A |
The Step-by-Step Excavation and Engineering Process
Proper waterfall excavation requires creating terraced shelves to support stone armoring and prevent liner slippage. You must dig a reservoir basin at least 18 inches deep and carve a vertical spillway into the natural slope to ensure gravity-fed flow and hydrostatic stability.
- Identify the 811 utility lines before any shovel hits the dirt.
- Mark the perimeter using landscape marking paint or a garden hose.
- Excavate the lower basin to a depth of 18 inches for pump submergence.
- Carve the waterfall run into the soil with 6-inch vertical drops.
- Remove every sharp stone or root that could puncture the EPDM.
- Tamp the soil until it reaches a 95% Proctor density.
- Install the non-woven geotextile underlayment.
- Lay the EPDM liner without stretching it tight.
Precision is everything during the dig. If your shelves are too narrow, your rocks will slide. If they are too wide, the water disappears behind the stones. Use a level on every shelf. Water does not lie. It will show you exactly where you messed up the grade. I see guys skip the underlayment. Don’t. A single sharp pebble will ruin your $250 investment in one season. It will leak. You will be frustrated. Use the underlayment. Protect the membrane. This is engineering, not arts and crafts.
How much modified gravel do I need for a waterfall base?
For a small $250 waterfall, you typically need approximately 0.5 cubic yards of modified gravel or crushed stone to create a stable sub-base. This material provides structural support for the heavy boulders and helps manage hydrostatic pressure beneath the liner system to prevent frost heave or settling.
“Proper pond filtration relies on the surface area of biological media to support nitrifying bacteria.” – Texas A&M AgriLife Extension
Managing the Mechanicals: Pump and Plumbing Integration
Successful waterfall plumbing relies on matching pump GPH to the vertical head height and spillway width to achieve the desired flow rate. Use kink-free tubing and waterfall foam to seal the spillway stone, ensuring all circulated water remains on top of the EPDM membrane.
The pump is the heart. If the heart stops, the system dies. Most DIYers buy a pump that is too weak. If your waterfall is 3 feet high, a 300 GPH pump will only deliver about 150 GPH at the top due to head pressure. Calculate your vertical lift. Friction loss in the hose matters. Keep your runs short. Hide the pump in a small plastic vault or a cluster of rocks at the bottom. This protects the intake from debris. Use black waterfall foam between the spillway rocks. This forces the water over the rock rather than under it. If the water goes under the rock, you can’t see it. What is the point of a waterfall you can’t see? Use the foam. It is ugly until it dries, then you trim it. It works. Don’t skip it.
How do I calculate GPH for a backyard waterfall?
To calculate the required GPH, multiply the spillway width in inches by 100 for a standard flow or 150 for a heavy flow. Add friction loss for every 10 feet of tubing and 1 foot for every 90-degree turn to determine the total dynamic head needed from your submersible pump.
The Armoring Phase: Rock Placement and Aesthetics
Armoring a budget waterfall involves placing primary structural boulders at the base and spillway to define the water’s path and structural integrity. Use graded river rock and pea gravel to fill voids, hide the liner edges, and provide surface area for beneficial bacteria to colonize.
This is where the project looks like a waterfall or a pile of rocks in a puddle. Start from the bottom. Place your largest stones first. They take the weight. Use the ‘one-over-two’ rule like a bricklayer. Avoid straight lines. Nature doesn’t use 90-degree angles. Tuck the liner behind the top rocks to create a ‘drip edge’. This ensures water can’t siphon out the back. Fill the gaps with smaller gravel. This creates a natural filter. Within weeks, the rocks will grow a layer of bio-film. This is good. This is the nitrogen cycle in action. It keeps the water clear. Don’t scrub the rocks clean. Let the biology work. In the first year, expect some settling. It is normal. Keep some extra gravel on hand to fill the low spots. The water will settle. The soil will compact. Just keep an eye on the water level.
![Build a $200 Solar Pond Fountain [2026 DIY Project]](https://lawnmajesty.com/wp-content/uploads/2026/05/Build-a-200-Solar-Pond-Fountain-2026-DIY-Project.jpeg)
![Build a $60 Solar Powered Bird Bath [2026 DIY]](https://lawnmajesty.com/wp-content/uploads/2026/06/Build-a-60-Solar-Powered-Bird-Bath-2026-DIY.jpeg)