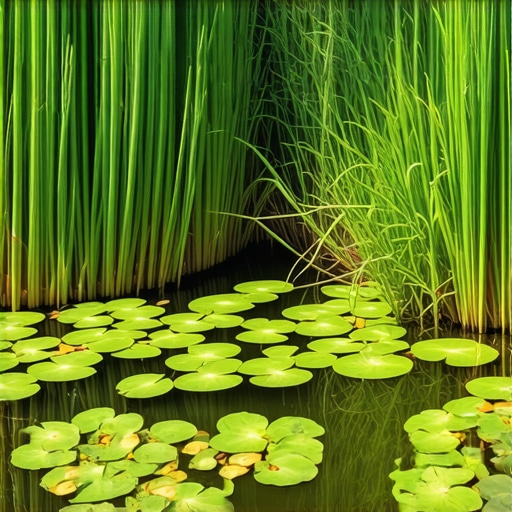
![Build a $60 Solar Powered Bird Bath [2026 DIY]](https://lawnmajesty.com/wp-content/uploads/2026/06/Build-a-60-Solar-Powered-Bird-Bath-2026-DIY.jpeg)
Build a $60 Solar Powered Bird Bath [2026 DIY]
The Physics and Biology of a Functional Bird Bath
Building a solar-powered bird bath requires more than just a basin; it demands a level, compacted base to prevent tipping and a high-efficiency photovoltaic pump that moves at least 40 GPH. Proper drainage and sunlight exposure are the primary engineering factors for 2026 DIY projects to ensure both structural longevity and avian safety.
I always drill into my new crew members: if you don’t fix the soil grading first, every plant you put in the ground is just expensive compost. The same logic applies to a 15-pound bird bath. If you set a heavy resin or concrete basin on uncompacted turf, the first heavy rain will turn that soil into a slurry, and your project will lean like a failed retaining wall. I’ve seen $5,000 garden designs ruined by one $60 accessory that wasn’t leveled properly. We do things right from the sub-grade up, or we don’t do them at all.
Siting the Basin: Engineering for Sunlight and Safety
For a solar bird bath to function, the monocrystalline solar panel must receive at least six hours of unobstructed direct sunlight daily to maintain a consistent 180 GPH flow rate. Proper placement also considers the predatory leap distance, keeping the basin at least five feet away from dense shrubbery where cats can hide. Positioning is a calculation of irradiance and escape routes. Most DIYers fail because they prioritize aesthetics over the solar arc. You need to map the sun. In the northern hemisphere, your panel needs a south-facing bias. If the pump doesn’t move water, the water goes stagnant. Stagnant water is a breeding ground for Culex mosquitoes and avian botulism. It will rot. Don’t skip the site survey.
“Water depth should not exceed 2 inches at the center of the basin to accommodate the average tarsus length of common songbirds.” – Agricultural Extension Management Standards
How much sun does a solar bird bath need?
A 2026-spec solar bird bath pump requires a minimum of 4 to 6 hours of direct solar radiation to maintain functional water pressure and prevent biofilm accumulation. Indirect light or partial shade will result in intermittent pump cycles, which fail to aerate the water effectively, leading to rapid algae growth.
Materials and Technical Specifications
Choosing the right materials is a matter of density and thermal mass. We avoid cheap plastics that degrade under UV exposure. Instead, we look for fiber-reinforced concrete or high-density polymers. Below is the material breakdown for a professional-grade $60 build.
| Material Item | Technical Specification | Estimated Cost |
|---|---|---|
| Basin | 20-inch Diameter / UV-Stable Resin | $25.00 |
| Solar Pump Kit | 3.5W Monocrystalline / Brushless Motor | $18.00 |
| Base Material | 3/4-inch Modified Gravel (CR617) | $5.00 |
| Leveling Sand | Coarse Polymeric Sand | $4.00 |
| River Stones | Smooth 1-3 inch Basalt | $8.00 |
The Ground-Up Construction Process
Follow this checklist to ensure the bird bath survives the freeze-thaw cycles and hydrostatic shifts of your local climate. Precision matters.
- Excavate the Footing: Dig a 12-inch diameter hole to a depth of 4 inches. Remove all organic matter.
- Compaction: Use a hand tamper to compress the sub-soil until it reaches 95% compaction.
- Base Layer: Add 3 inches of modified gravel. Tamp again. This prevents settling.
- Leveling: Apply a 1-inch layer of coarse sand. Use a torpedo level. It must be 0.0 degrees.
- Basin Placement: Center the basin and verify stability. It should not wobble.
- Pump Installation: Submerge the pump, ensuring the suction cups adhere to the basin floor.
- Water Quality: Fill with filtered water to a depth of exactly 1.5 inches.
What is the best material for a bird bath basin?
The most durable material for a DIY bird bath is glass-fiber reinforced concrete (GFRC) or UV-stabilized high-density polyethylene, as these resist thermal expansion cracks and ultraviolet degradation. Avoid untreated wood or thin ceramics that lack frost-resistance in colder climates, as they will shatter during winter months.
Maintaining the Hydraulic Cycle
The biggest enemy of a solar pump is particulate matter. In a landscaping environment, grass clippings, pollen, and bird dander will clog the intake filter within 72 hours. You must clean the sponge weekly. If the pump makes a grinding noise, it’s cavitating. Turn it off. Check the water level. Deep, infrequent maintenance is a myth; these systems require a bi-weekly scrub with a stiff-bristled brush—no soap. Soap destroys the natural oils in bird feathers. Stick to a 10% white vinegar solution if you have mineral buildup. In 2026, we see more high-efficiency pumps, but the biological reality of nitrate buildup from bird waste remains the same.
“Effective avian water features must incorporate a moving water element to disrupt the surface tension, discouraging mosquito oviposition.” – Public Health Entomology Manual
If you live in an area with heavy clay soil, like parts of the Midwest, your drainage is poor. You might need to extend your gravel base deeper to prevent frost heaving. In sandy Florida soils, your main concern is wind-driven shifting; you may need to anchor the base with a rebar stake. Always call 811 before digging, even for a small project. You don’t want to hit a shallow secondary line for your irrigation or outdoor lighting. Local codes often dictate drainage runoff; ensure your bird bath overflow doesn’t contribute to foundation dampness. Done right, this feature is a biological asset. Done wrong, it’s a mosquito ranch. Keep the water moving. Keep the base solid.
![Why Your 2026 Pond is Green [The $40 Filter Fix]](https://lawnmajesty.com/wp-content/uploads/2026/06/Why-Your-2026-Pond-is-Green-The-40-Filter-Fix.jpeg)
![Stop 2026 Pond Leaks: 3 Sealing Tape Rules [Fix]](https://lawnmajesty.com/wp-content/uploads/2026/06/Stop-2026-Pond-Leaks-3-Sealing-Tape-Rules-Fix.jpeg)