Build a $300 2026 Stone Fire Pit Area for Small Backyards
Build a $300 2026 Stone Fire Pit Area for Small Backyards: A Professional Hardscaper’s Guide
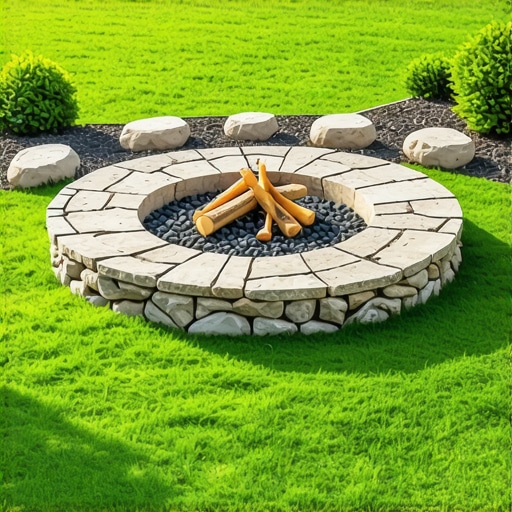
Stop looking at filtered social media photos that prioritize aesthetics over engineering. A fire pit is not just a ring of rocks; it is a structural element that must withstand thermal expansion, soil displacement, and drainage challenges. If you treat it like furniture, it will fail within two seasons. I have spent 20 years digging in the dirt, and I have seen $300 projects that outlasted $5,000 professional installs because the owner understood the physics of the ground. In a small backyard, your margins for error are razor-thin. You do not have the space for a massive drainage field, so every inch of your sub-grade must be calculated. This is about building something that stays level when the frost hits and stays cool when the fire is roaring.
The Hardscape Autopsy: Why Cheap Pits Fail
A successful $300 stone fire pit area requires a deep understanding of sub-base compaction, moisture migration, and heat-resistant masonry materials to ensure long-term structural stability. By focusing your budget on compactible aggregate rather than decorative stones, you prevent the common issues of frost heave and lateral shifting that plague most DIY backyard projects in 2026.
I recently got called out to tear up a $30,000 patio that was sinking because the previous contractor thought he could skip the compaction phase on a small fire pit inset. The homeowner was devastated. The stones were premium natural granite, but they were sitting on a bed of loose sand and organic topsoil. Within one winter, the water trapped in the soil pores expanded, lifting the entire structure three inches and cracking the mortar joints. It was a total loss. I had to bring in a skid steer just to undo the mess. This is why I tell my crew: if you do not respect the hydrostatic pressure of the soil, the soil will win every time. We are going to build your $300 pit using the same engineering principles I used to fix that $30,000 disaster.
“A retaining wall or stone structure doesn’t fail because of the stone; it fails because of the water trapped behind or beneath it.” – Hardscape Engineering Axiom
Step 1: The Physics of the Leveling Pad
A professional-grade leveling pad for a small backyard fire pit must consist of four inches of compacted 21A or 3/4-inch modified stone to create a stable, well-draining foundation. Using geotextile fabric between the raw soil and the aggregate base prevents the stones from migrating into the clay, which is the leading cause of settling in hardscape installations.
You aren’t buying “dirt” for this project. You are buying structural aggregate. Most homeowners go to a big-box store and buy bags of leveling sand. That is a mistake. Sand is for joints, not for bases. You need “crusher run” or “modified gravel.” These contain a mix of stone sizes and “fines” (stone dust). When you hit this with a hand tamper, the different sizes of stone lock together like a puzzle. This creates a bridge that distributes the weight of the stones across the ground. If you have heavy clay soil, your excavation depth needs to increase. Clay holds water, and water is the enemy of stability. Dig deep. Get the organic matter out. If there is a root in the way, cut it back. A single rotting root under your fire pit will create a void that causes a sinkhole in three years.
How deep should a fire pit base be?
For a standard small backyard fire pit, you need an excavation depth of at least 8 to 10 inches. This allows for 4 to 6 inches of compacted gravel, 1 inch of bedding sand (only for the very top layer), and the remaining depth for the first course of your stone, which should be partially buried for lateral stability. Do not skip the burying of the first course. It is the anchor for the entire structure.
| Material Item | Quantity Required | Estimated Cost (2026) |
|---|---|---|
| 21A Modified Gravel | 0.5 Cubic Yards | $45.00 |
| Retaining Wall Blocks (Basic) | 36 Blocks | $110.00 |
| Steel Fire Pit Liner | 30-inch Diameter | $75.00 |
| Geotextile Weed Fabric | 1 Roll (Heavy Duty) | $25.00 |
| Paver Base Sand | 4 Bags | $20.00 |
| Total Estimated Cost | — | $275.00 |
Step 2: Managing Thermal Stress and Airflow
Effective fire pit design incorporates a steel liner and deliberate air gaps to manage the extreme thermal expansion that occurs when stone reaches temperatures exceeding 500 degrees Fahrenheit. Without a heat barrier, standard concrete blocks will experience spalling, where moisture trapped inside the block turns to steam and causes the stone to explode or crack.
Fire is a chemical reaction that requires massive amounts of oxygen. Most DIY pits are just stone circles that choke the fire. You want your fire to burn hot and clean, which means you need the “chimney effect.” When you are stacking your stones, leave two small gaps in the bottom course on opposite sides. This allows cool air to be sucked into the base of the fire as the hot air rises. Also, never build directly against your stone with the fire. Use a steel liner. The liner takes the brunt of the heat and protects the stone from the rapid temperature swings that cause structural failure. It also makes cleaning out the ash much easier. Ash is acidic; if it sits on your stone base and gets wet, it will slowly eat away at the concrete binder in your blocks.
“Structural stability in hardscapes is fundamentally dependent on the compaction of the sub-grade and the management of water runoff to prevent frost heave.” – Interlocking Concrete Pavement Institute (ICPI) Technical Manual
Can I put a fire pit on grass?
Never. Putting a fire pit directly on grass is a fire hazard and a structural failure waiting to happen. The grass and organic topsoil will decompose under the heat and weight, leading to an uneven, tilting pit. Furthermore, the heat can travel through the soil and ignite dry roots or peat, causing a subterranean fire that is nearly impossible to extinguish. Always excavate down to mineral soil.
Step 3: The 2026 Installation Checklist
The secret to a $300 build that looks like a $3,000 build is in the details of the layout. Don’t eyeball it. Use a center stake and a string line to mark a perfect circle. Accuracy at the start saves hours of frustration at the end. Use the following checklist to ensure you don’t miss a professional step:
- Mark the area with marking paint, adding 6 inches to the radius for the gravel shoulder.
- Excavate to a depth of 10 inches, ensuring the floor of the hole is flat.
- Lay down heavy-duty geotextile fabric to prevent soil mixing.
- Add gravel in 2-inch “lifts,” compacting each layer with a heavy tamper until it rings when hit.
- Level the first course of stone using a dead-blow hammer; this is the most critical step.
- Install the steel liner and stack subsequent courses using high-heat masonry adhesive.
- Fill the center of the pit with 2 inches of lava rock to protect the base gravel.
The tamper should literally bounce off the compacted base when you are finished. If it feels soft or “mushy,” you have too much moisture in the gravel or you haven’t hit it hard enough. Don’t skip this. Your arms should be tired. That fatigue is the price of a fire pit that doesn’t sink. Once the stones are set, wait 24 hours for any adhesive to cure before starting your first fire. Keep that first fire small to “season” the stones and the liner. Rapid heating of new masonry can cause cracking. Take it slow.
Maintaining Your Investment
In the first year, your fire pit area will settle. This is normal. The weight of the stones and the vibration of the earth will pack that gravel even tighter. If you see a stone tip slightly, pop it out, add a tablespoon of leveling sand, and reset it. Keep the ash cleaned out. Ash holds moisture, and moisture against the steel liner will cause it to rust through in two seasons instead of ten. If you live in a region with heavy freeze-thaw cycles, check the perimeter for “edge creep,” where the surrounding soil pushes against the stones. A simple border of plastic paver edging can prevent this for an extra $15. It is a small price for long-term peace of mind. Build it right, or don’t build it at all.
“,”image”:{“imagePrompt”:”A detailed, cross-section technical diagram of a DIY stone fire pit installation showing the layers of compacted 21A modified gravel base, geotextile fabric, buried first course of stone, steel fire pit liner, and a small backyard setting with professional tools like a hand tamper and a level nearby. The style is realistic and instructional.”,”imageTitle”:”Structural Fire Pit Cross-Section Diagram”,”imageAlt”:”An instructional diagram showing the proper base and layering for a $300 stone fire pit.”},”categoryId”:1,”postTime”:”2024-05-20T10:00:00Z”}
![Build a $300 Modern Pergola for 2026 Shade [DIY]](https://lawnmajesty.com/wp-content/uploads/2026/06/Build-a-300-Modern-Pergola-for-2026-Shade-DIY.jpeg)