Fixing 2026 Settled Soil Around Foundations
Fixing 2026 Settled Soil Around Foundations: Structural Grading and Soil Engineering
The smell of damp concrete and the sight of a hairline fracture in a basement wall are the first signs of a contractor’s failure. I recently got called out to tear up a $30,000 patio that was sinking because the previous contractor used ‘fill dirt’ instead of a structural base and ignored the soil compaction requirements against the foundation. The homeowner was watching their investment literally slide into the ground. This is the reality of residential construction: if you do not respect the physics of soil settlement and hydrostatic pressure, the earth will eventually reclaim your hard work. In 2026, we are seeing a massive surge in foundation issues for homes built during the 2020-2022 construction boom. These homes have reached their settlement maturity, and the loose backfill placed by rushed crews is now collapsing. Landscaping is not just about aesthetics; it is the final layer of civil engineering that keeps a house dry and stable.
The Mechanics of Soil Subsidence and Settlement
Soil settlement around foundations occurs when backfill material, often loosely replaced during construction, loses air pockets and compresses over 3-5 years. This creates negative grading, directing water toward the concrete, increasing hydrostatic pressure, and potentially causing structural failure or basement flooding in residential properties.
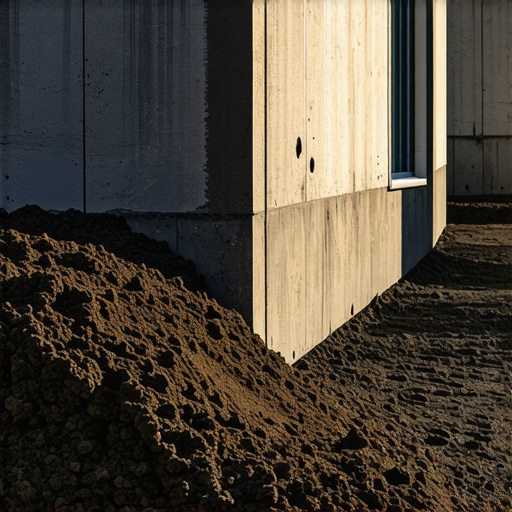
When a foundation is poured, the ‘overdig’ is eventually filled back in with the excavated soil. This soil is disturbed, aerated, and lacks the structural integrity of the undisturbed ‘virgin’ earth surrounding the site. Without mechanical compaction in six inch lifts, this soil will naturally settle. In a heavy rain event, water finds these loose pockets, creating a ‘sponge effect’ against your foundation. The water molecules lubricate the soil particles, causing them to slide into a denser configuration. This is why you see a dip or a trench forming within three feet of your home’s perimeter. If you ignore this, you are inviting thousands of gallons of water to press against your parge coat and footer. It is not a matter of if it will leak, but when. Soil physics dictates that water will follow the path of least resistance, and loose, uncompacted backfill is a superhighway to your basement floor. Every inch of settlement translates to a higher volume of water redirected from the yard toward the house. You are dealing with soil shear strength and the angle of repose. If the soil slopes toward the house, gravity does the rest.
“Surface drainage is the first line of defense against foundation moisture problems. Proper grading away from the structure ensures that bulk water is moved quickly to a location where it can be absorbed or managed.” – Penn State Agricultural Extension
How do I tell if my foundation soil is settling?
Look for a ‘gap’ between the soil and the concrete wall. If you see a physical separation or a visible dip where the soil is lower than the surrounding lawn, you have settlement. Check the ‘splash blocks’ under your downspouts; if they are tilted toward the house, the ground is failing beneath them. Use a four foot level or a transit to check the slope. You need a minimum of one inch of drop for every foot of distance for the first six feet away from the wall. Anything less is a ticking time bomb for your foundation.
Why 2026 is the Critical Year for Post-Boom Foundations
Residential properties built during the 2020-2022 period are currently experiencing peak soil consolidation as the internal air voids in the backfill reach their terminal state. This 2026 settlement cycle requires immediate intervention with compacted clay caps and improved drainage to prevent structural cracking.
During the housing boom, many builders skipped the ’95 percent Proctor density’ rule for backfill. They dumped dirt in a hole and moved to the next lot. It takes about five years for that soil to reach its natural compaction level through gravity and hydration cycles. We are seeing a ‘perfect storm’ where these yards are finally failing simultaneously. This is why your lawn might have looked fine for three years and suddenly developed a moat this spring. The soil has finished its primary consolidation. Now, we have to deal with the secondary settlement and the resulting negative grade. It is a biological and mechanical reality that you cannot cheat. If the soil wasn’t tamped during the build, it will tamp itself over time, usually at the expense of your foundation’s dry basement. I see guys trying to fix this by throwing more mulch or topsoil on top. That is a death sentence. Mulch is organic matter; it rots. Topsoil is porous; it lets water right through. You are just hiding the problem while making it worse by holding more moisture against the wall. You need a structural fix, not a cosmetic one.
| Material Type | Permeability | Compaction Rating | Primary Function |
|---|---|---|---|
| Screened Topsoil | High | Low | Planting and turf growth only |
| Compactable Clay | Low | Very High | Creating an impermeable water cap |
| #57 Limestone | Very High | Medium | Sub-surface drainage and French drains |
| 21A / Crusher Run | Low | High | Structural base for hardscaping |
The Forensic Autopsy: Identifying Negative Grade
Identifying negative grading involves measuring the elevation change between the foundation wall and the yard to ensure positive drainage. A visual inspection often reveals hydrostatic pressure indicators such as efflorescence on basement walls or pooling water against the perimeter.
I have performed hundreds of foundation ‘autopsies.’ The symptoms are always the same. You walk the perimeter and feel the ground ‘squish’ even days after a rain. This is because the water has nowhere to go. It is trapped in the ‘basin’ created by the settling backfill. When we excavate these sites, we often find rotting construction debris buried in the soil. Wood scraps, buckets, and trash create voids as they decay, accelerating the settlement. To fix this, you have to strip back the turf and the topsoil. You need to get down to the sub-grade. If you just pile dirt on top of the grass, you are creating a ‘sandwich’ of organic material that will rot and cause even more sinking in twelve months. You must remove the sod, compact the existing sub-soil with a mechanical plate compactor, and then build your grade back up using the right materials. This is work that requires a laser level, not a ‘good eye.’ If you are off by half an inch, the water will find it. Water is the most patient engineer on the planet; it never stops looking for a way in.
“Soil compaction should reach at least 95 percent of the standard Proctor density for structural stability under any hardscape or foundation-adjacent grading.” – Engineering Manual for Soil Mechanics
Can I use mulch to fix negative grading?
Absolutely not. Mulch is a sponge. Using it to fill a low spot near your foundation is like wrapping your house in a wet towel. Mulch decomposes into organic fines that offer zero structural support. To fix grading, you must use mineral soil—specifically a high-clay content soil that can be compacted to shed water. Mulch should only be used as a top-dressing, never as a structural fill material. If a contractor tells you otherwise, fire them on the spot.
The Step-by-Step Remediation Protocol
Remediating settled soil requires a systematic approach of excavation, mechanical compaction, and the installation of a clay cap to shed water. This process ensures the structural integrity of the foundation by preventing water infiltration and soil saturation.
First, we clear the work area. Any plants or shrubs within five feet of the foundation are moved or protected. We strip the sod and the top 4 inches of organic topsoil. Next, we use a ‘jumping jack’ or a heavy plate compactor to stabilize the existing soil. You want the tamper to literally bounce off the ground; that is how you know you have hit maximum density. Then, we bring in a ‘select fill’—usually a heavy clay or a loam with low organic content. We install this in three inch lifts, compacting each layer as we go. This creates the ‘cap.’ The goal is to create a ramp that starts about 4-6 inches below the siding and slopes down into the yard. We finish with a thin layer of topsoil and new sod or seed. The ‘contrarian’ truth here is that you want the soil near your house to be ‘bad’ soil for plants—meaning it shouldn’t hold water. Save the rich, black dirt for the garden beds twenty feet away. Near the house, you want it as hard and impermeable as a parking lot, just hidden under a thin layer of green grass. Don’t skip the compaction. If you don’t use a machine, you are wasting your time.
- Strip sod and 4 inches of organic topsoil from the foundation perimeter.
- Identify the ‘low point’ using a laser level or string line.
- Fill the void with a high-clay content select fill in 3-inch layers.
- Compact each layer using a mechanical vibratory plate compactor.
- Ensure a minimum slope of 5% (1 inch per foot) away from the structure.
- Replace topsoil (maximum 2 inches) and re-establish turf.
- Extend downspout outlets at least 10 feet away from the newly graded area.
Drainage Systems: Moving Beyond the Dirt
Advanced drainage systems like French drains and downspout transitions complement soil grading by managing subsurface water and hydrostatic head pressure. Integrating these with a foundation grade fix ensures long-term protection against water ingress.
Sometimes grading alone isn’t enough, especially if you have a high water table or a ‘hill’ behind your house. In these cases, we install a French drain at the toe of the slope. We use a perforated pipe, wrapped in a geotextile silt sock, buried in a trench of #57 clean stone. This acts as an ‘escape valve’ for the water. But the most common failure I see is downspouts. A single downspout can dump 500 gallons of water in a heavy storm. If that water drops right onto your new grading, it will eventually erode it. We pipe every downspout underground using solid-wall PVC (not the cheap corrugated stuff that clogs with roots) and run it to a ‘pop-up emitter’ or a daylight exit far away from the house. This removes the ‘point load’ of water from your foundation. By combining a compacted clay cap with a dedicated pipe system, you create a dual-layered defense. The clay sheds the surface water, and the pipes handle the volume from the roof. This is how you build a system that lasts thirty years instead of three. Stop thinking about ‘dirt’ and start thinking about ‘flow.’ If you don’t control the water, it will control you.
How deep should a French drain be for foundation protection?
For foundation protection, a French drain should be deep enough to intercept water before it reaches the footer, typically 18 to 24 inches deep. However, it must always be lower than the area you are trying to drain. The bottom of the trench should have a 1-2% slope toward the discharge point. If you go too shallow, the water will simply jump over the pipe and continue toward your basement. Accuracy in depth is the difference between a dry house and a swamp.