How to Build a Durable Wood Retaining Wall
How to Build a Durable Wood Retaining Wall
Building a wood retaining wall that doesn’t rot or collapse within five years requires more than just stacking 4x4s from a big-box store. It is a project rooted in civil engineering and soil mechanics. Most DIYers and low-bid contractors fail because they treat wood walls as furniture. In reality, a retaining wall is a dam designed to hold back thousands of pounds of hydrostatic pressure and saturated earth. If you don’t respect the physics of the soil, your wall will bow, lean, and eventually fail. This guide breaks down the high-level engineering required to build a timber structure that lasts twenty years or more.
The Hardscape Autopsy: Why Most Wood Walls Fail
To build a durable wood retaining wall, you must prioritize structural drainage, use UC4B rated timbers for ground contact, and implement deadman anchors to resist the lateral force of the soil. I recently got called out to tear up a $30,000 patio that was sinking because the previous contractor used cheap landscape timbers for the supporting wall. They didn’t use a single ounce of drainage stone or a perforated pipe behind the timber. Within three years, the wood had turned into expensive mulch, and the hydrostatic pressure had pushed the wall four inches out of plumb. The entire patio was essentially floating on a mud slurry. We had to excavate the entire mess, dispose of the rotted wood, and start from the soil up. It was a textbook case of why cutting corners on the foundation is the fastest way to burn money in landscaping.
“A retaining wall doesn’t fail because of the stone; it fails because of the water trapped behind it.” – Hardscape Engineering Axiom
The Physics of Soil and Hydrostatic Pressure
When you cut into a slope to build a wall, you are disturbing the natural angle of repose. This creates a wedge of soil that wants to slide back down. When rain hits that soil, the weight increases exponentially. This is called hydrostatic pressure. Without a path for that water to exit, it will push against your timbers until the fasteners snap or the wood bows. You aren’t just building a wall; you are managing water. This is why 12 inches of clean 57 stone behind the wall is non-negotiable. This stone column allows water to drop vertically to your drainage pipe rather than pushing horizontally against your timbers. Don’t believe the ‘well-drained soil’ myth. In heavy clay, water stays trapped, and clay expands when wet, exerting massive force on your structure.
| Material Type | Treatment Grade | Design Life | Best Use Case |
|---|---|---|---|
| 4×4 Hemlock/Fir | UC3A (Above Ground) | 3-5 Years | Garden edging only |
| 6×6 Pressure Treated | UC4A (Ground Contact) | 12-18 Years | Low walls under 2 feet |
| 6×6 Pressure Treated | UC4B (Heavy Duty) | 25+ Years | Structural retaining walls |
| Reclaimed RR Ties | Creosote Treated | 30+ Years | Industrial or rustic utility |
Phase 1: Excavation and the Modified Gravel Base
A durable base for a retaining wall must be excavated to a depth of at least 12 inches, filled with 6 inches of compacted 2A modified stone, and leveled to within an eighth of an inch. If your base isn’t solid, your wall will settle unevenly. The soil at the bottom of your trench must be undisturbed. If you over-dig, you must backfill with gravel and compact it in 2-inch lifts. Never backfill with loose dirt. Use a plate compactor. The machine should literally bounce off the surface when the compaction is right. This creates a bridge that distributes the weight of the wall and prevents frost heave from popping your first course out of alignment.
How deep should a wood retaining wall post be?
For any wall over three feet, you should bury at least 40 percent of the wall’s height underground or utilize structural posts set in concrete every 4 feet. If you are building a standard stacked timber wall, the first course should be at least 50 percent buried. This ‘toe’ of the wall is what prevents the bottom from kicking out. Without proper embedment, the weight of the soil behind the top of the wall acts as a lever, and the bottom is the weak point that will slide forward. In hardscaping, gravity is your friend only if you anchor it properly.
Phase 2: Timber Selection and Fastening
You must use 6×6 timbers rated for UC4B ‘Heavy Duty Ground Contact.’ Most big-box retailers sell UC4A, which is fine for a fence post but won’t survive the constant moisture of a retaining wall backfill. Look for the tag on the end of the timber. If it doesn’t say UC4B, don’t buy it. When it comes to fastening, throw away the spikes. Use 10-inch or 12-inch structural timber screws. These screws have a coating that resists the corrosive nature of the ACQ (Alkaline Copper Quaternary) chemicals used to treat the wood. Space your fasteners every 18 inches and staggered between courses. This creates a monolithic structure rather than a stack of loose wood.
What is the best wood for a retaining wall?
The best wood for a retaining wall is Pressure-Treated Southern Yellow Pine rated for Ground Contact (UC4B) or reclaimed railroad ties if aesthetics allow. While cedar and redwood are naturally rot-resistant, they lack the structural density required to hold back significant soil loads over long periods. Southern Yellow Pine is a dense softwood that accepts pressure treatment deep into the heartwood, making it the industry standard for hardscape engineering. Avoid ‘landscape timbers’ with rounded sides; they lack the surface area for stable stacking and offer poor chemical penetration.
“Hydrostatic pressure is the primary driver of retaining wall failure, as saturated soil can weigh twice as much as dry soil.” – USDA Soil Engineering Field Manual
Phase 3: The Drainage Column and Deadman Anchors
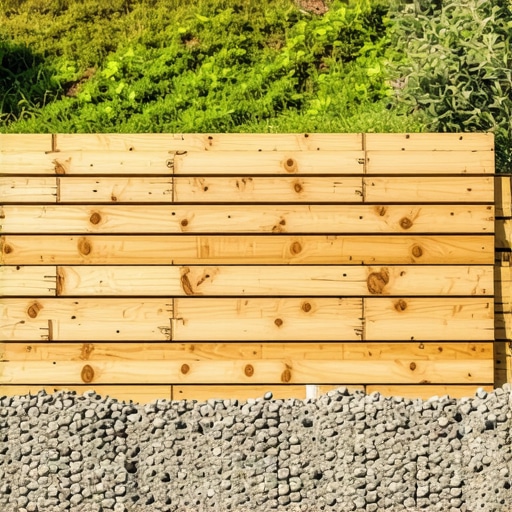
The drainage system for a timber wall must include a 4-inch perforated SDR-35 pipe placed at the base of the wall, covered by a geotextile fabric wrap and 12 inches of clean stone. This is the ‘French Drain’ concept applied to hardscaping. The fabric prevents fine soil particles from clogging the gaps in your stone. Without this, your drainage stone becomes ‘blinded’ by mud within two seasons. Additionally, for walls over 24 inches, you must install ‘deadmen.’ A deadman is a timber T-joint that extends 4 to 6 feet back into the hillside. It acts as an anchor. The weight of the soil sitting on top of the deadman holds the face of the wall in place. It is the only way to prevent a wood wall from leaning over time.
- Step 1: Level the trench and compact the 6-inch gravel base.
- Step 2: Lay the first course, ensuring it is perfectly level and square.
- Step 3: Install the perforated drain pipe with a 1 percent slope toward an outlet.
- Step 4: Stack subsequent courses, staggering the joints like bricks.
- Step 5: Install deadmen every 8 feet on the third or fourth course.
- Step 6: Backfill with 12 inches of clean stone behind every course.
- Step 7: Cap the stone with a layer of geotextile and 4 inches of topsoil to prevent surface water infiltration.
Maintenance and Long-Term Integrity
Wood is an organic material. It will eventually return to the earth, but you can delay that process. Every three years, check the drainage outlets. If you see water trickling out after a heavy rain, the system is working. If the area behind the wall stays swampy, your pipe is clogged. Check for ‘borers’ or carpenter ants, which love the damp environment behind a timber wall. A quick application of a wood-safe pesticide can save the structural core of your timbers. Don’t paint the wood; it traps moisture inside and accelerates rot from the inside out. Use a breathable oil-based stain if you want to maintain the color. Treat the wood like the engineering material it is, and it will serve your landscape for decades.