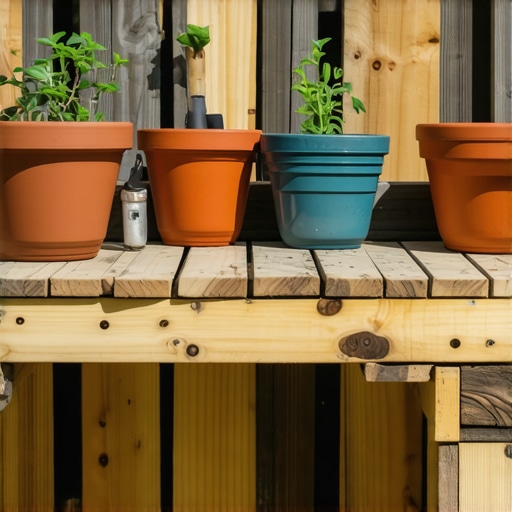
How to Build a Simple Potting Bench from Pallets
How to Build a Simple Potting Bench from Pallets: A Professional Grade Approach
Most DIY tutorials on building a potting bench from pallets are a recipe for rot and structural failure within two seasons. I always drill into my new crew members: if you don’t fix the soil grading first, every plant you put in the ground is just expensive compost. The same logic applies to your workspace; if you build a flimsy bench from degraded wood, your seed starts and potting precision will suffer. We aren’t just slapping wood together. We are engineering a workstation that respects horticultural ergonomics and material durability. This guide breaks down the physics and biology of a proper garden bench build.
Selecting Structural Pallets for Longevity
To build a durable potting bench, you must identify heat-treated (HT) pallets that provide structural integrity without the risk of chemical leaching from methyl bromide (MB) treatments. Avoid any wood with discoloration or ‘fuzzy’ textures, which indicate active fungal colonization that will rapidly spread to your terracotta pots and seed trays. This is about more than just aesthetics; it is about preventing pathogens from entering your garden design. I have seen too many homeowners introduce rot to their greenhouses by bringing in ‘reclaimed’ wood that was already infested with wood-destroying organisms.
“Heat treatment (HT) standards for wood packaging materials require the core temperature to reach 56 degrees Celsius for at least 30 minutes to eliminate pests and pathogens.” – Penn State Extension: Wood Packaging Regulations
How do I know if a pallet is safe for a potting bench?
Look for the IPPC stamp branded into the side of the pallet runners; a stamp marked with ‘HT’ signifies the wood was kiln-dried and is safe for handling soil and seedlings, whereas ‘MB’ indicates toxic fumigation. Check for 1-inch thick deck boards. Thin slats will warp under the weight of saturated 5-gallon nursery containers. If the wood is graying, it has already lost its lignin strength. You want the golden-brown hue of relatively fresh timber. If it smells like chemicals, walk away. Your plants depend on a clean environment.
| Pallet Stamp | Treatment Method | Garden Safety Rating | Structural Durability |
|---|---|---|---|
| HT | Heat Treated | High (No leaching) | High (Kiln-dried) |
| MB | Methyl Bromide | Danger (Toxic) | Low (Chemically soaked) |
| DB | Debarked | Neutral | Variable |
| KD | Kiln Dried | Safe | Very High |
The Engineering Phase: Blueprint and Dimensions
A potting bench is an extension of your landscaping workflow, and its height must be calibrated to 36 inches to prevent lumbar strain during high-volume transplanting tasks. Most pallets are 48×40 inches, which provides the perfect depth for a 20-inch work surface and a 20-inch elevated tool rack. Don’t eyeball this. Use a level and a square. If your bench isn’t plumb, water will pool on the surface, inviting fungal growth and uneven drainage in your seed flats. Gravity is a relentless foreman; work with it, not against it.
How tall should a potting bench be for ergonomics?
A professional potting bench should stand between 34 and 38 inches high, specifically aligned with the user’s waist height to minimize spinal flexion during heavy soil mixing. This height ensures that the force applied when tamping down soil into 4-inch pots comes from the shoulders, not the lower back. If you are taller than 6 feet, aim for 40 inches. If you are shorter, 32 inches is your target. One size does not fit all in hardscaping or carpentry. Misalignment leads to fatigue. Fatigue leads to sloppy gardening.
The Step-by-Step Installation Process
Construction begins by dismantling the pallets using a pry bar and a reciprocating saw. Do not just hammer them apart; you will split the grain and ruin the fastener-holding capacity of the wood. Once you have your 2×4 stringers and 1×6 deck boards, follow this sequence. Focus on lateral stability. A wobbly bench is a dangerous bench. We use 3-inch exterior grade deck screws. Nails are for amateurs; they pull out as the wood swells and shrinks with the humidity.
- Step 1: Frame the Legs. Use four 2×4 stringers cut to your ergonomic height. Notch the tops to accept the frame rails for a ‘wood-on-wood’ load transfer.
- Step 2: Build the Main Box. Create a 48-inch by 24-inch rectangle. Check for square by measuring the diagonals. They must be identical.
- Step 3: Install the Work Surface. Space your top slats 1/8 inch apart. This allows spilled soil and water to pass through rather than creating a muddy sludge.
- Step 4: The Backboard and Shelving. Vertical slats provide a place to hang trowels and cultivators. Keep your tools off the ground to prevent rust and soil-borne disease transfer.
- Step 5: Sanding and Sealing. Use 80-grit sandpaper to remove splinters. A light coat of linseed oil will protect the wood without poisoning your lawn care environment.
“The structural integrity of any timber assembly is dictated by the shear strength of the fasteners and the moisture content of the substrate.” – Structural Timber Manual (ICPI Standards)
The Science of Soil Management on Your New Bench
Your potting bench is the laboratory where soil pH and nutrient density are controlled before plants ever hit your garden design. When you mix your own potting media on this bench, you are looking for a specific bulk density. Standard field soil is too heavy and will compact in pots, suffocating the roots. You need a mix of peat or coco coir, perlite, and compost. On this bench, you can precisely measure your N-P-K ratios without making a mess of your lawn. Proper drainage in the pots starts with the physical structure of the mix you prepare right here.
Why is a potting bench better than the ground?
Using a potting bench prevents soil compaction and the transfer of turf-borne pests like grubs or fungal spores from the lawn into your sensitive nursery stock. Working at waist height allows for closer inspection of root flares and foliage for signs of chlorosis or spider mites. It is about control. On the ground, you are at the mercy of the elements and local pests. On the bench, you are the master of the micro-environment. It is the difference between a professional nursery and a ‘mow-and-blow’ hack operation.
Environmental Integration and Drainage
Where you place your pallet bench matters as much as how you build it. Do not set the wooden legs directly on the soil. Hydrostatic pressure will pull moisture up into the grain, causing rot from the bottom up. Place the bench on a small pad of modified gravel or a set of concrete pavers. This breaks the capillary action and ensures the legs stay dry. This is a basic hardscaping principle. If wood touches wet dirt, wood turns back into dirt. It is biology. It is inevitable unless you engineer against it. It will rot if you ignore this.
Maintenance and Seasonal Care
In the fall, strip the bench of all pots. Soil left in terracotta will freeze, expand, and shatter the pots. Scrub the bench surface with a 10% bleach solution to kill off any lingering Phytophthora or other water molds. Check the screws for looseness. Wood is a dynamic material; it breathes. Tighten the fasteners to maintain the structural rigidity. If you treat this bench like a piece of equipment rather than a piece of trash, it will last a decade. Don’t be lazy with the maintenance. Done right, this pallet build outperforms the $400 kits sold at big-box stores. Don’t skip the cleaning. It matters.
![Build a $500 Outdoor Kitchen Frame with Steel Studs [DIY]](https://lawnmajesty.com/wp-content/uploads/2026/05/Build-a-500-Outdoor-Kitchen-Frame-with-Steel-Studs-DIY.jpeg)

![Build a $300 Modern Pergola for 2026 Shade [DIY]](https://lawnmajesty.com/wp-content/uploads/2026/06/Build-a-300-Modern-Pergola-for-2026-Shade-DIY.jpeg)