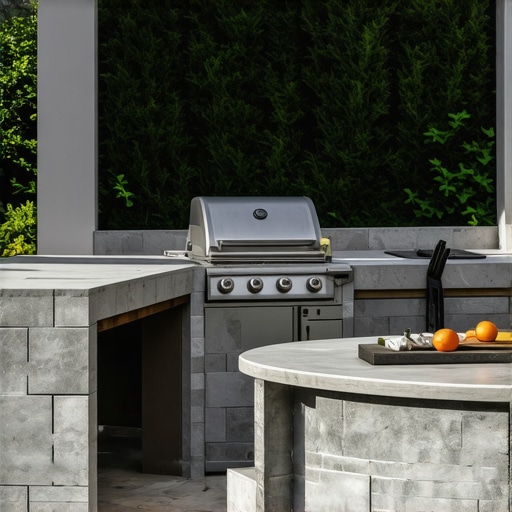
How to Build an Inexpensive Outdoor Kitchen Using Concrete Blocks
The Engineering Reality of Outdoor Kitchens
I recently got called out to tear up a $30,000 patio that was sinking because the previous contractor ignored the sub-base compaction and tried to build a heavy outdoor kitchen on top of two inches of stone dust. The weight of the concrete masonry units (CMU) and the granite countertop crushed the uncompacted soil, leading to structural shearing and gas line tension. If you want to build an inexpensive outdoor kitchen, concrete blocks are the gold standard for durability and cost, provided you treat the project like a civil engineering task rather than a craft project.
“A retaining wall or heavy masonry structure doesn’t fail because of the stone; it fails because of the water trapped behind it and the lack of a consolidated base.” – Hardscape Engineering Axiom
How deep should a footing be for a concrete block wall?
To support the weight of concrete blocks, a concrete footing must be poured below the frost line, typically 12 to 36 inches deep depending on your region, to prevent heaving and structural cracking. Using a trench filled with 6 inches of compacted 21A or 57 stone before pouring 3,000 PSI concrete ensures the kitchen island remains level for decades.
Phase 1: Soil Mechanics and Foundation Stabilization
The success of your outdoor kitchen depends entirely on the soil load-bearing capacity and your ability to manage hydrostatic pressure. Most DIY failures occur because the homeowner assumes the existing patio can support a 2,000-pound block structure. It cannot. You must excavate down to undisturbed subsoil. If you hit heavy clay, you need to over-excavate and replace it with modified gravel that can be compacted to a 98% Proctor density. Anything less and your kitchen will migrate. Use a plate compactor. Do not use a hand tamper. A hand tamper is for amateurs who enjoy doing the same job twice.
What is the best concrete block for an outdoor kitchen?
Standard 8x8x16-inch CMU blocks are the most cost-effective choice for outdoor kitchens because they offer high compressive strength and allow for internal rebar reinforcement. Using hollow-core blocks provides a channel for running electrical conduits and gas lines without compromising the structural integrity of the masonry shell.
| Material Type | Relative Cost | PSI Rating | Durability (Years) |
|---|---|---|---|
| Standard CMU Block | Low | 1,900+ | 50+ |
| Steel Frame Kits | High | N/A | 15-20 |
| Pressure Treated Wood | Lowest | N/A | 5-10 (Not Recommended) |
| Poured Concrete | Medium-High | 3,000-4,000 | 40+ |
Phase 2: The Masonry Build and Utility Integration
Once your footing is cured (give it 72 hours, don’t be impatient), you start the first course. This is the most critical step. If the first course of concrete blocks is even 1/8th of an inch off, the top of the counter will be crooked by an inch. Use a full mortar bed for the first course to allow for micro-adjustments. Use a level on every single block. For subsequent courses, you can use structural masonry adhesive if the blocks are precision-cut, but a running bond pattern is non-negotiable for strength. Every corner should be interlocked. This isn’t just about looks; it’s about lateral stability.
- 811 Call: Always have your utility lines marked before digging your footing.
- Drainage: Ensure the interior of the block island has a way for water to escape.
- Rebar: Drop #4 rebar into the cores and fill with grout every 32 inches.
- Venting: If using Propane, you MUST install vents at the bottom. Propane is heavier than air. Without vents, it pools and becomes a bomb.
Phase 3: Veneer, Countertops, and Finishing
The beauty of a concrete block kitchen is that it acts as a structural skeleton for any finish. You can apply natural stone veneer, stucco, or even thin-brick. When applying stucco, use a scratch coat first. If you skip the scratch coat, the stucco will delaminate within two winters. For the countertop, poured-in-place concrete is the most inexpensive option and fits the hardscaping aesthetic. It allows you to create custom overhangs for seating. Just remember: hydrostatic pressure isn’t just a ground issue; water must shed off the counter. Aim for a 1% slope away from the grill.
“Proper masonry construction requires a balance of thermal expansion joints and rigid structural support to survive the freeze-thaw cycles of the northern climates.” – ICPI Installation Standards
How much modified gravel do I need for a patio base?
To calculate modified gravel needs, multiply the square footage by the depth in feet (usually 0.5 feet for a 6-inch base) and divide by 27 to get cubic yards. For a standard 10×10 area, you will need approximately 2.5 tons of crushed stone to ensure a stable, non-shifting foundation for your masonry work.
Post-Install Maintenance and Longevity
Concrete is porous. If you don’t seal it, it will degrade. Use a silane-siloxane sealer on the blocks and the countertop. This penetrates the surface and creates a hydrophobic barrier without making it look like plastic. Reapply every three years. Check your mortar joints annually for efflorescence or cracking. If you see white powder, you have a moisture problem inside the wall. Address it early. Don’t wait until the block faces start spalling. Your kitchen is a machine. Maintain it like one.