How to Install Landscape Lighting Without a Professional
Professional Strategies for DIY Landscape Lighting Installation
I recently got called out to tear up a $30,000 patio that was sinking because the previous contractor failed to plan for electrical conduit. They had simply jammed thin-gauge lighting wire into the edge of the stone with a screwdriver. Over two seasons, water followed the wire path, undermined the bedding sand, and created a structural nightmare. Most homeowners think landscape lighting is about sticking plastic spikes in the dirt. It is actually a lesson in civil engineering and electrical load management. If you ignore the physics of your yard, your lights will fail before the first frost hits.
The Core Engineering of Low-Voltage Systems
To install landscape lighting without a professional, you must calculate total wattage load, select a multi-tap transformer, and use 12-gauge direct-burial wire buried at least six inches deep to prevent frost heave or mower damage. Most DIY failures stem from voltage drop where the lights at the end of the run appear dimmer than those near the power source. Proper planning involves mapping the total distance and ensuring your transformer can handle the initial surge. Do not buy a kit from a big-box store and expect it to last five years. It won’t. You need professional-grade components that can withstand the hydrostatic pressure of wet soil and the chemical reality of lawn fertilizers.
“A landscape lighting system is only as durable as its weakest connection point; moisture ingress in buried splices is the primary cause of circuit failure.” – International Dark-Sky Association (IDA) Guidelines
What size transformer do I need for 10 LED lights?
Calculating your transformer size requires adding the total wattage of all fixtures and adding a 20 percent safety buffer to prevent overheating the internal coil. Most professional LED landscape lights pull between 3 and 7 watts per fixture. If you have 10 lights at 5 watts each, your total load is 50 watts. A 60-watt transformer is cutting it too close; you should opt for a 75-watt or 100-watt unit. This allows for future expansion and ensures the transformer runs at a lower temperature, which extends the life of the internal components. Never exceed 80 percent of a transformer’s rated capacity for long-term reliability.
The Structural Blueprint: Planning Your Layout
Before you touch a shovel, you need a blueprint. 80 percent of the work happens before a single wire is unspooled. You must identify your power source, typically a GFCI-protected outdoor outlet. From there, you map your runs. There are three main wiring methods: the Daisy Chain, the T-Method, and the Hub Method. For professional results, the Hub Method is superior. You run a heavy-gauge cable to a central junction box (the hub) and then run shorter, equal-length wires to each fixture. This ensures every light receives the exact same voltage. It prevents the yellowing effect seen in poorly designed systems.
Recommended Material Specifications
| Component | DIY Grade (Avoid) | Professional Grade (Required) | Reasoning |
|---|---|---|---|
| Wire Gauge | 16-gauge or 18-gauge | 12-gauge or 10-gauge | Prevents voltage drop and resists breakage. |
| Connectors | Plastic clip-ons | Heat-shrink or grease-filled caps | Stops water from corroding copper strands. |
| Fixture Material | Plastic or thin aluminum | Solid brass or copper | Resists soil acidity and impact. |
| Transformer | Plastic internal mount | Stainless steel multi-tap | Weatherproofing and voltage adjustment. |
Placement is your next hurdle. You aren’t just lighting a path; you are highlighting architectural features or specimen plants. When placing fixtures near trees, consider the root flare. Never nail fixtures into a tree. As the tree grows, it will swallow the wire and the fixture, leading to a short. Use stainless steel stand-off screws that can be adjusted as the girth of the tree increases. This is the difference between a hack job and horticulture.
Execution: The Installation Process
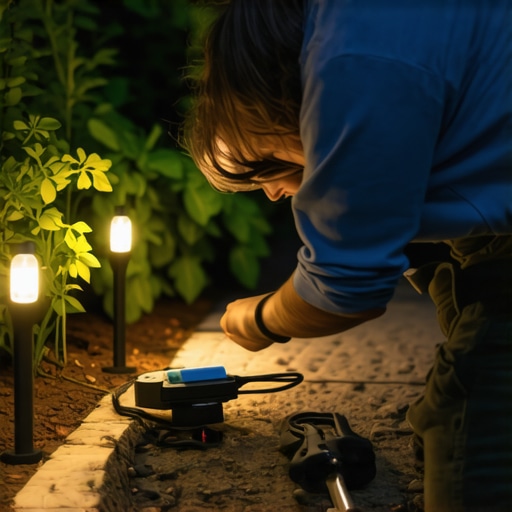
Start at the transformer. Mount it at least 12 inches above the ground to avoid splash-back from rain. Run your main 12/2 wire from the transformer along your planned route. Use a square-edge spade to cut a trench six inches deep. Do not use a rototiller; you will destroy existing root systems and potentially hit gas or water lines. Always call 811 before you dig. No exceptions. Even a shallow lighting trench can sever a communication line. Once your trench is open, lay your wire. Don’t pull it tight. Soil moves. Give the wire some slack to account for the freeze-thaw cycle that will inevitably shift the ground.
How to prevent voltage drop in long lighting runs?
Voltage drop occurs when the resistance in the wire reduces the electrical pressure before it reaches the light fixture, resulting in dimmer output and color shifting. To mitigate this, use 12-gauge wire for runs up to 100 feet and 10-gauge wire for anything longer. Additionally, a multi-tap transformer allows you to move the wire from the 12V terminal to the 13V or 14V terminal, boosting the starting voltage to compensate for the resistance encountered over the distance. This is why cheap transformers fail; they only offer a single 12V output. You need that extra push for the far corners of the garden.
“Voltage drop is a physical certainty in DC circuits; managing it through wire gauge and load distribution is the hallmark of a professional installation.” – Hardscape Engineering Axiom
The Connection Protocol Checklist
- Strip exactly 3/4 inch of insulation from the wire.
- Ensure no copper strands are frayed or cut.
- Apply dielectric grease to the connector before sealing.
- Use a heat gun for heat-shrink connectors to create a vacuum seal.
- Test the voltage at the furthest fixture with a multimeter before burying the wire.
The connection is where 99% of DIY systems die. The cheap clip-on connectors that come with big-box lights pierce the insulation. This creates a hole. Water enters that hole. Capillary action then pulls that water up the wire like a straw. Within a year, the copper turns green and brittle. You must use moisture-proof connectors. If the connector doesn’t have a gel or a mechanical seal, don’t use it. It will rot. Period.
The Finishing Phase: Compaction and Aiming
Once your lights are wired and tested, it is time to backfill. Do not just throw the dirt back in. You need to lightly compact the soil in the trench. If you leave air pockets, water will collect there, creating a muddy mess that will cause the wire to migrate toward the surface over time. Use the butt end of your shovel to tamp the soil down every two inches of fill. The ground should be firm. In areas with heavy clay, like the Southeast, or rocky soil in the Northeast, you may need to backfill with a thin layer of sand first to protect the wire from sharp stones.
Aiming should be done at night. This is the only way to see the shadows. Avoid “hot spots” where the light is too bright and blinds guests. Your goal is reflected light. Bounce the light off a stone wall or the canopy of a Japanese Maple. This creates depth. If you can see the bulb, you’ve failed the design test. Hide the source. The light should seem to come from nowhere. This is how you achieve that high-end look without the $5,000 contractor fee. Just remember: one inch of water per week on your lawn is enough to cause corrosion if your splices aren’t watertight. Check your transformer every spring for ant nests or debris. Keep the cooling fins clear. A clean system is a long-lived system.