
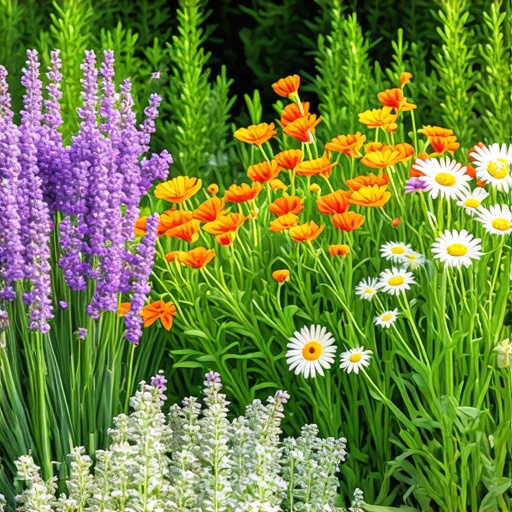
The Best Perennials for a Vibrant Cottage Garden Look
The Structural Reality of Designing an Authentic Cottage Garden
Successful cottage gardens require advanced soil amendment and topographical grading to ensure moisture reaches the root zone without causing anaerobic rot. Most DIYers fail because they prioritize flower color over Cation Exchange Capacity (CEC) and soil structure, leading to plant death within two seasons. I always drill into my new crew members: if you don’t fix the soil grading first, every plant you put in the ground is just expensive compost. I have seen countless homeowners drop five figures on high-end nursery stock only to watch it drown in a heavy clay basin because they didn’t understand sub-surface hydrology. You cannot just dig a hole and hope for the best. You have to engineer an environment where the biology can thrive. A real garden is an integrated system of drainage, mineral balance, and root competition. If your soil is compacted to more than 300 PSI, your perennials will fail to establish the deep root systems necessary to survive the summer heat. We use penetrometers to check compaction before a single shovel hits the dirt. If the soil is tight, we rip it and incorporate organic matter to break up the mechanical bonds of the clay particles. This is the difference between a professional installation and a weekend hack job.
Soil Chemistry: The Foundation of the Perennial System
Establishing the correct soil pH levels and macronutrient ratios is the critical first step in ensuring that perennial species can metabolize nutrients effectively. Plants like Delphinium and Foxglove are not just pretty; they are chemical sensors that react poorly to acidic imbalances or high salinity in the groundwater.
“Phosphorus mobility in soil is limited; therefore, it must be placed in the root zone during planting to ensure proper ATP production and root elongation.” – Agricultural Extension Office Manual
We focus on the NPK ratio specifically for flowering. High nitrogen fertilizers will give you massive green leaves but zero blooms. You want a higher middle number. Phosphorus is what drives the energy transfer in the plant. Without it, your cottage garden will look like a cabbage patch. We also look at the micronutrients: Boron, Manganese, and Zinc. These are the catalysts for enzyme production. If your soil is depleted, your plants will be stunted and susceptible to powdery mildew. I don’t care what the bag at the big-box store says. Get a lab test from your local university extension before you buy a single bag of lime or sulfur.
How do I prep a flower bed for a cottage garden?
To prepare a bed, you must excavate to a depth of 12 inches, remove all sod, and till in 4 inches of composted organic matter to improve porosity and drainage. This mechanical aeration reduces bulk density, allowing oxygen to reach the rhizospheres where beneficial aerobic bacteria reside. Don’t skip the grading. Your bed should have a slight crown. Water must move. Stagnant water is a death sentence. It kills the roots by cutting off oxygen, leading to Pythium and other fungal pathogens. Use a hard rake to create a smooth, even surface. If you see a puddle after a light rain, your grade is wrong. Fix it now. Do it right.
Engineering the Aesthetic: Planting Densities and Growth Habit
The visual density of a cottage design is achieved through strategic plant spacing that accounts for the mature canopy spread and root architecture of each species. You aren’t just placing plants; you are managing a three-dimensional space that will change over three to five years.
| Perennial Species | Root Architecture | Soil Preference | Hardiness Zone |
|---|---|---|---|
| Echinacea purpurea | Fibrous/Deep | Well-drained / Lean | 3-8 |
| Baptisia australis | Taproot (Deep) | Acidic to Neutral | 3-9 |
| Nepeta x faassenii | Fibrous/Spreading | Sandy/Loam | 3-8 |
| Salvia nemorosa | Fibrous | Loam/Well-drained | 4-9 |
We utilize a staggered planting grid. This isn’t a cornfield. You want the plants to eventually touch, but you need air circulation between them to prevent botrytis. If you plant too close, you create a humid microclimate that invites every pest in the county. If you plant too far apart, you leave room for weeds to colonize the bare soil. It is a balancing act of biomass. We look at the growth habit: upright, mounding, or sprawling. You place the structural plants like Baptisia or Joe Pye Weed first. These are your anchors. Then you layer in the mid-story and finally the ground covers. It is civil engineering with living materials.
Which perennials live the longest in clay soil?
Perennials such as Amsonia hubrichtii and Rudbeckia fulgida are the most resilient options for heavy clay because their aggressive root systems can penetrate dense soil aggregates. These plants can handle the expansion and contraction of clay during freeze-thaw cycles without their root flares being sheared off or desiccated. Most other plants will struggle. Clay has high nutrient-holding capacity but poor gas exchange. You need plants that can handle low-oxygen environments during the wet spring months. Echinacea is another workhorse, provided you don’t over-amend with soft peat moss which can lead to crown rot in heavy soils.
Hydrological Management: Drip Irrigation vs. Overhead Hazards
A professional cottage garden relies on sub-surface drip irrigation to deliver precise water volumes directly to the root zone while keeping the foliage dry to minimize fungal infections. Overhead spraying is for amateurs. It wastes water through evaporation and hits the leaves, which causes leaf spot and rust.
“A garden design doesn’t fail because of the plant choice; it fails because of the water trapped in the wrong place or the lack of water in the right place.” – Hardscape Engineering Axiom
We install pressure-compensated emitters. Every plant gets exactly what it needs. We also use rain sensors. If it rained an inch last night, the system stays off. Over-watering is the number one killer of perennials in residential landscapes. People think more is better. It is not. It will rot the crown. We want deep, infrequent watering. This forces the roots to grow down, chasing the moisture into the subsoil. That is how you build a drought-tolerant garden. A shallow root system is a weak root system. It will die the first week the temperature hits 90 degrees.
How much modified gravel do I need for a garden path?
For a stable garden path, you need a 4-inch base of compacted 2A modified gravel topped with a 1-inch leveling course of screenings or sand. This structural base prevents the path from heaving during winter and ensures that pedestrian traffic does not compact the surrounding garden soil, which would damage the root zones of nearby perennials. Use a plate compactor. If you don’t compact the base, your path will be a muddy mess in six months. Don’t use pea gravel for the base. It doesn’t lock together. It is like walking on marbles. Use crushed stone with fines. It packs like concrete.
The Installation Checklist: Ground-Up Execution
- Site Analysis: Conduct a soil test and measure sunlight exposure for a minimum of 8 hours for full-sun perennials.
- Bed Delineation: Use a garden hose or marking paint to define organic, flowing curves that mimic natural landscapes.
- Excavation: Remove all existing vegetation and excavate to 12 inches to address any underlying subsoil compaction.
- Amendment: Incorporate compost and mineral additives based on your lab results to achieve a target pH of 6.5.
- Grading: Create a 2% slope for drainage and crown the beds to prevent water pooling at the plant base.
- Planting: Install plants at the correct depth, ensuring the root flare is level with the soil surface.
- Mulching: Apply 2 inches of shredded hardwood mulch, keeping it away from the stems to prevent bark rot.
The Maintenance Lifecycle: Beyond the Install
Once the garden is in the ground, the work changes from engineering to monitoring. You have to watch the nutrient cycling. As perennials grow and die back, they return organic matter to the soil, but they also consume minerals. We do a follow-up soil test every three years. We also practice selective deadheading. This isn’t just for looks; it prevents the plant from putting all its energy into seed production, which can shorten the lifespan of certain short-lived perennials like Lupines. We also look for pests. We don’t use broad-spectrum insecticides. That is a hack move. It kills the beneficial insects too. We use Integrated Pest Management (IPM). If we see aphids, we check for ants or a lack of ladybugs. We solve the problem at the systemic level. A healthy garden should be a self-regulating ecosystem. If you have to spray chemicals every week, your design is flawed. You picked the wrong plants for the site. Buy quality nursery stock. Big-box plants are often root-bound and treated with growth regulators that fail once they hit real soil. Start with strong genetics. It costs more upfront, but you won’t be replacing dead plants every spring. Your garden is an investment. Treat it like one.

![3 Reasons Your 2026 Hydrangeas Aren't Blooming [Fix]](https://lawnmajesty.com/wp-content/uploads/2026/05/3-Reasons-Your-2026-Hydrangeas-Arent-Blooming-Fix.jpeg)