Build a $400 Dry Stack Stone Wall for 2026 Gardens
The Engineering Logic of Dry Stack Masonry
Building a dry stack stone wall for under $400 in 2026 requires a firm grasp of structural engineering, friction coefficients, and local material sourcing. While most DIYers focus on aesthetics, a successful wall is actually an exercise in managing hydrostatic pressure and soil shear strength through meticulous base preparation and stone selection. I recently got called out to tear up a $30,000 patio that was sinking because the previous contractor used uncompacted pea gravel instead of a proper modified stone base. The water had no exit, the soil turned to slurry, and the entire structure failed within two seasons. We are not making that mistake here. A $400 budget is tight, but by utilizing local fieldstone and your own manual labor, you can build a structure that outlasts a mortared wall. Mortar is rigid; it cracks when the earth moves. A dry stack wall is a living thing. It breathes. It shifts with the freeze-thaw cycle and settles into the landscape. To hit that $20 per linear foot target, you need to be smart. You aren’t buying palletized Pennsylvania Blue Stone. You are hunting for quarry scrap or native fieldstone. You are calculating tonnage based on the specific gravity of your local rock. You are digging a trench that is a minimum of 12 inches deep to get below the organic layer of the soil.
Phase 1: Planning and Site Analysis
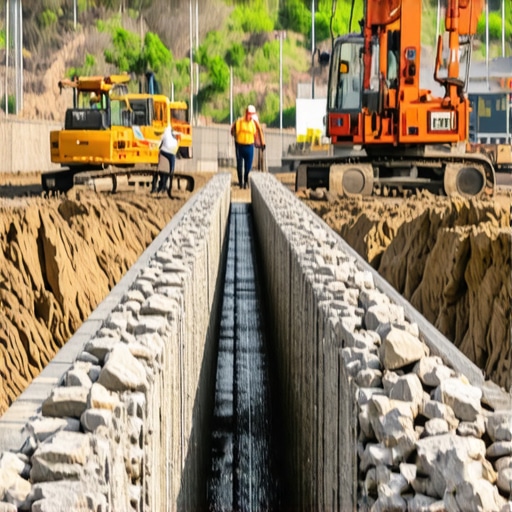
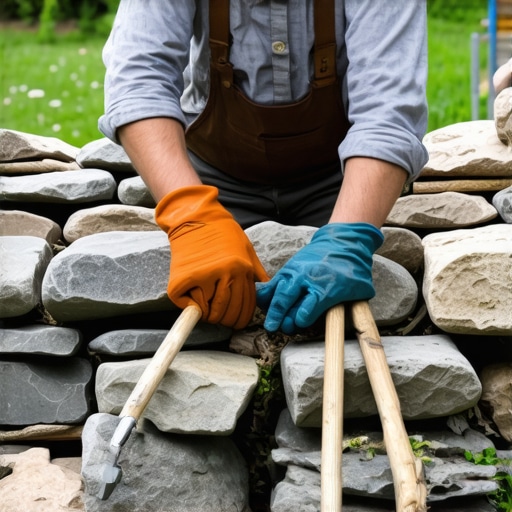
Effective garden design begins with topographical mapping and utility location to ensure the retaining wall does not interfere with drainage patterns or subsurface infrastructure. Before you strike a shovel, call 811. I have seen guys hit gas lines because they thought a 12-inch trench was ‘too shallow to matter.’ It isn’t. You need to calculate the surcharge load of the soil behind the wall. If you are holding back a steep slope, a $400 wall isn’t enough; you’ll need geogrid reinforcement. But for a standard 18-to-24-inch garden border, gravity and batter (the inward lean of the wall) are your primary allies. [IMAGE_PLACEHOLDER]
How deep should a dry stack wall footer be?
For a wall standing 2 feet tall, your footer trench must be at least 6 to 10 inches deep, filled with 4 to 6 inches of compacted 2A modified gravel. This creates a non-frost-susceptible base that prevents the stones from ‘heaving’ during winter moisture expansion in the soil.
Do I need mortar for a 2-foot garden wall?
No, mortar is actually detrimental for small garden walls because it traps moisture and leads to efflorescence and structural cracking. A gravity-fed dry stack system allows water to weep through the joints, significantly reducing the hydrostatic load on the stone faces.
Sourcing Materials: The $400 Breakdown
To stay within a $400 budget for a 20-foot wall, you must prioritize bulk material purchases over bagged goods and choose irregular fieldstone over sawn masonry.
| Material | Quantity | Estimated Cost | Purpose |
|---|---|---|---|
| Local Fieldstone | 2.5 Tons | $240 | Main structural body |
| 2A Modified Gravel | 1.5 Tons | $65 | Compacted sub-base |
| #57 Drainage Stone | 0.5 Tons | $35 | Backfill for drainage |
| Geotextile Fabric | 1 Roll (Heavy Duty) | $40 | Soil separation |
| Delivery Fee | Local Haul | $20 | Bulk transport |
This pricing assumes you are sourcing from a local quarry or a landscape supply yard, not a big-box home improvement store. Big-box stores charge a 300% markup on stone by selling it in small bags or crates. You need to buy by the ton. If you have a heavy-duty pickup, you can save the delivery fee, but 2.5 tons of stone will require multiple trips. Don’t overload your suspension; a broken leaf spring will kill your budget faster than expensive stone.
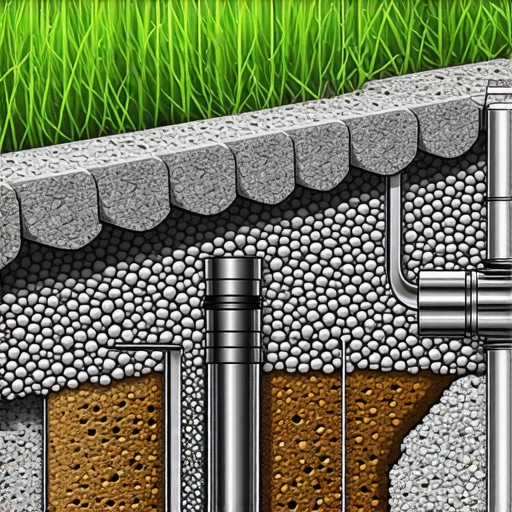
The Anatomy of the Foundation
The foundation of a stone wall is the most critical element, requiring mechanical compaction to reach at least 95% Standard Proctor Density to prevent future subsidence.
“A retaining wall doesn’t fail because of the stone; it fails because of the water trapped behind it.” – Hardscape Engineering Axiom
You must excavate a trench that is 6 inches wider than your wall’s base. If your wall is 12 inches wide at the bottom, your trench is 18 inches wide. Level the bottom of the soil. Don’t just ‘eyeball’ it. Use a transit level or a string line. Fill the trench with crushed limestone or granite fines. This is your leveling pad. Use a plate compactor. If you don’t want to rent one, use a hand tamper, but you better be prepared for a workout. You are looking for a base that is rock-hard. If you can push a screwdriver into it, it’s not compacted enough. It will settle. The wall will tilt. You will be angry.
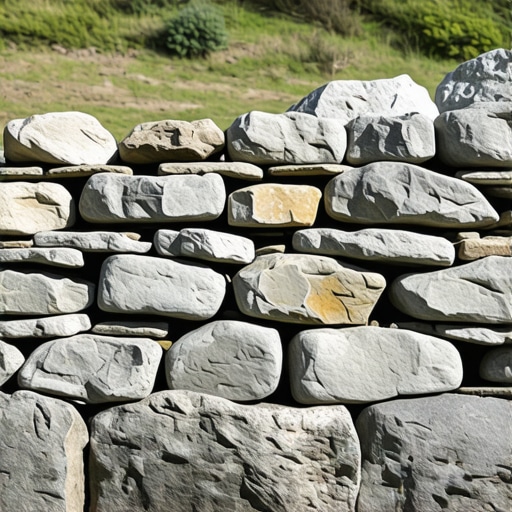
The Build: Stacking for Longevity
Stacking stone is a game of spatial geometry where you must ensure every stone has three points of contact and follows the ‘one over two, two over one’ rule of bond patterns.
- Sort your stones: Group them by size—large ‘hearting’ stones for the base, flat ‘binders’ for the middle, and ‘capstones’ for the top.
- Set the Batter: Tilt the wall back toward the slope at a rate of 1 inch for every 1 foot of height. This shifts the center of gravity.
- Hearting: Fill the gaps between the large face stones with smaller spalls. This prevents internal shifting.
- Drainage Backfill: Place 4 inches of clean 3/4 inch stone behind the wall as you build. Wrap this in filter fabric to prevent siltation.
As you lay each course, check for wobble. If a stone moves, shim it with a small, flat sliver of rock. Never use dirt to level a stone. Dirt washes away. Rock stays forever. This is the difference between a professional landscape installation and a weekend project that falls over in three years. Use a dead-blow hammer to set the stones firmly into the base. The sound should change from a hollow ‘thud’ to a sharp ‘crack’ when the stone is fully seated.
Environmental Factors and Soil Microbiology
The interaction between soil pH, moisture retention, and the stone type can significantly alter the microclimate of your 2026 garden.
“Soil stability in residential landscapes is dependent on the management of pore water pressure and the maintenance of granular friction layers.” – USDA Soil Mechanics Guide
If you use limestone, expect the soil immediately adjacent to the wall to become more alkaline over time. This is great for clematis or lavender, but it will kill rhododendrons or blueberries. If you are in a region with heavy clay, like the Piedmont region, your drainage backfill is non-negotiable. Clay holds water like a sponge. When that water freezes, it expands with enough force to pop a 500-pound stone right out of your wall. Always install a 4-inch perforated drain pipe at the base of your backfill if you are working with heavy clay soils. This pipe should daylight at the ends of the wall to allow water to escape the retaining zone. Don’t skip this. It’s the cheapest insurance you can buy for your hardscape.
The Final Touch: Capping and Planting
The capstone layer provides the final vertical pressure necessary to lock the lower courses in place and must be selected for weight and flatness. For a $400 budget, look for the largest, flattest stones you have left. Set them so they overhang the face of the wall by about half an inch. This creates a drip edge, keeping water from running down the face of the stone and eroding the base. Once the wall is up, you can integrate creeping phlox or lithodora into the crevices. Just remember: plants in a dry stack wall need very little soil. Too much soil in the cracks will hold moisture and speed up stone weathering. Use a mix of grit and compost. It will survive. Your 2026 garden deserves a structure built on physics, not just luck. Forget the ‘mow-and-blow’ shortcuts. Build it heavy. Build it deep. Build it once.