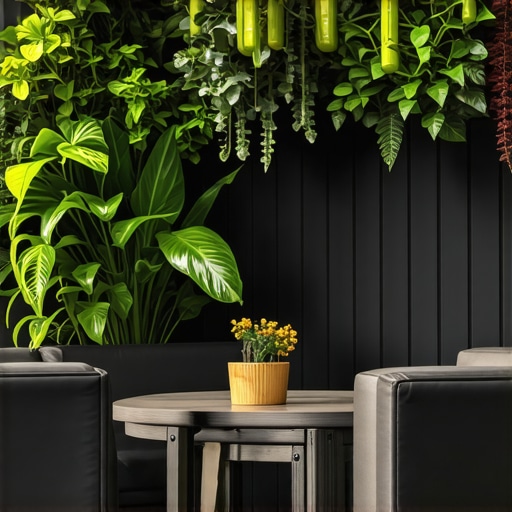
Why Every Modern Patio Needs a Vertical Garden
Modern hardscaping is not just about laying pavers; it is about managing thermodynamic heat transfer and structural biology. I always drill into my new crew members: if you don’t fix the soil grading first, every plant you put in the ground is just expensive compost. This principle applies doubly to vertical gardens. Most homeowners treat a patio as a static slab of concrete or stone, but it is actually a thermal heat sink that radiates infrared energy long after the sun goes down. By integrating vertical greening, you are essentially installing a biological cooling tower that manages moisture and temperature through technical transpiration. This is not about aesthetics; it is about site-specific engineering and plant physiology. A patio without verticality is a wasted opportunity for environmental control.
The Engineering of Vertical Integration and Structural Loads
Integrating a vertical garden onto a patio requires calculating dead loads and live loads to ensure the retaining wall or support frame doesn’t buckle under the weight of water-saturated growing media. You cannot simply bolt a heavy wooden frame to a 4-inch concrete slab and expect it to hold without cracking. You need to consider the pounds per square foot (PSF) when the substrate is at field capacity. Water weighs 8.34 pounds per gallon. A saturated felt-pocket system can easily reach 10 to 15 pounds per square foot. If you are mounting this to an existing structure, you must verify the shear strength of your fasteners. We use 3/8-inch stainless steel wedge anchors for masonry or structural lag screws for wood frames. Never use plastic wall anchors for a system that will be subjected to wind loads and constant moisture. It will fail. Drainage is equally critical. You must have a clear path for effluent water to exit the system and enter a French drain or a dedicated catch basin. If water pools at the base of your vertical garden, it will undermine the compaction of your patio’s modified gravel base. Settlement is the enemy of any hardscape project.
“A retaining wall doesn’t fail because of the stone; it fails because of the water trapped behind it.” – Hardscape Engineering Axiom
How much weight can a standard patio wall hold?
A standard 4-inch masonry block wall can typically support a vertical garden weight of 15-20 lbs per square foot, provided the footer is at least 12 inches deep and 24 inches wide, but you must account for lateral wind pressure which can double the effective load during storms.
Microclimates and the Urban Heat Island Effect
Vertical gardens utilize transpiration cooling and shading to reduce ambient temperatures on hardscaped surfaces by up to 15 degrees, mitigating the urban heat island effect while protecting building envelopes from direct solar radiation. When sun hits a stone patio, the surface temperature can exceed 140 degrees Fahrenheit. This heat radiates upward, stressing both people and nearby plantings. A vertical wall of foliage acts as a biological shield. The leaves intercept the photons, using them for photosynthesis rather than allowing them to hit the stone and convert into heat. Furthermore, plants release water vapor through their stomata. This phase change from liquid to gas consumes energy, which effectively cools the surrounding air. We call this evaporative cooling. It is the same principle behind a high-end misting system, but it is powered by the sun and requires no electricity. To maximize this, you need plants with high leaf area indices. Broad-leafed species provide more surface area for cooling but require higher moisture levels. It is a trade-off between water consumption and cooling capacity.
| System Type | Weight (Saturated) | Maintenance Level | Longevity |
|---|---|---|---|
| Felt Pockets | 5-8 lbs/sq ft | High (Daily watering) | 3-5 Years |
| Modular Trays | 12-18 lbs/sq ft | Medium | 10+ Years |
| Hydroponic Panels | 3-5 lbs/sq ft | Expert (Chemical balance) | 15+ Years |
Choosing the Right Growing Media and Fertigation
Successful vertical gardens on patios rely on pressure-compensating drip emitters and dedicated drainage planes to prevent salt buildup and ensure the hydroponic solution reaches every root zone. In a vertical environment, gravity is your biggest challenge. Water wants to race to the bottom, leaving the top plants desiccated while the bottom plants drown in anaerobic soil. This is why we use engineered growing media. Forget about standard potting soil from a big-box store. It is too heavy and compacts too quickly, leading to root rot. We use a mix of expanded shale, perlite, and coconut coir. This provides the necessary porosity for oxygen to reach the roots while retaining enough moisture to prevent wilting. For irrigation, we install Netafim techline with 0.6 GPH (gallons per hour) emitters spaced every 6 inches. This ensures a slow, even soak. We also integrate a venturi-style fertilizer injector into the main line. This is called fertigation. It allows us to deliver precise NPK ratios directly to the roots. Without consistent feeding, vertical plants quickly exhaust the limited nutrients in their small root zones and turn yellow. This is a common sign of nitrogen deficiency or pH imbalance.
“Vertical greenery reduces surface temperature of walls by as much as 20°C (36°F) through direct shading and evapotranspiration.” – American Society of Landscape Architects
Which plants survive best in a vertical patio environment?
The best plants for vertical patio gardens are those with fibrous root systems like Heuchera, Carex, and various Sedum species, as they can tolerate the limited soil volume and frequent wet-dry cycles characteristic of vertical modules.
Installation Protocol and Maintenance Logic
The installation process must be methodical to avoid future structural failures or moisture intrusion into the home’s siding. First, we install a 30-mil HDPE (high-density polyethylene) moisture barrier against the wall. This is non-negotiable. If you skip this, moisture will find its way into your wall studs or masonry, leading to mold and rot. Next, we secure a stainless steel or aluminum frame to the structure. We leave a 1-inch air gap between the barrier and the plant modules to allow for airflow. This prevents fungal growth and keeps the wall dry. Once the frame is plumb and level, we install the irrigation manifold. We always include a flush valve at the lowest point of the system to clear out mineral deposits and sediment. After planting, the first 30 days are the most critical. This is the establishment phase. You must monitor the soil moisture daily. If the root balls dry out once, the capillary bond is broken, and the plant will likely die. We use smart controllers with soil moisture sensors to automate this. It isn’t cheap, but it’s cheaper than replacing $2,000 worth of dead plants. Check the pH of your runoff water weekly. Most municipal water is too alkaline, which locks out essential micronutrients like iron and manganese. You may need to add a mild acidifier to your fertigation tank to keep the pH between 5.5 and 6.5. This is the sweet spot for nutrient uptake. Don’t skip this. Your plants depend on it. High-end landscaping is a game of inches and decimals. If you aren’t measuring, you’re just guessing.
- Install 30-mil HDPE moisture barrier behind the frame.
- Verify fastener shear strength for 20 PSF saturated load.
- Use pressure-compensating drip emitters for uniform irrigation.
- Select engineered growing media with at least 40% porosity.
- Monitor NPK and pH levels weekly via runoff testing.
![Build a $400 Flagstone Fire Pit [2026 Weekend Project]](https://lawnmajesty.com/wp-content/uploads/2026/06/Build-a-400-Flagstone-Fire-Pit-2026-Weekend-Project.jpeg)